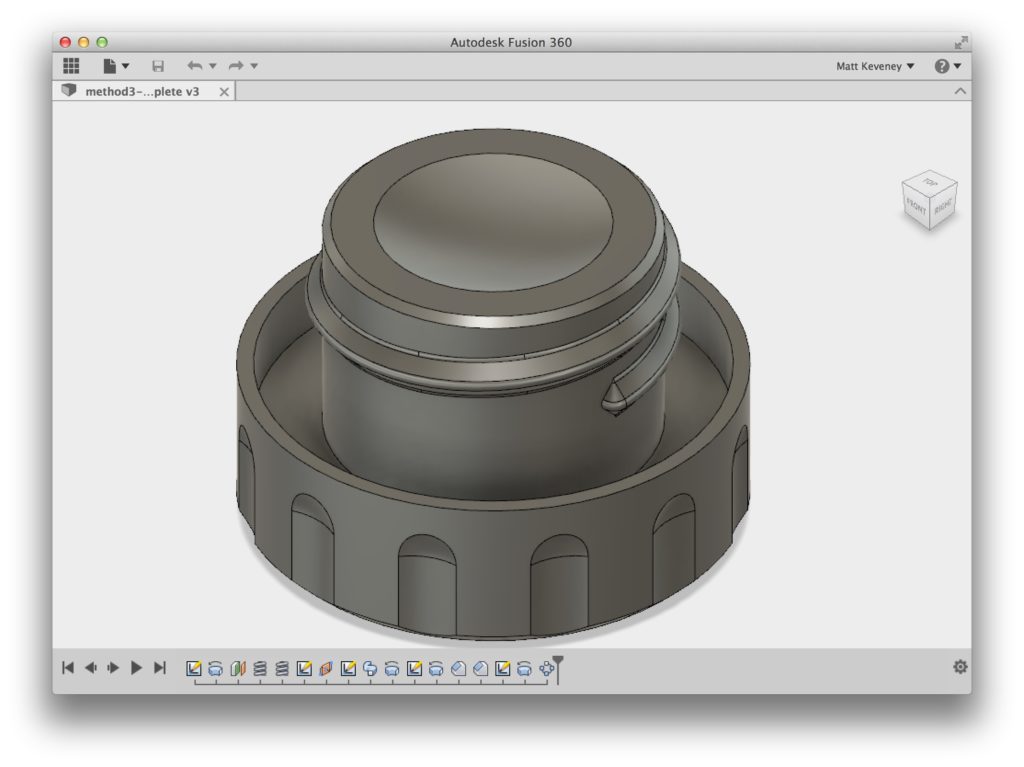
At our 3D print meeting on May 16, a few of us discussed modeling for 3D printing. We used Jill’s thermos stopper as an example to be reproduced using Fusion 360. The original stopper was made of formed stainless steel (I think), and had shallow external threads extending about 1 1/4 turns. The thread cross-section was a graceful curve, making it easy to clean, and probably easy to manufacture.
Most of the modeling was straightforward, but the non-standard threads presented a challenge. This post makes good on my promise to follow-up on the subject. I’ll also take a few side trips to share some of my habits that I think make the modeling process easier. You’ll get more out of this post if you’re at least somewhat familiar with Fusion 360. Their website has excellent online tutorials.
Before continuing, I should point out that Fusion 360 does have a thread tool capable of creating a number of thread forms by simply entering measurements in a dialog box. It supports a lot of thread types and it’s definitely the way to go if you’re working with standard fasteners or if a standard thread form will do. For a model to be 3D printed complete with threads, be sure to check the modeled box. The threads will have to be fairly coarse to get reasonable results on our FDM printers. Un-modeled threads merely communicate the design intent to the manufacturing team. This saves a lot of space in the design file, allows for much faster rendering, and is appropriate when the threads will be cut by a tap or die as a secondary manufacturing step.
But on with our example. First off, we need something to apply the threads to, so I’ll take a detour to re-create the basic stopper model. In fact I’ll illustrate three different ways to do it. (I did not save the original model we worked on, so these dimensions are just the best I can remember.)
Stopper body, method 1
The first technique I’ll show is perhaps the most intuitive to a newcomer. Folks who’ve used Sketchup or another simple modeling tool may find this familiar.
First create a cylinder, specifying the dimensions of the large end of the stopper.
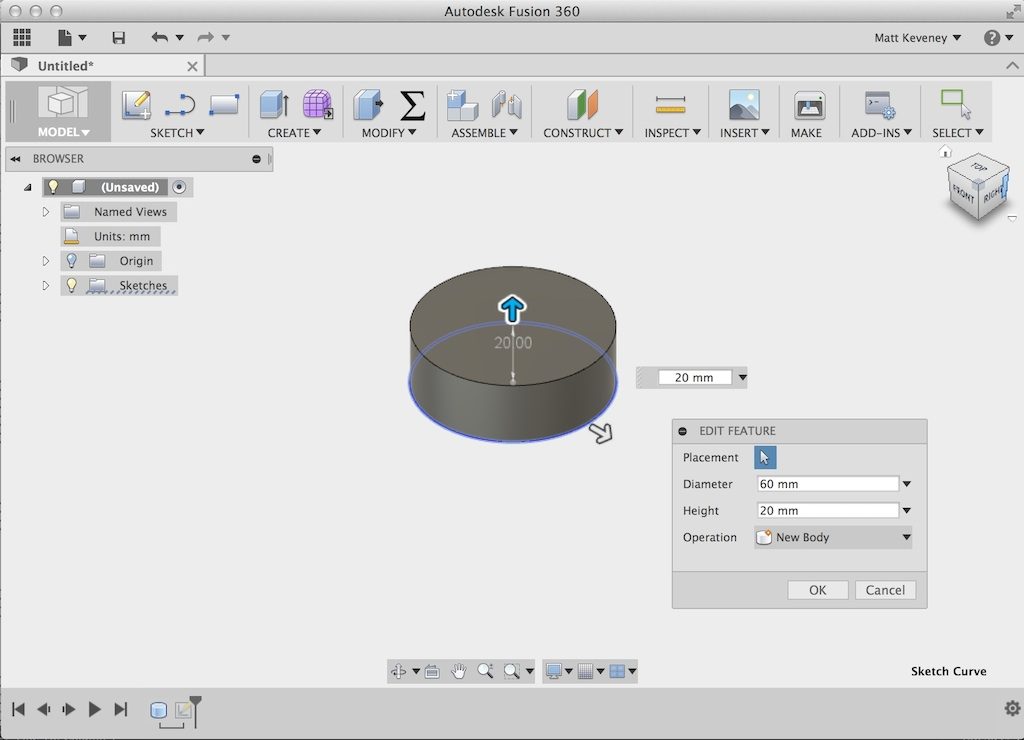
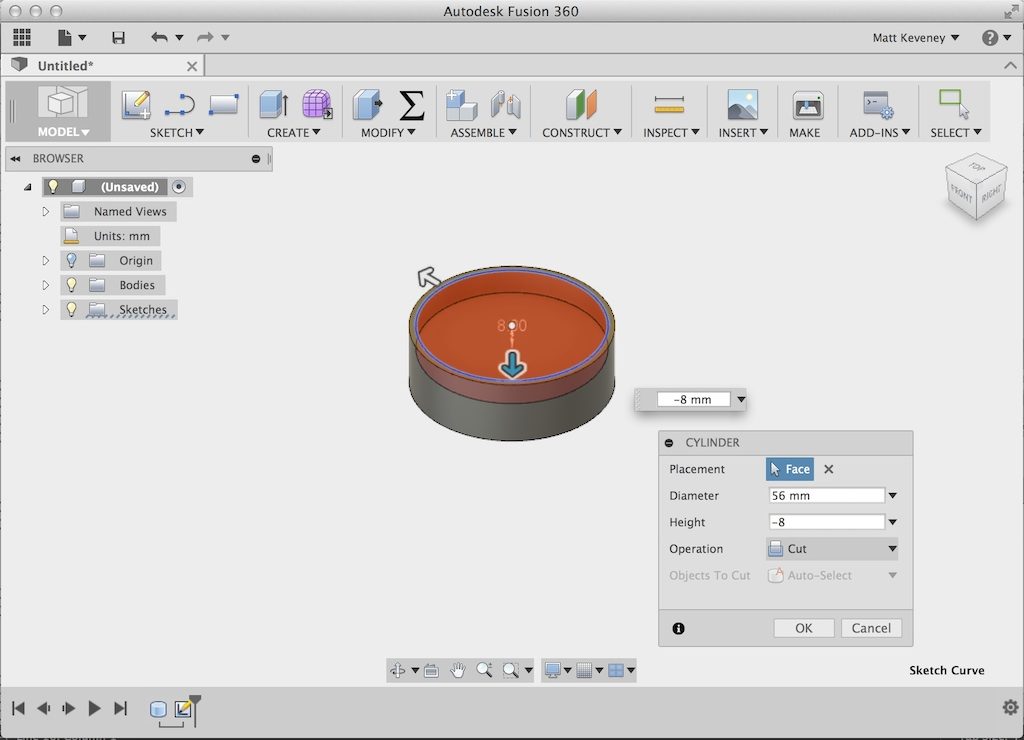
Then create another cylinder to the dimensions of the cutout portion where the gasket seats, and logically subtract it from the first part.
Finally, create a third cylinder, the dimensions of the inner portion of the stopper, and join it with the first body. Fusion 360 chooses join or cut operations by default if the new volume touches or intersects an existing body.
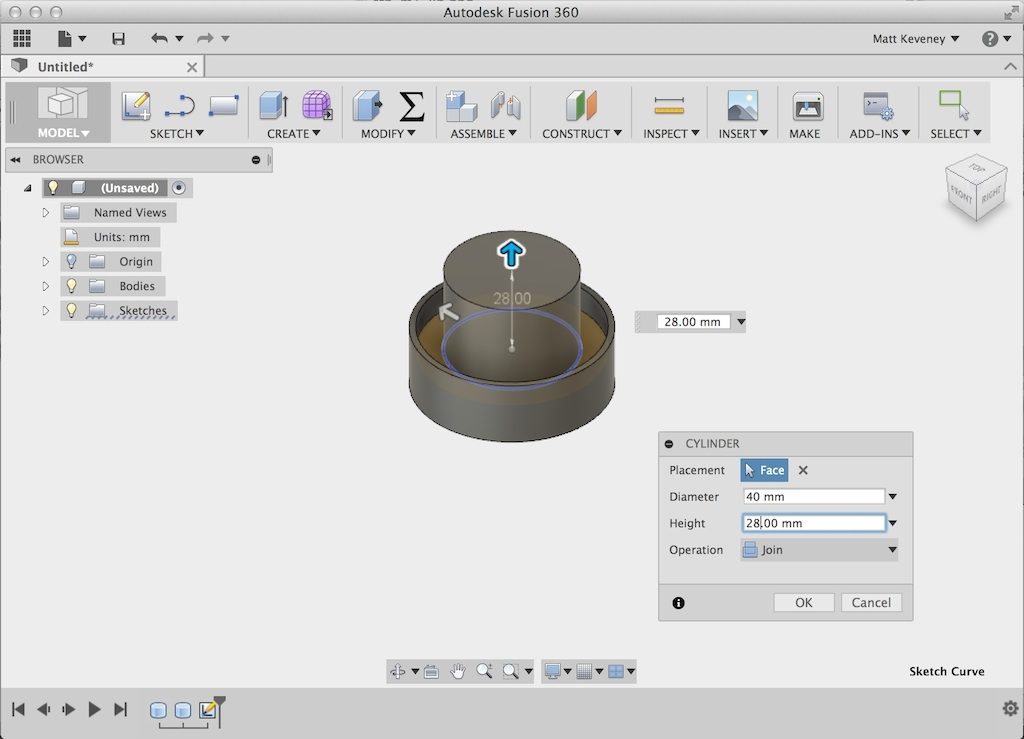
This is my least-favorite method of the three described here, since the dimensions are scattered among the operations. To make a change or even just view a measurement, we have to search through the operation history (at the bottom of the screen), opening the steps one-by-one. Still, the results are equivalent, so if it seems intuitive and comfortable to you, by all means use this technique.
Stopper body, method 2
Start the next method with a sketch on the XZ plane containing 3 concentric circles. These are dimensioned to the diameter of each section. Fusion 360 by default arranges positive Y up, positive Z toward you. Most 3D printers consider the bed to be the XY plane, with Z being the vertical axis. This is not a big deal, since we can rotate our part before slicing, but it might be confusing to a newcomer.
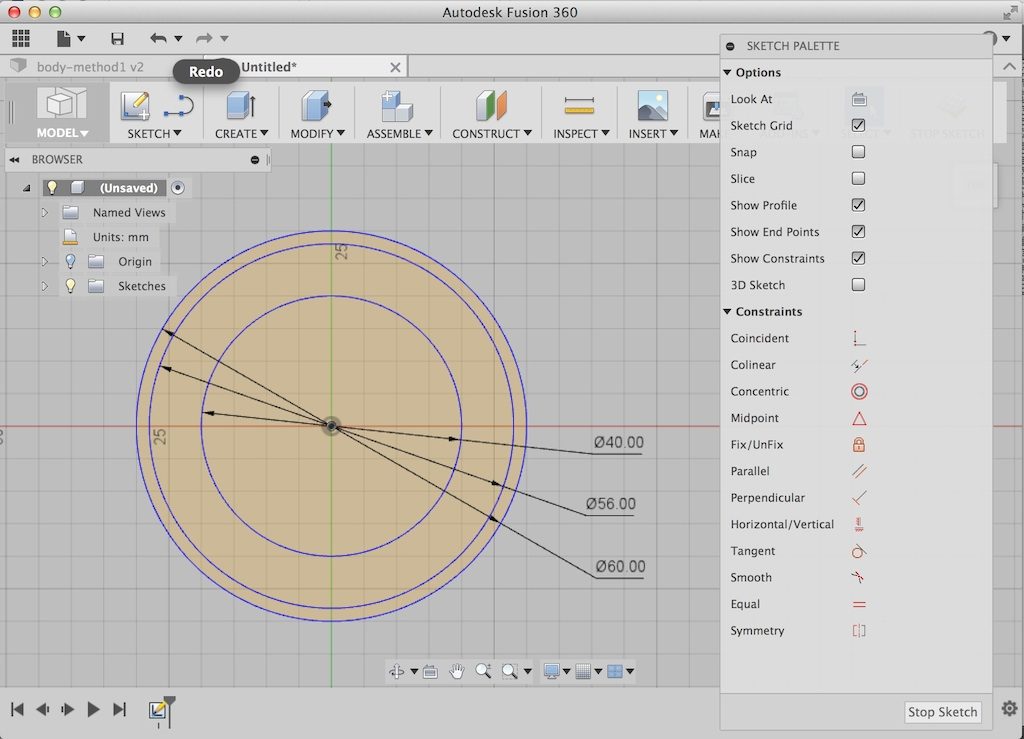
Next make three extrusions using the push-pull tool. The first extrusion is the innermost portion of the stopper.
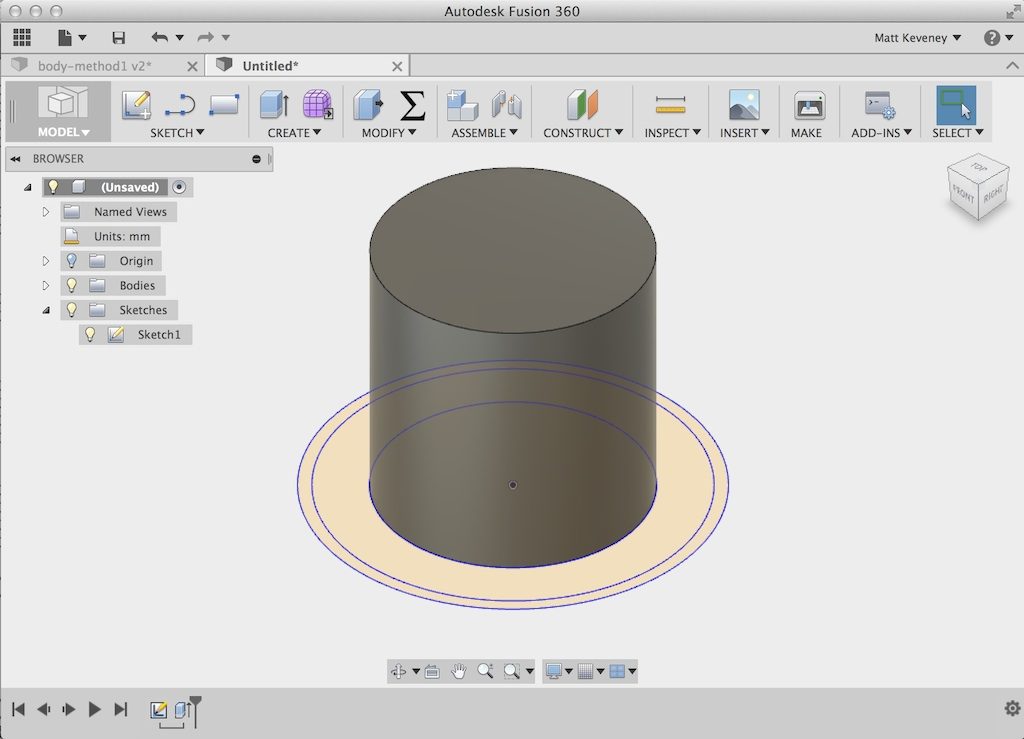
Fusion 360 automatically hides the sketch after this operation, so we need to unhide it again (click the light bulb in the browser). Then select the next profile outward and pull to the level of the stopper below the gasket.
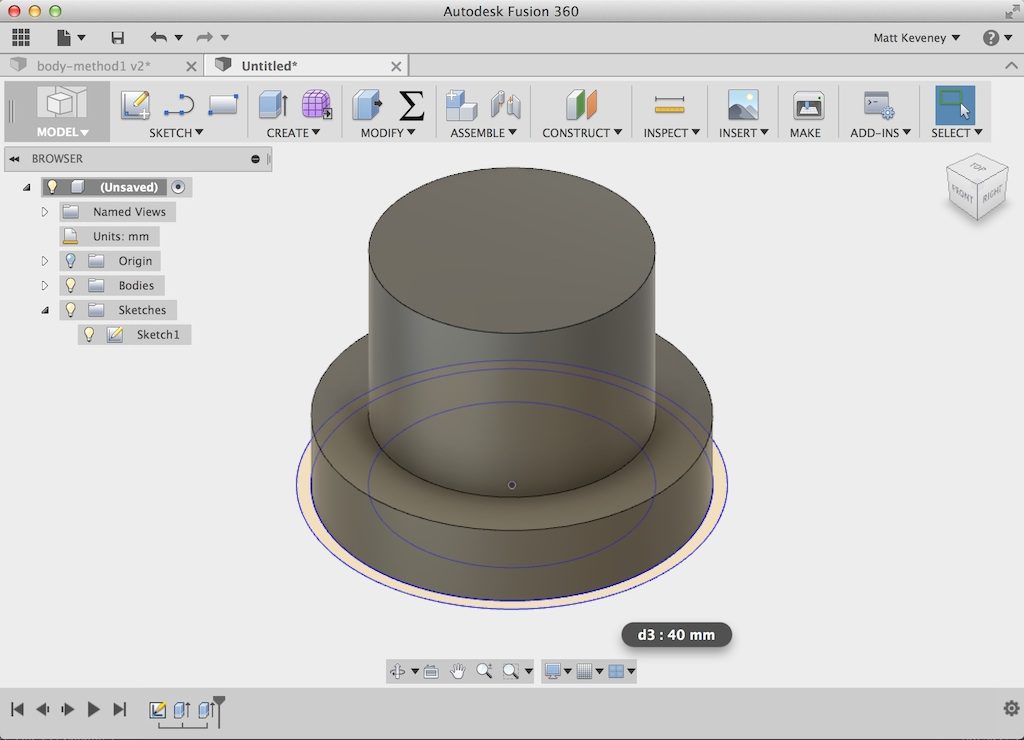
Finally select the outermost profile and pull to the depth of the outer section.
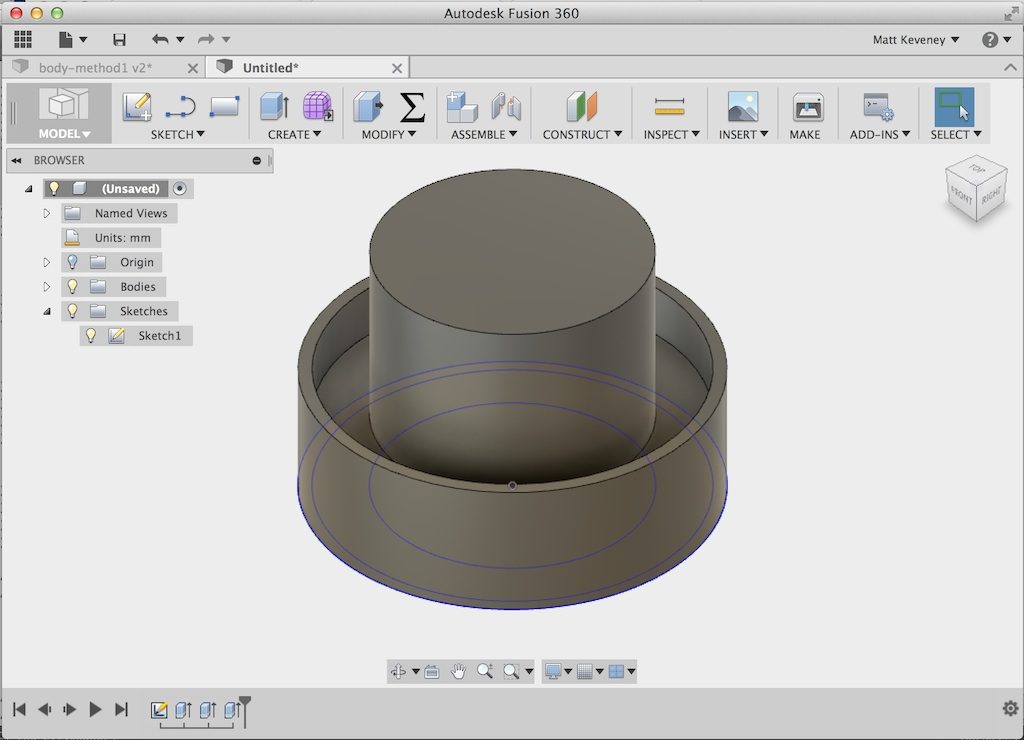
I like this technique a bit better, since the three diametral dimensions can be viewed together and edited just by opening the sketch. We still have to go hunting to find or change the extrusion heights. I should note however that we can make this hunting somewhat easier by renaming the operations (right click in the operation history). This helps with the first method as well.
Stopper body, method 3
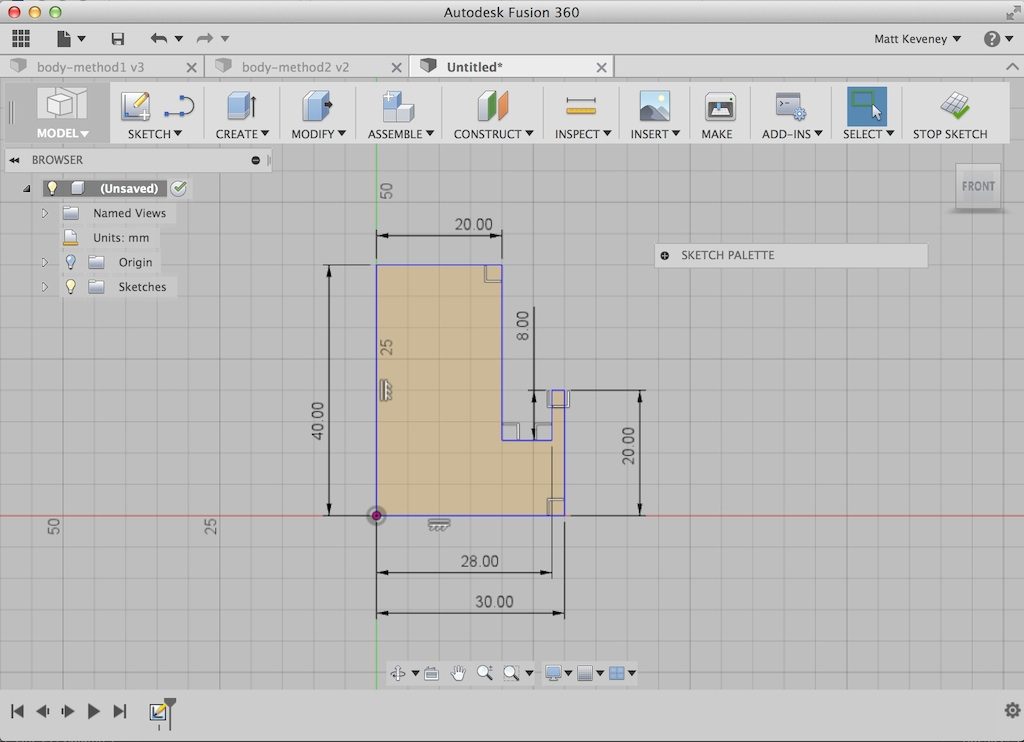
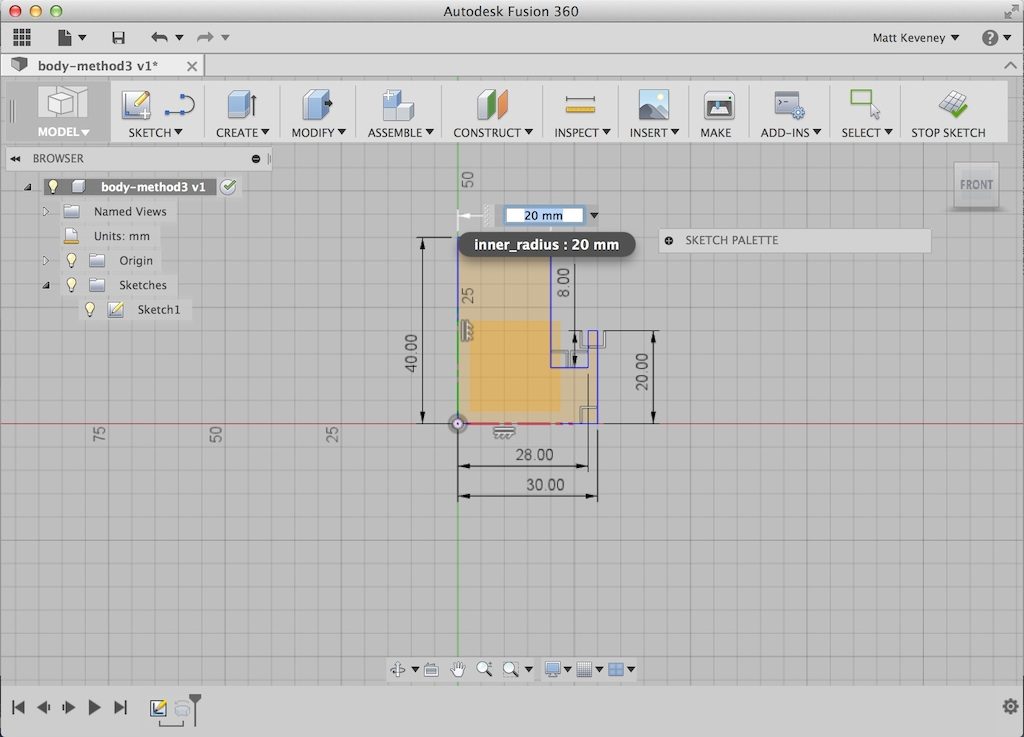
The final technique uses a single sketch in the XY plane which describes a radial cross section.
Then we create the solid with a single revolve operation.
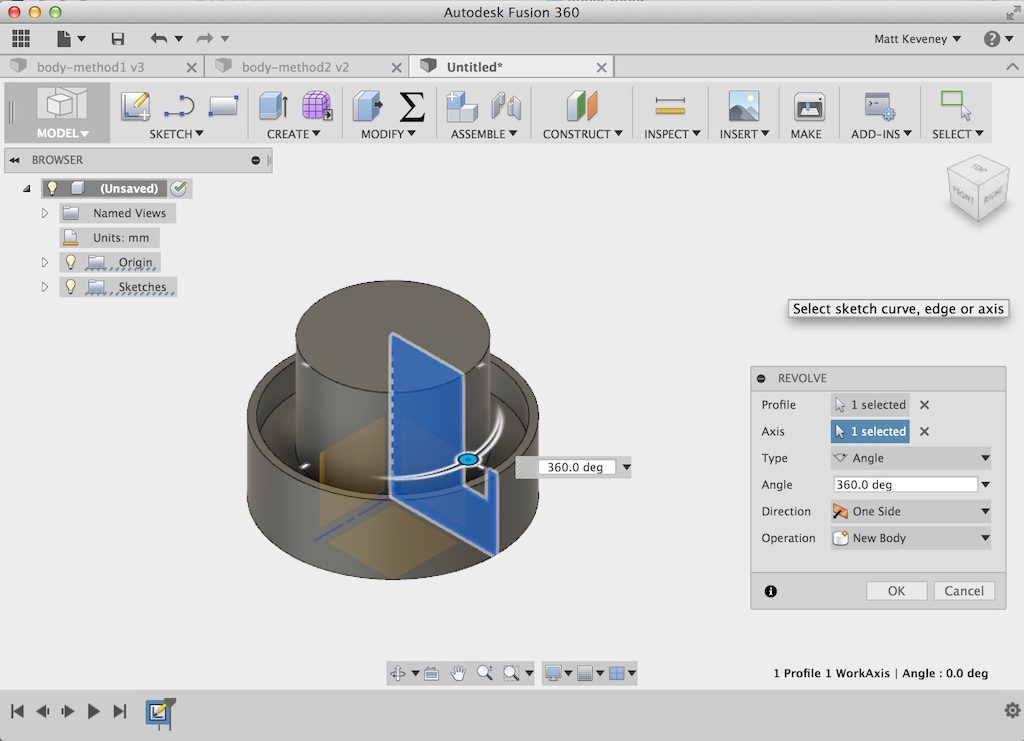
While this might seem the most abstract of the techniques, it’s my favorite since all the dimensions I might want to change are located in a single sketch. I’ll use this version in the remainder of the article.
The threads
Now for those threads I keep promising. We’re going to create a profile and sweep it along a helical path.
Unfortunately Fusion 360 doesn’t seem to have convenient way to draw a helix. My first thought was to write a Python macro, but that’s probably because I’m a software engineer and If you own a hammer, every problem looks like a nail.
So, I spent a bit of time exploring other options and discovered the coil tool. This is obviously handy for modeling springs, but we’ll use it just to create our helical path and then hide the coil forever after. It turns out we actually need two parallel helices; the second serves as a rail to guide our sweep operation. Without the rail, the profile may twist while it sweeps along the path.
But before we start, we want our coil to have the same diameter as the inside portion of our stopper, so let’s go back into the stopper sketch and give that dimension a more meaningful name. First we open the sketch and double-click the dimension.
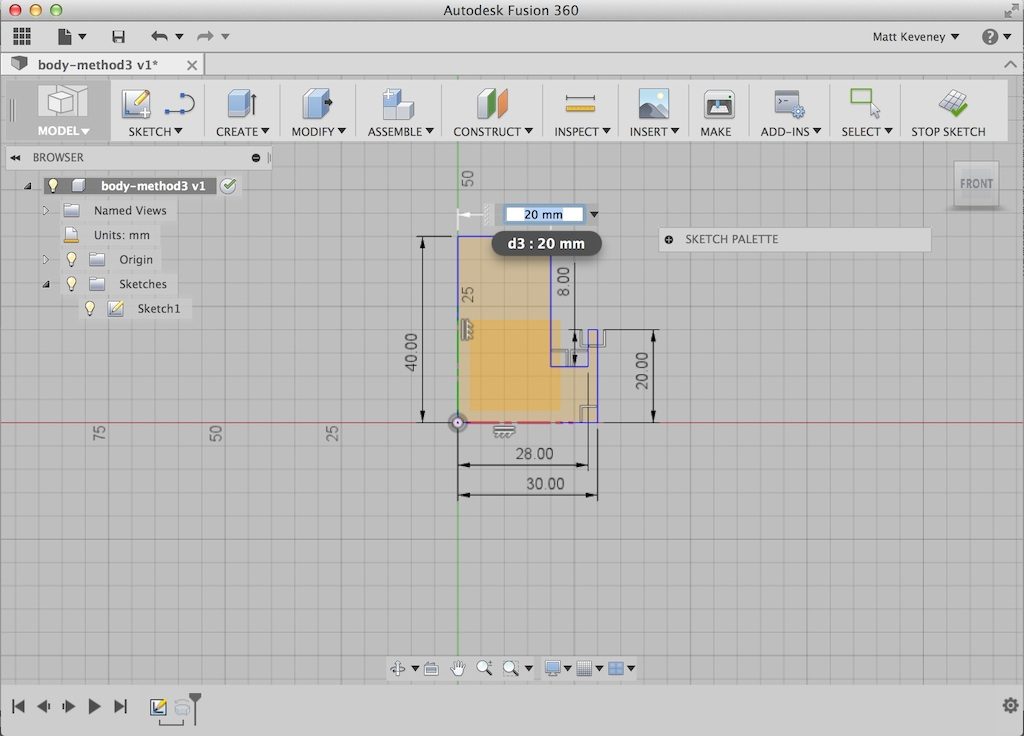
We see that it’s labeled d3. Then open the change parameters dialog, browse to dimension d3, and rename it inner_radius.
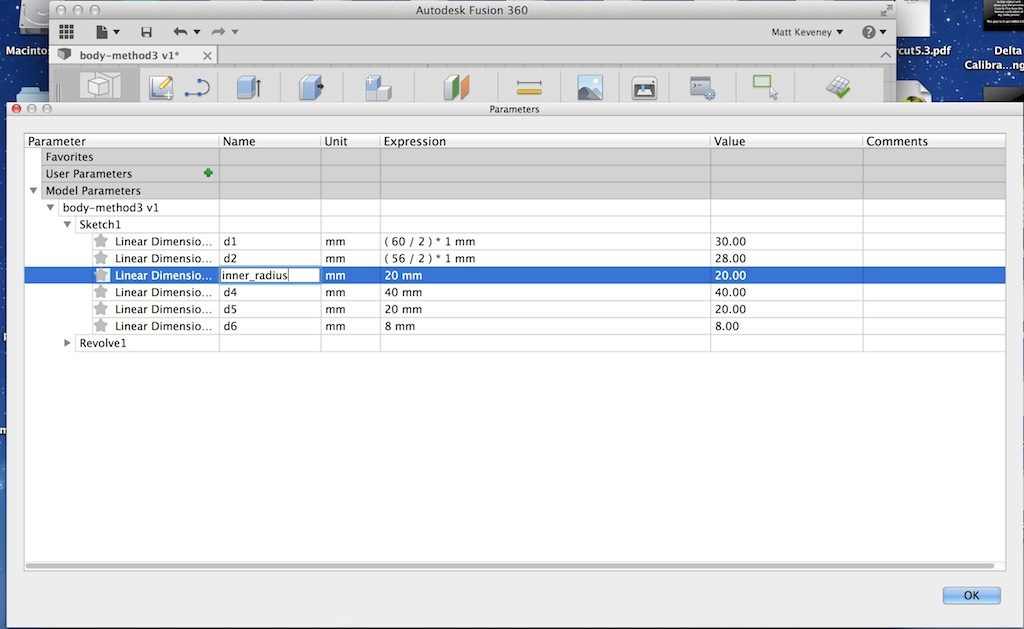
Now, if we double-click the dimension in the sketch we see that it has been renamed.
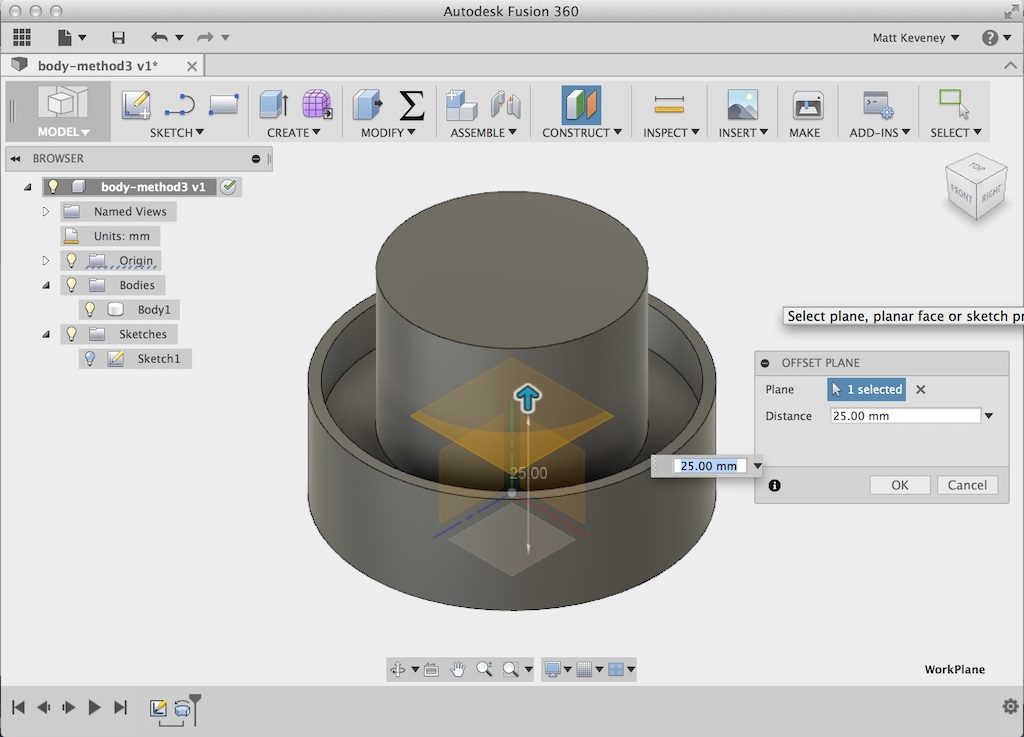
Create a new work plane, parallel to the XZ plane but offset upward to the lower extent of our threads (25mm).
Hide the stopper body for now, just to get it out of the way. Then create the coil on the work plane we just added, centered at the origin. Use a triangular section, positioned on the inside of of our specified diameter, with the remaining settings as shown.
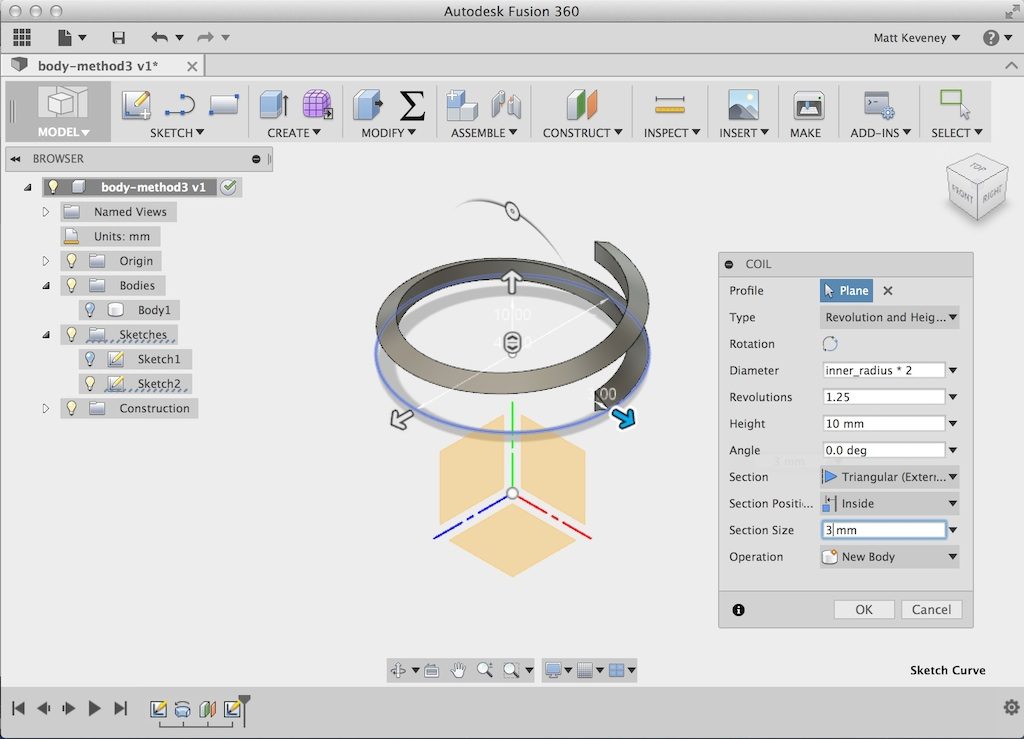
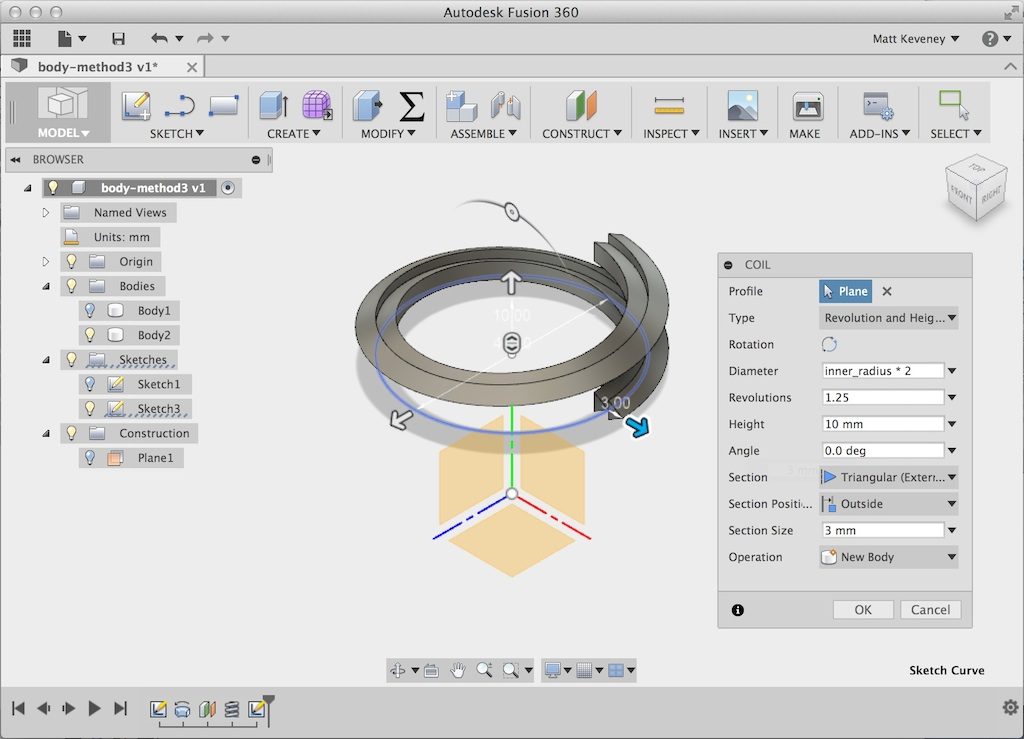
Note that the diameter is set to inner_radius * 2. Now, if we modify the dimension in the original sketch, the coil will automatically adjust to match. Unhide the construction plane, and create another coil identical to the first, except position this one to the outside.
Select the work plane again (unhide first, if necessary) and create a sketch on it. Click the home button to get a perspective view, and select Sketch > Project/include > Include 3D geometry. Now click the outer edge of the outer coil. You’ll see a purple line appear.
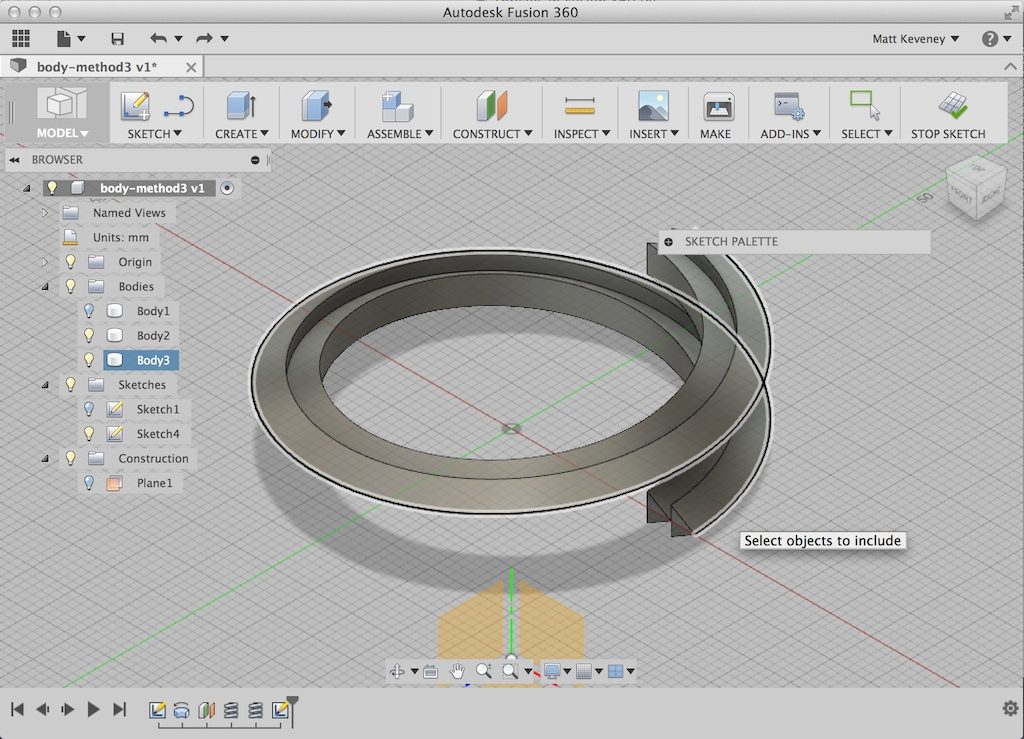
Hide the outer coil, and select the outer edge of the inner coil. Another purple line appears. Hide the inner coil.
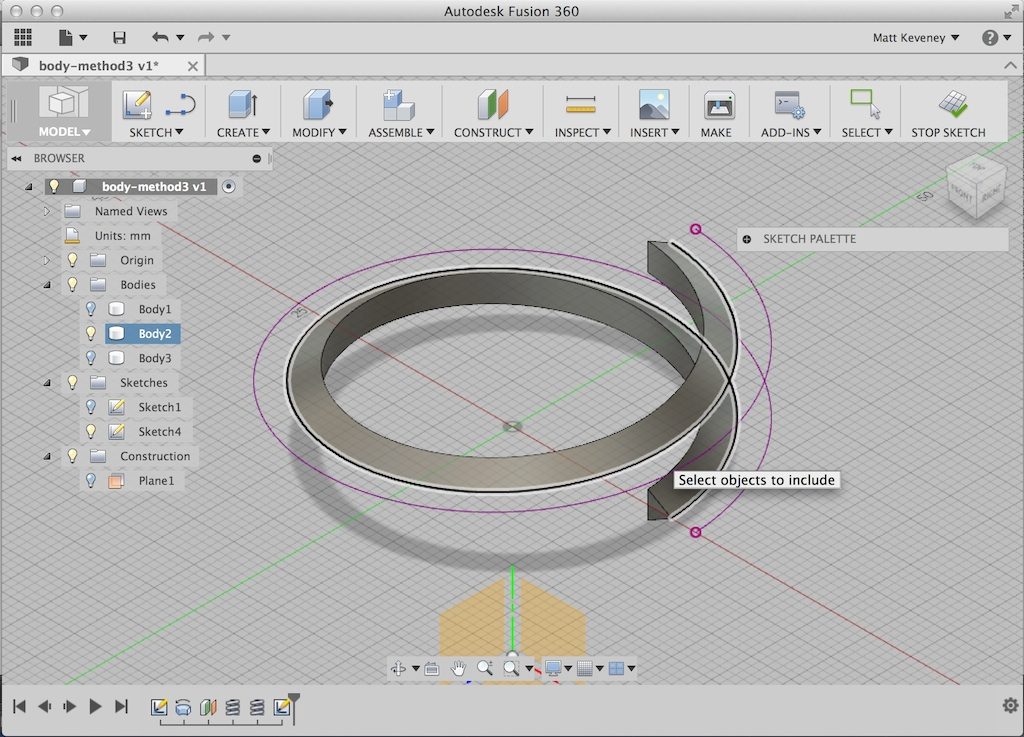
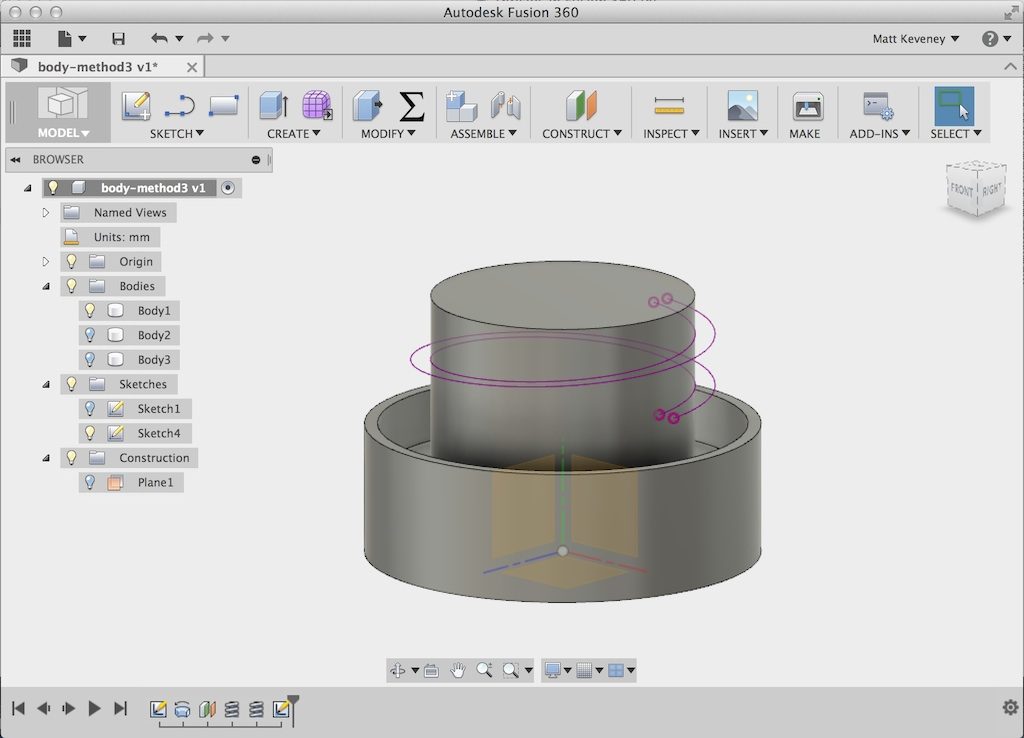
Whew! All that guff was just to produce those purple helices. Note that even though the curves are hovering over the sketch plane, they still belong to that sketch. Close the sketch and unhide the stopper body so you can see how these curves look in context.
Hide the stopper body again, select the inner helix and create a construction plane along the path. Drag the plane to snap to the lower end of the helix, and finish the operation.
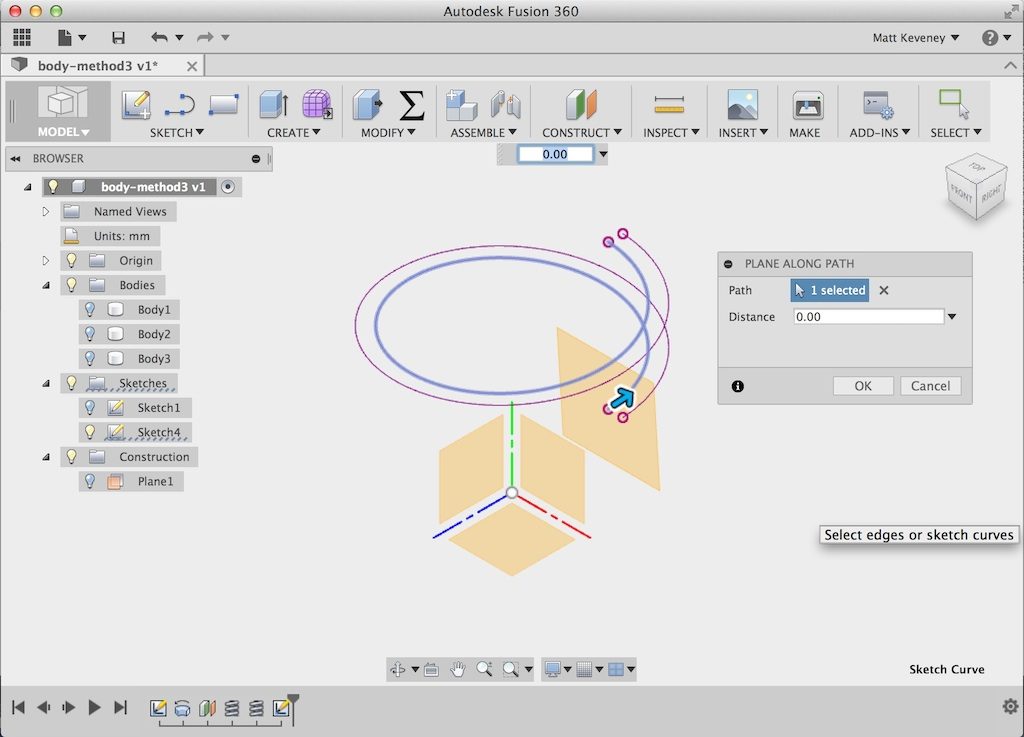
Drag the view around a bit, and notice that the plane is not quite vertical but is perpendicular to the helix. This is important for the upcoming sweep operation.
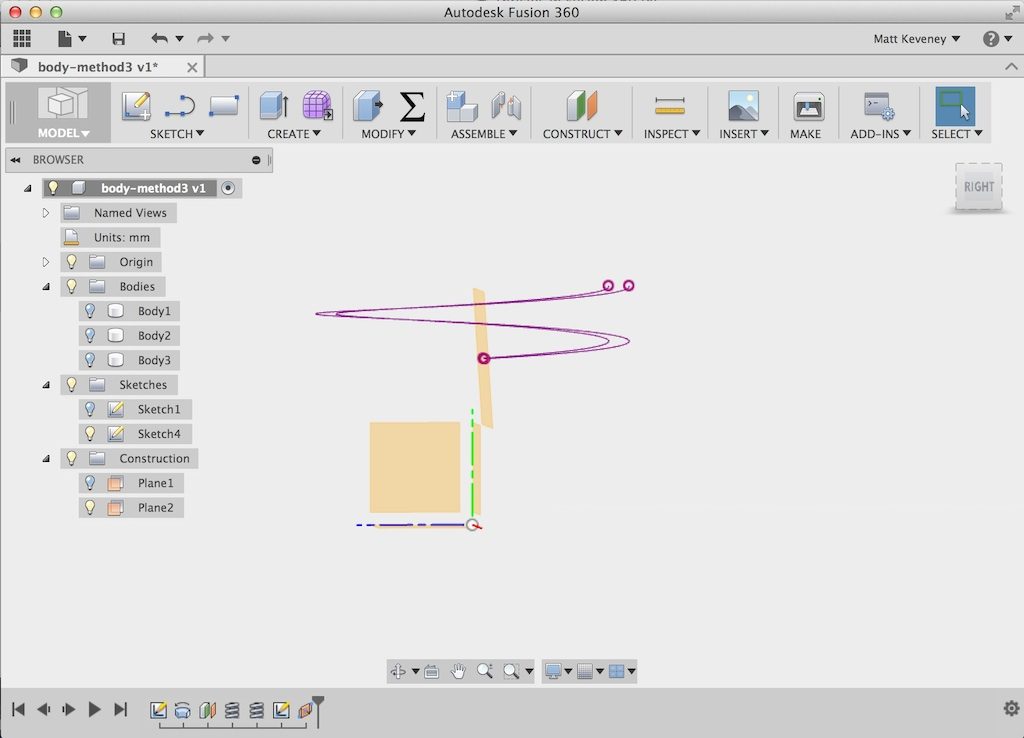
Select that plane and create a sketch. Then draw the thread profile and close the sketch.
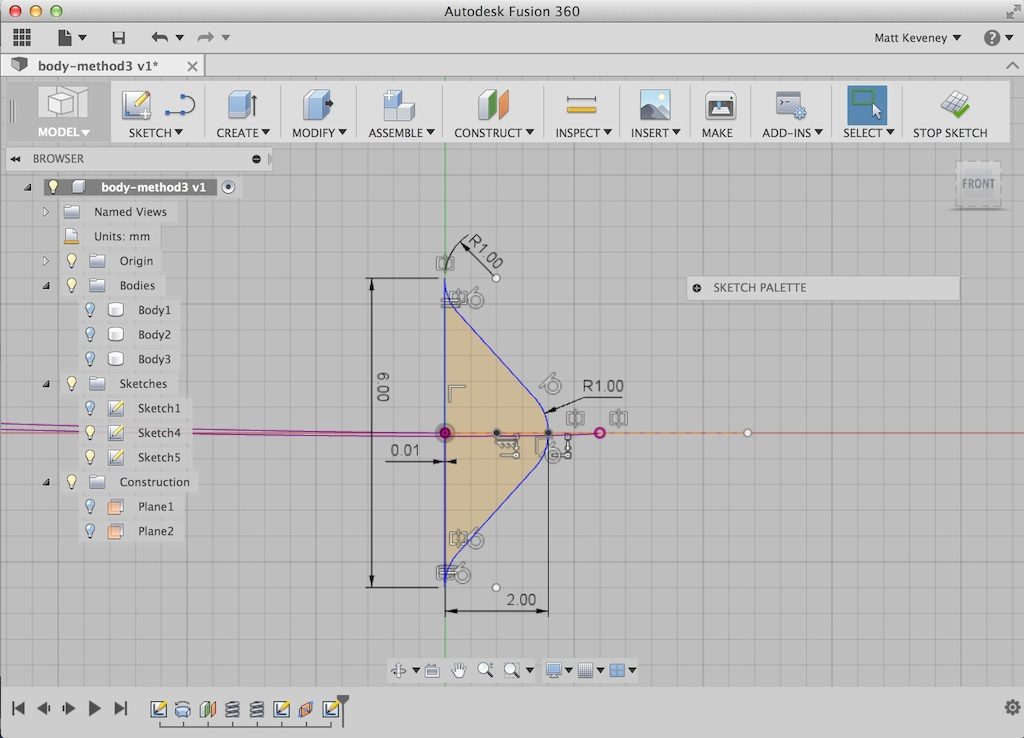
The sharp eyed will notice that the left vertical line in my profile is offset slightly left of center. This forces that edge of the profile to end up inside the inner cylinder. Otherwise, only the center point of this edge would actually touch the cylinder, since the entire plane upon which it is drawn is tilted slightly from vertical. Offsetting slightly inward avoids intersection problems when we later join the sweep to the stopper body.
Now, finally, unhide the stopper body and select the sweep tool. Select type: Path + Guide Rail, then choose the new sketch profile, the inner helix as the path, and the outer helix as the rail. Turn profile scaling off, unhide the stopper blank, and select operation join.
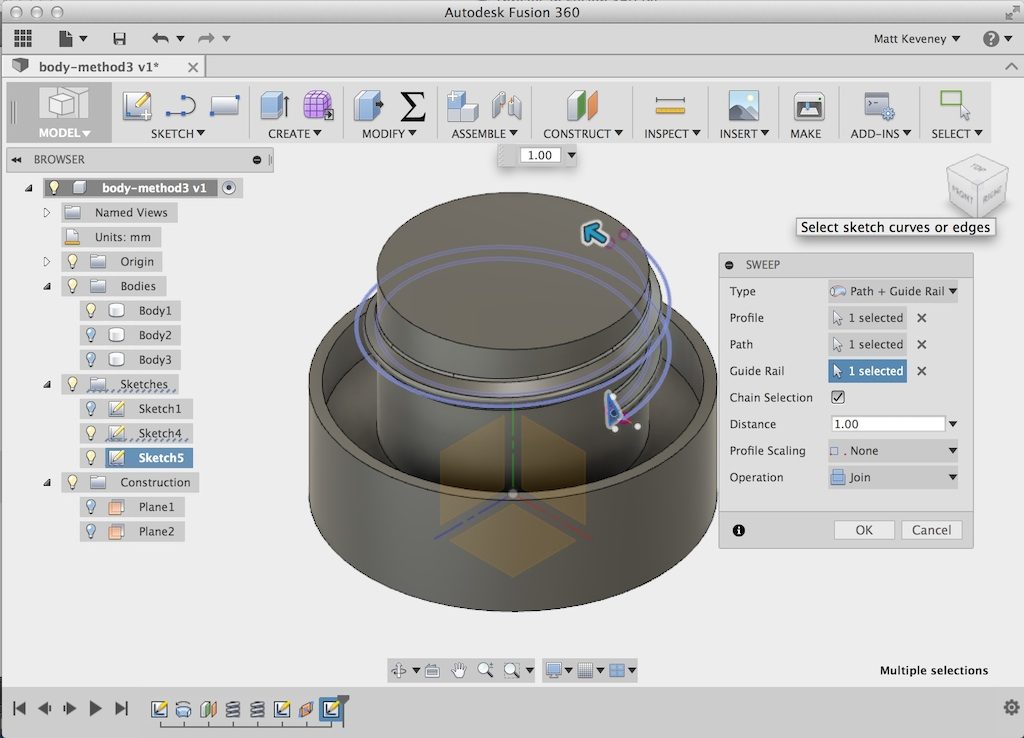
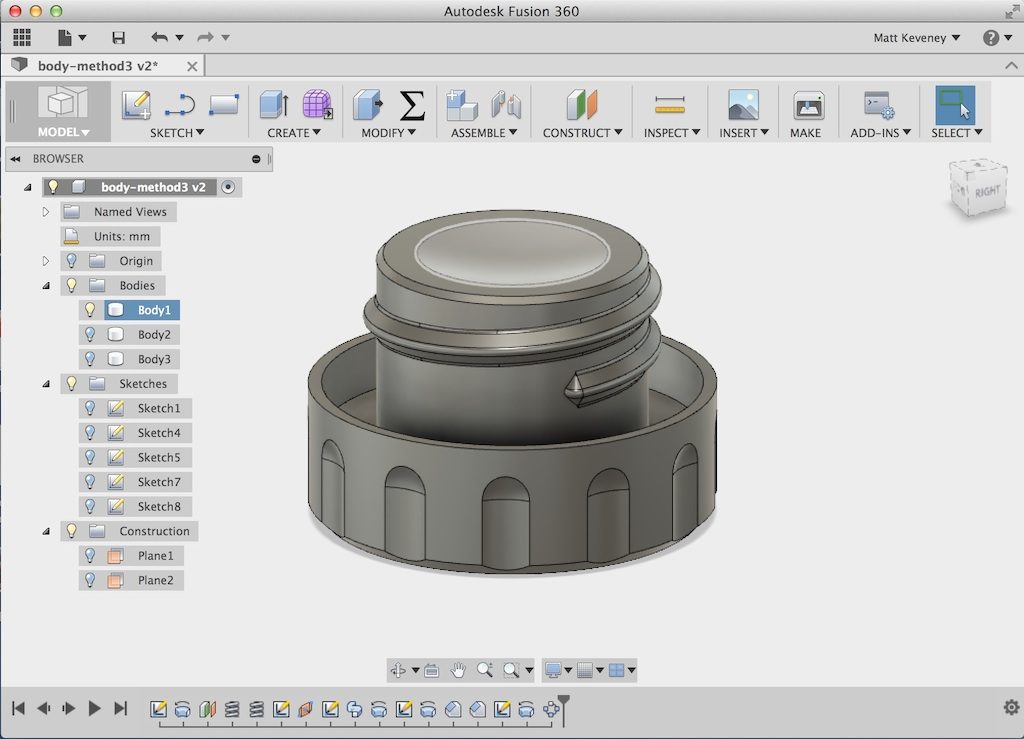
We’ve added our custom thread!
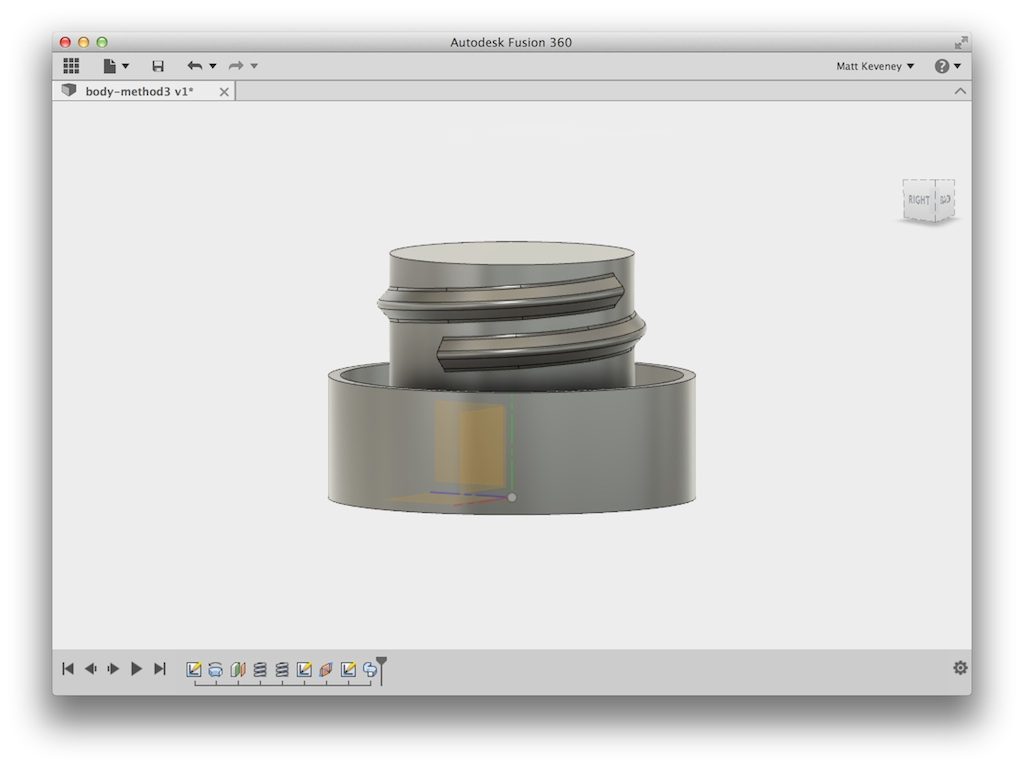
Here’s the model after a few more cosmetic operations.
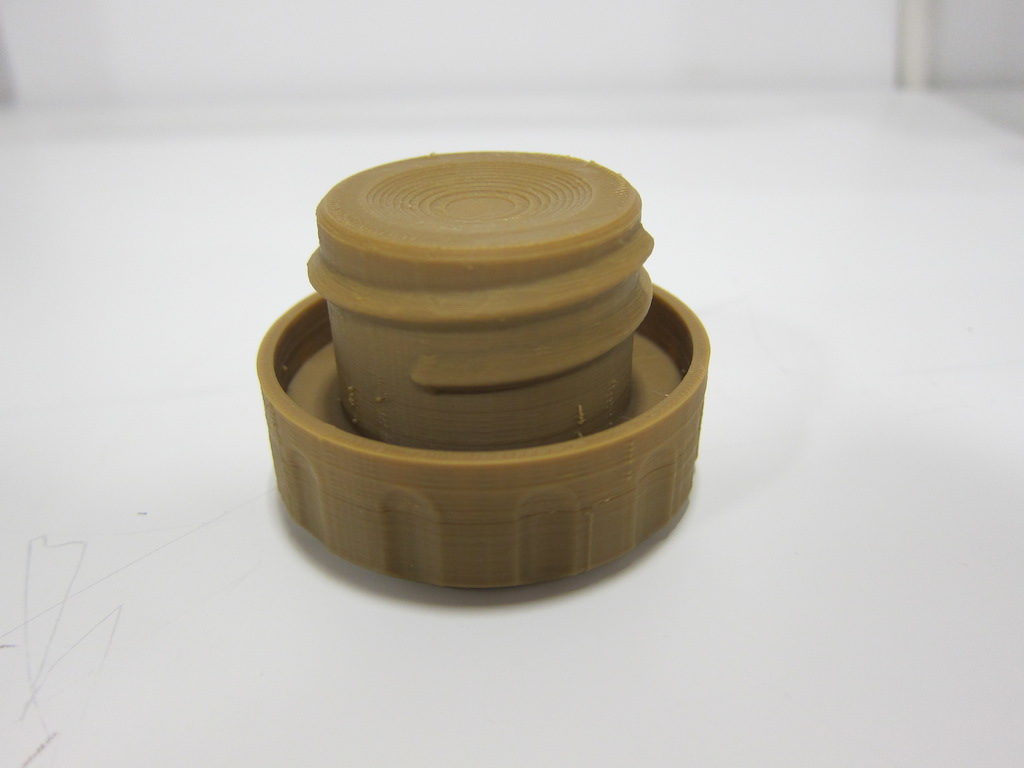
Of course I know you wouldn’t believe a word of it unless I printed one out, so here you go.
I hope you’ve enjoyed this article. Please leave your feedback below, including any other modeling questions you might have. Does anyone have any interest in a modeling class for 3D printing? If so, give me some ideas for what it should include!
-Matt

