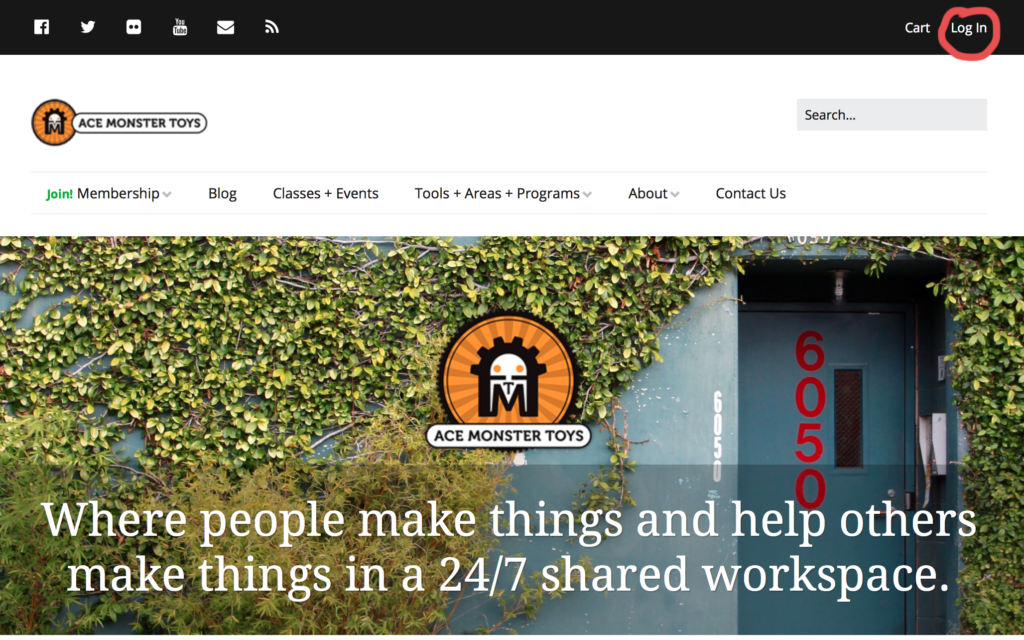
1. Go to acemonstertoys.org and login to your member account.
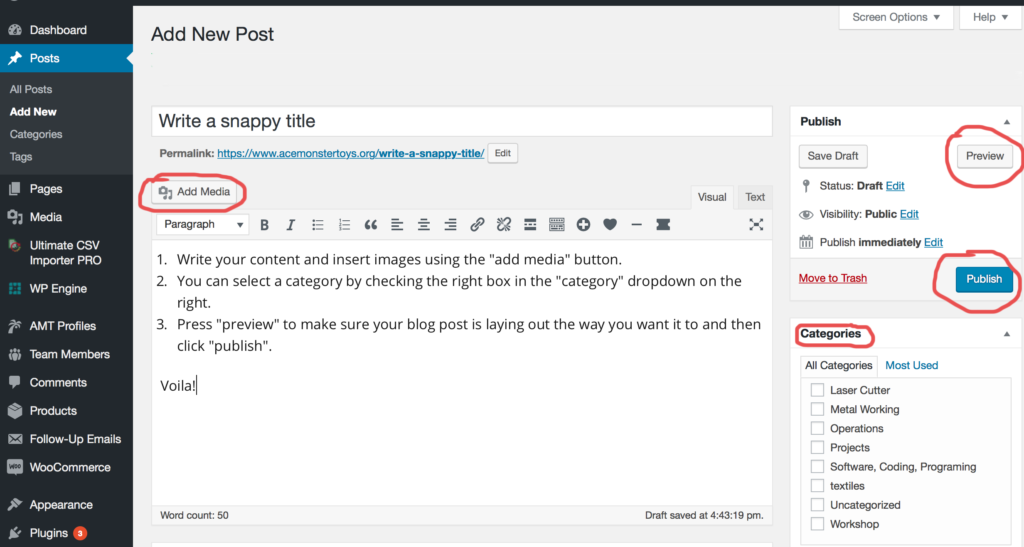
 2. Create a new post by clicking “Post” in the “New” dropdown menu.

3. Create your blog post using images and text! Write a snappy title, write your content and insert images using the “add media” button. You can select a category for your post in the appropriate menu in the side bar, as well as preview your post with the “preview” button and publish when you are ready.
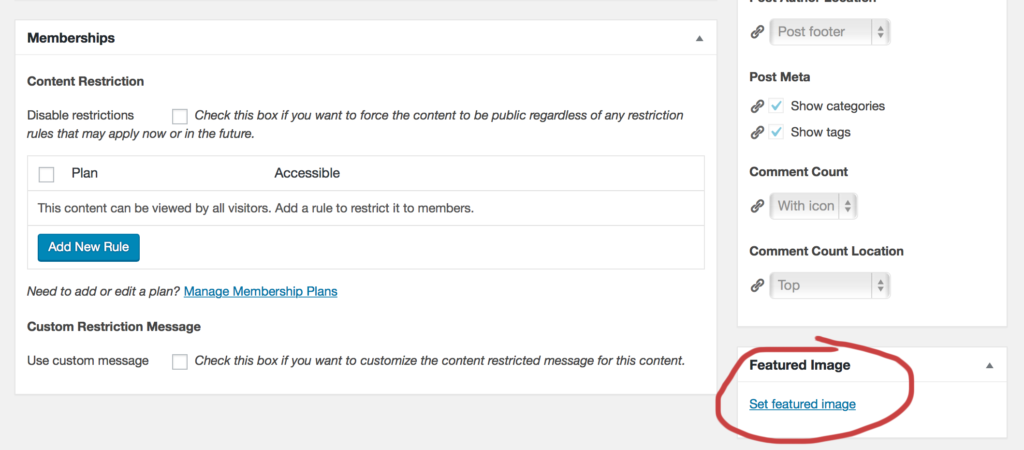
 4. Set your featured image. Scroll all the way down to “featured image” in the sidebar, and select or upload an image. The image will automatically be resized to a square thumbnail for the home page, but also shows up full size above your title in the blog. Landscape orientation works best. See the wiki for recommendations on featured image size: http://wiki.acemonstertoys.org/AMT_Blog_Image_Tips
More on uploading images:
- Clicking “add media” allows you to select from images in our media library, or you can upload your files using the “upload files” tab.
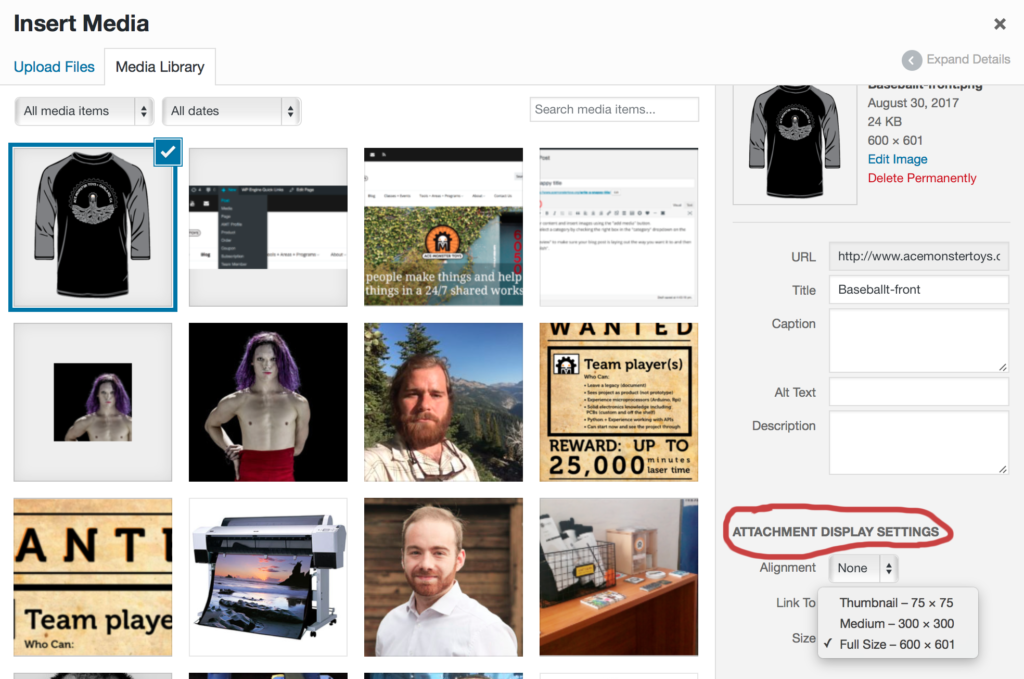
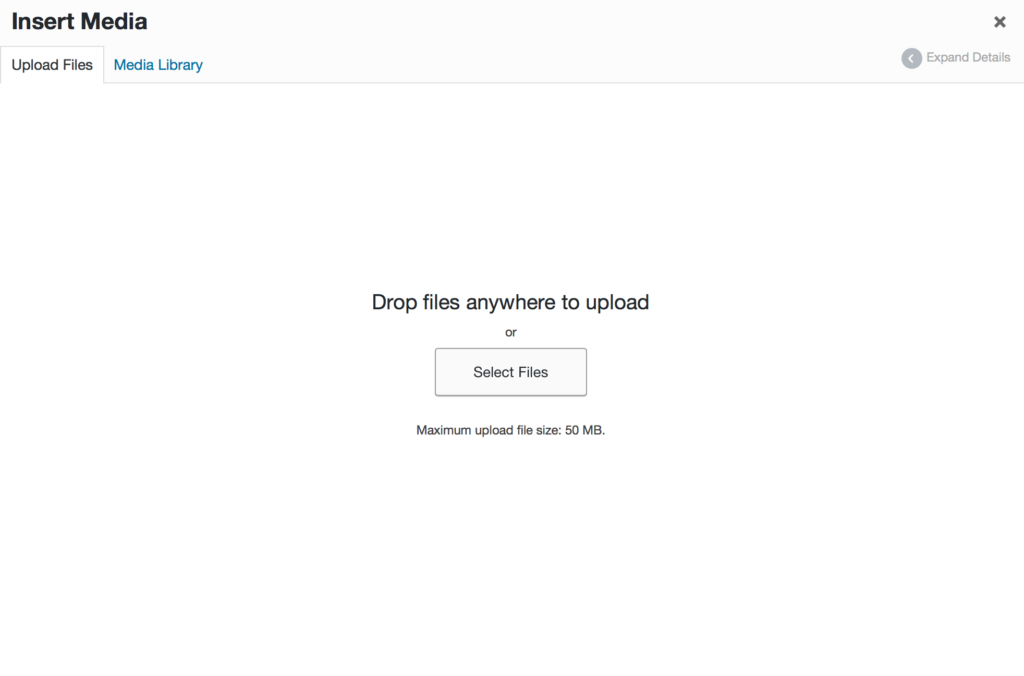 2. Once uploaded to the media library, you can select or deselect photos, and chose their alignment and size in the dropdown menus under “attachment display settings”.
3. Click “insert into post” once you are happy with your settings.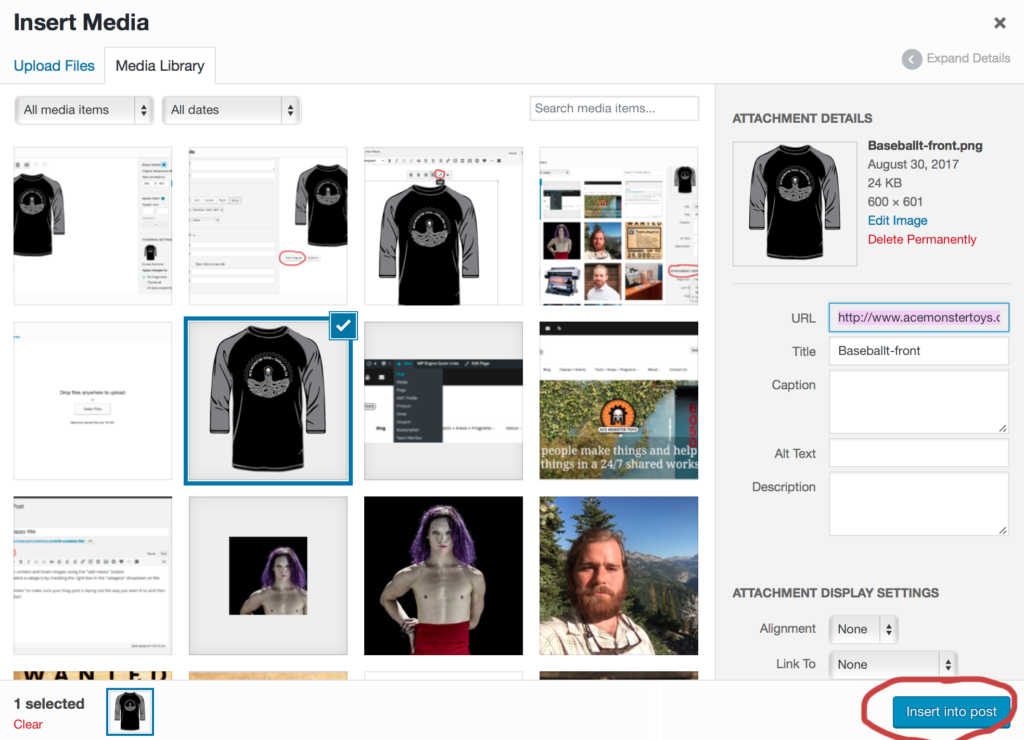
4. Once an image is inserted into your post, you can change the alignment or size settings by clicking the image once and then clicking the “edit” button on the tool bar that appears. It looks like a little pencil.
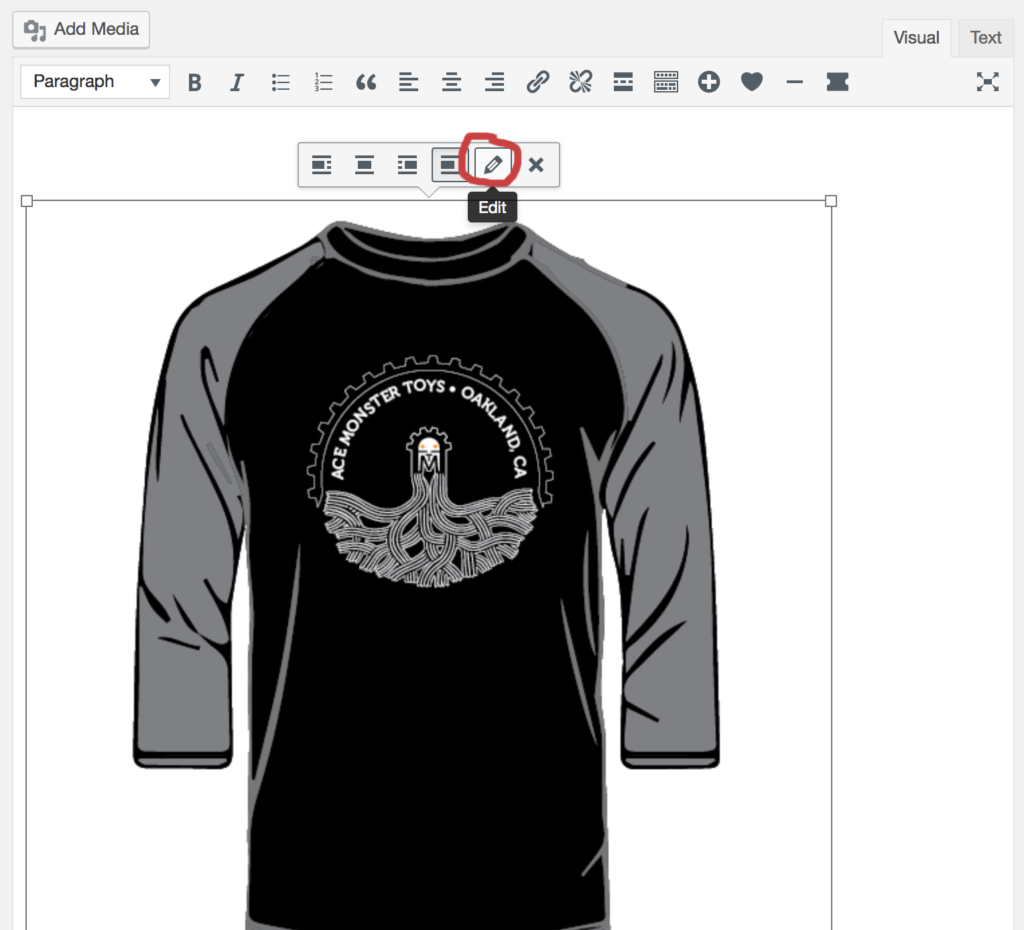
5. In the image editor panel that will open, you can make changes to your image, such as choosing to center align it, changing the size, or adding a caption. You can also click “edit original” for more options.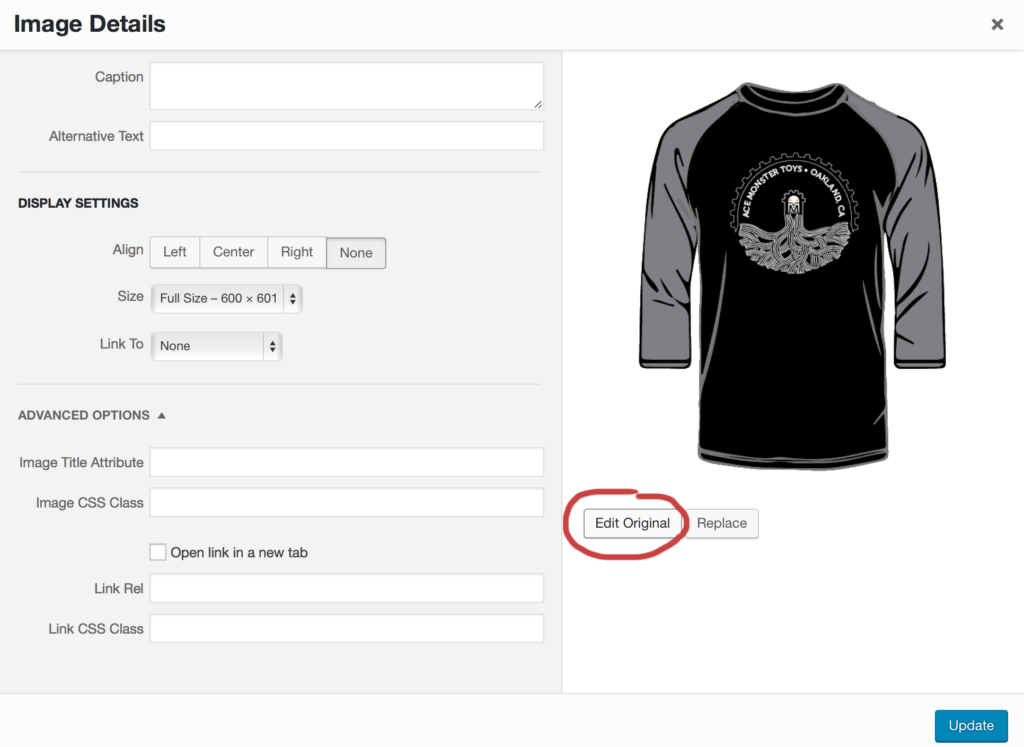
6. In this panel, you can rotate, flip, scale or crop your image. Make sure you click the blue save button when you make changes.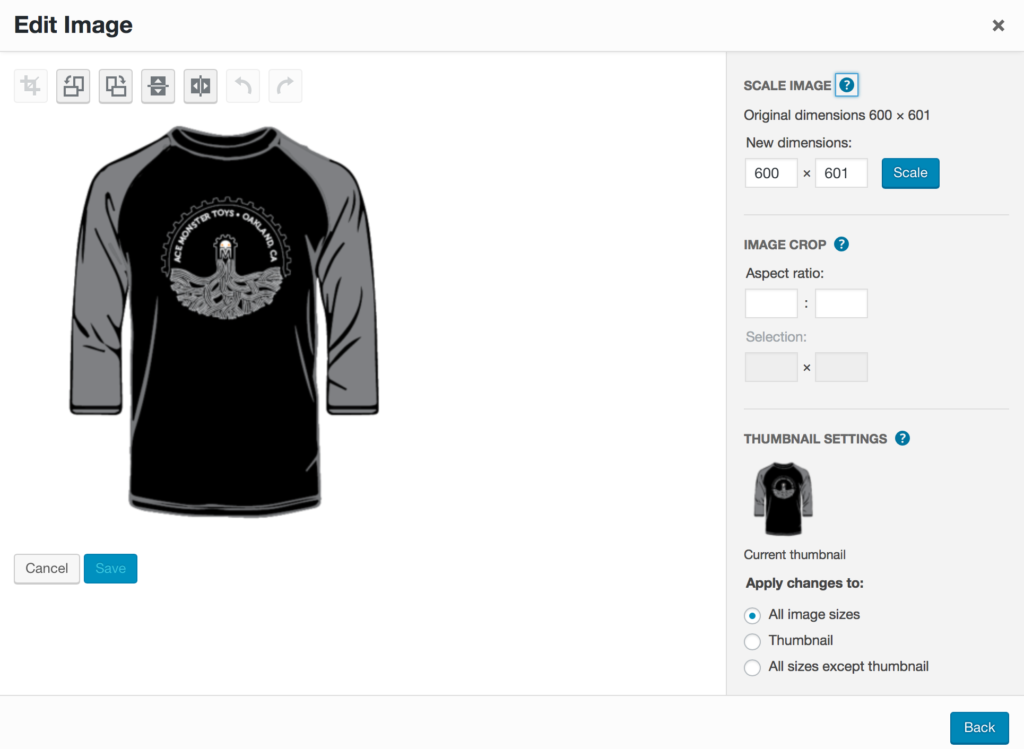
For more help with images and layout, wordpress has tons of documentation: https://codex.wordpress.org/Writing_Posts















 On Slack

