Author: Matt Keveney

3D printing steward, CAD geek, software engineer, and technological history buff.

Fusion 360 for Laser Cutting

Fusion 360 now has an experimental CAM feature to develop cutting paths for a laser cutter. I recently experimented with this feature, and thought I’d write up my findings.

These notes apply to our EXLAS 1280 laser cutter, which is driven by Lasercut 5.3 and accepts a DXF file as input. For non AMT readers, our laser cutter seems to be very similar to the RL-80-1290 sold by Rabbit Laser.

Background

It’s always been possible to use Fusion 360 to develop projects for our laser cutter. Taylor demonstrated it at one of his Fusion 360 workshops, and I’m sure more information can be found with a web search. Broadly, these are the steps:

  • Model your project as for any other media. Arrange bodies into ‘components’ as appropriate.
  • Copy each body to be laser cut to a new component called ‘cut layout’ or similar. Arrange the parts as desired, generally to minimize waste.
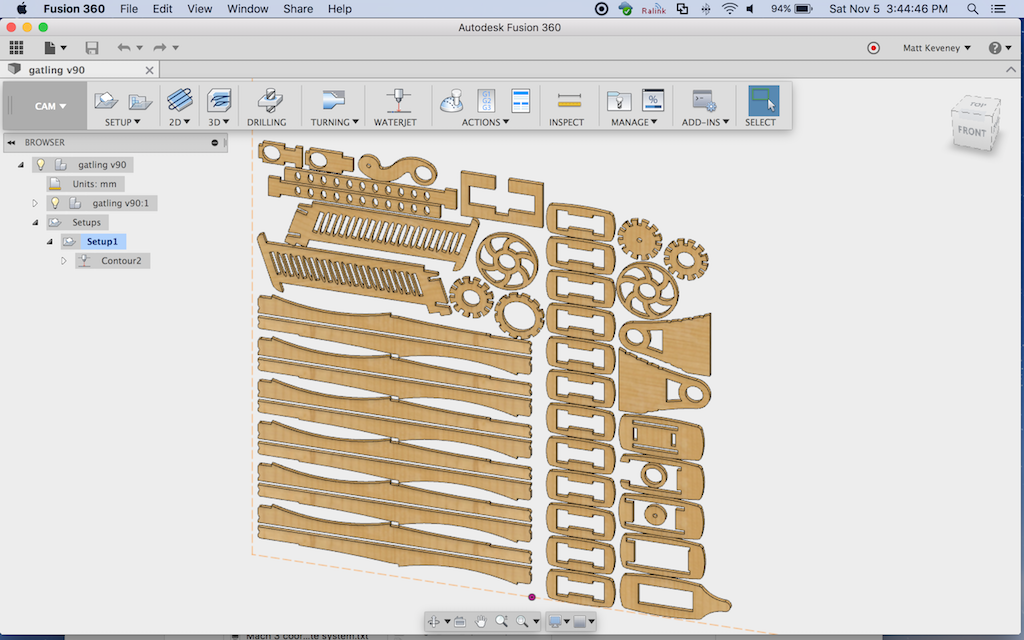
gatling-cutlayout

  • Create a new sketch and project all parts on the cut layout to the sketch plane.
  • Export this sketch as a DXF file.

The principal shortcoming of this approach is that the projected contours aren’t adjusted for the kerf of the laser cutter. Sometimes this doesn’t matter, but for parts that must precisely fit together (like the ubiquitous finger-jointed boxes) it can be an annoying problem.

We can adjust for kerf by doing some additional work right before exporting:

  • Edit the cut-layout sketch; Select each profile in turn and:
    • Apply the ‘offset’ tool, creating a new profile just outside the original. (For holes, offset inward.)
    • Select the original profile and delete it. (It’s probably smart to make a copy of your cut layout sketch first).
  • If you want ‘tabs’ to keep the pieces in the material sheet, they must be manually created: delete a small portion of the path at each desired location. I like to draw a small circle where I want the tab; use the ‘trim’ tool to delete the portion within the circle; then delete the circle.

Obviously, this is a major pain in the neck to maintain. If you didn’t get the kerf adjustment right the first time, or if your part dimensions or layout change, you must repeat these laborious steps. It’s an obvious application for a script or add-in, and I suspect something’s available but haven’t looked for it yet. Please post if you have an alternate technique!

Setting up for CAM

The new CAM support promises to address these shortcomings in a way that works more like the CAM workflow for milling or ‘CNC routing.’ To use it there are a few preliminary steps that must be done just once. These steps may become unnecessary when the feature passes out of the preview phase.

First turn the feature on: select ‘Preferences’ under your user name in the upper right corner. Then select ‘Preview’ and turn on ‘CAM – Water/Laser/Plasma cutter support.’
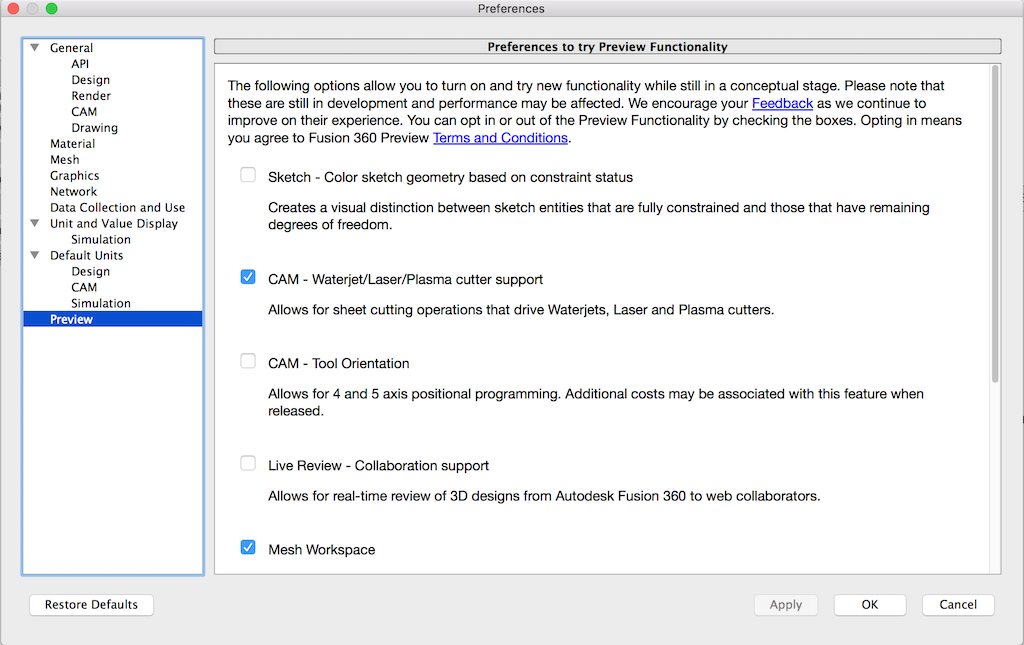
preview-prefs

Next, install the DXF ‘Post Process.’ This allows saving the tool path as a DXF file.

  • Browse here: http://cam.autodesk.com/posts/
  • In the ‘type’ dropdown, choose ‘Water / Laser / Plasma’
  • Then scroll down to ‘AutoCAD DXF’ and click ‘download’
  • Save the ‘dxf.cps’ file to your machine.
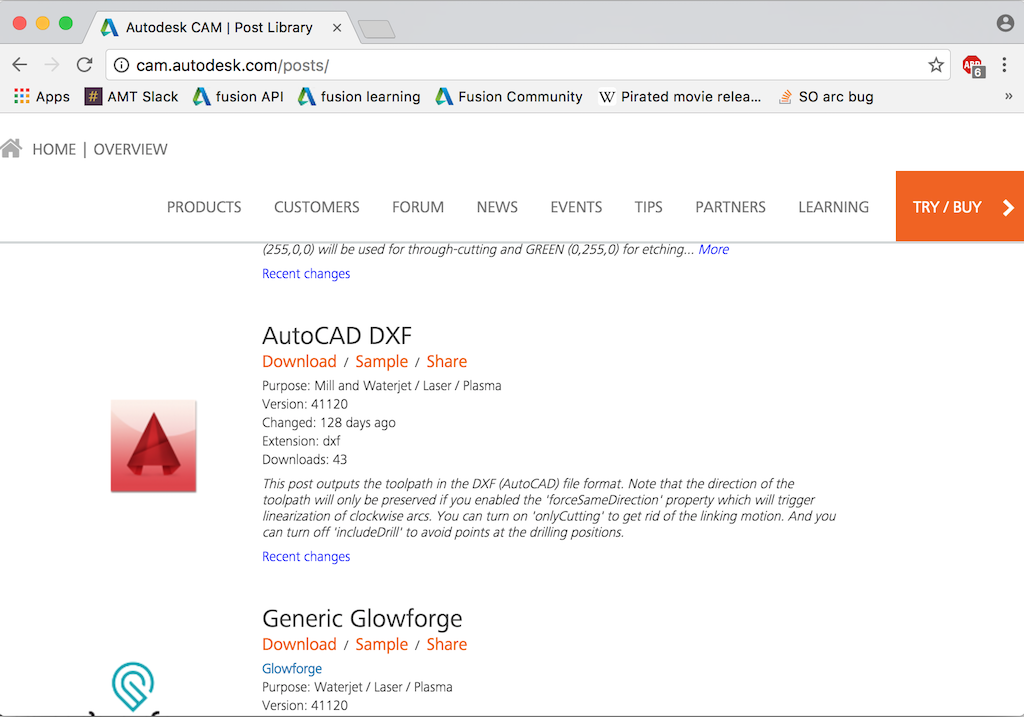
dxf-post

  • Install this post processor in your Fusion environment. On a Mac, you simply copy it to this directory:

/Users/<username>/Autodesk/Fusion 360 CAM/Posts

I’m sure there’s an equivalent on Windows. Please leave a comment if you figure out where it is.

Alternatively, you could also follow these steps, which put the post processor in the cloud so you can use it from multiple machines.

Creating the CAM tool path

You’ll probably still want to create the ‘cut layout’ component as described above. The CAM support does nothing to help with this step. (…Another obvious application for a custom script or add-in.)

Then, with the cut layout component visible and other components hidden,

  • Enter the CAM workspace (the big gray menu on the left).
  • Select ‘New Setup’ and set values as follows:
    • On the ‘Setup/Operation Type’ tab, choose ‘Water/laser/plasma’
    • On the ‘Stock’ tab, I prefer to use ‘relative size box’ with all offsets set to zero. You could also enter your actual stock size if desired, but this merely serves as a visual reference; perhaps as a double-check of your part layout.
    • I like to set WCS to ‘model orientation’, ‘stock box point’, and then choose the lower-left corner of my stock box as illustrated here. This works the same as for milling operations.
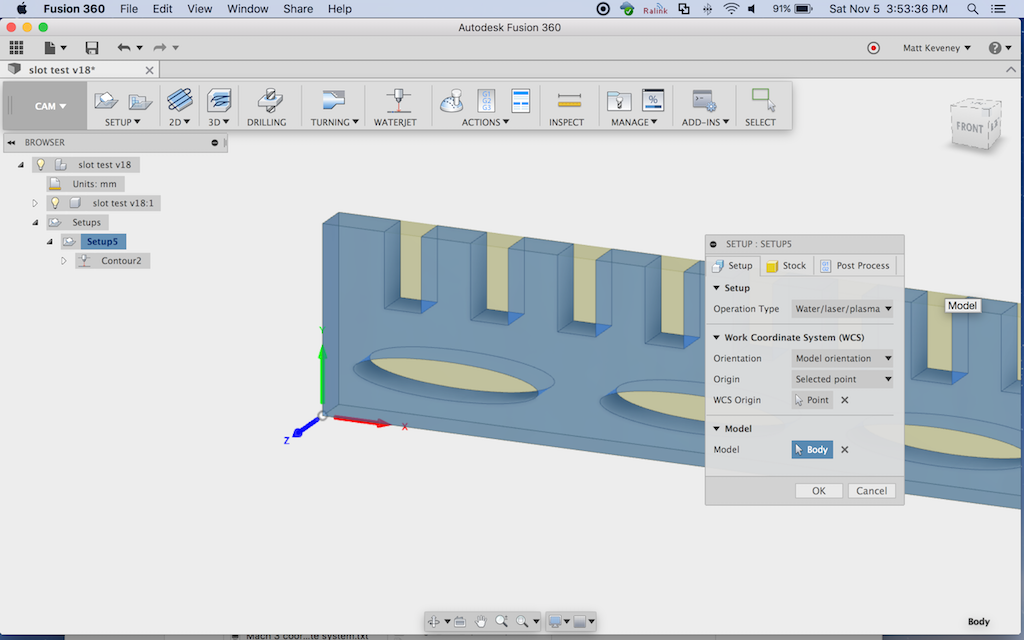
stock-origin

  • Click OK to finish the setup, then click ‘WATERJET’ to create a new contour operation, and set values on each tab as follows:
  • ‘Tool’ tab:
    • Type: ‘Laser cutting.’
    • cutting mode: ‘Through – auto’ (I’m not sure what this does but it sounds logical and worked for me).
    • Kerf width: more on this later; choose .5mm for now.
    • Feed settings: don’t matter in our case.
  • ‘Geometry’ tab:
    • Select the contours to be cut. It seems that these must be selected individually, which is a pain in the neck for a complex project. When selecting contours, note that a red arrow is displayed illustrating the cut direction. More on this later.
    • You can also set up ‘tabs’ here, if desired.
  • ‘Heights’ tab:
    • These values don’t matter, since we’re going to remove the movement paths at post-process time.
  • ‘Passes’ tab:
    • Set ‘Sideways compensation’ to ‘Left’ and set compensation type to ‘in computer’.
  • ‘Linking’:
    • Turn off both ‘Lead-In’ and ‘Lead-Out’

Click OK.

The tool path should be generated immediately. Examine it carefully, and ensure that the paths are all outside the part. For holes, the paths should be inside.

This is what those red arrows are all about. Note that the middle elliptical hole in my example has the tool path incorrectly positioned. To fix it, edit the contour; choose the geometry tab, and click the arrow on the offending contour.
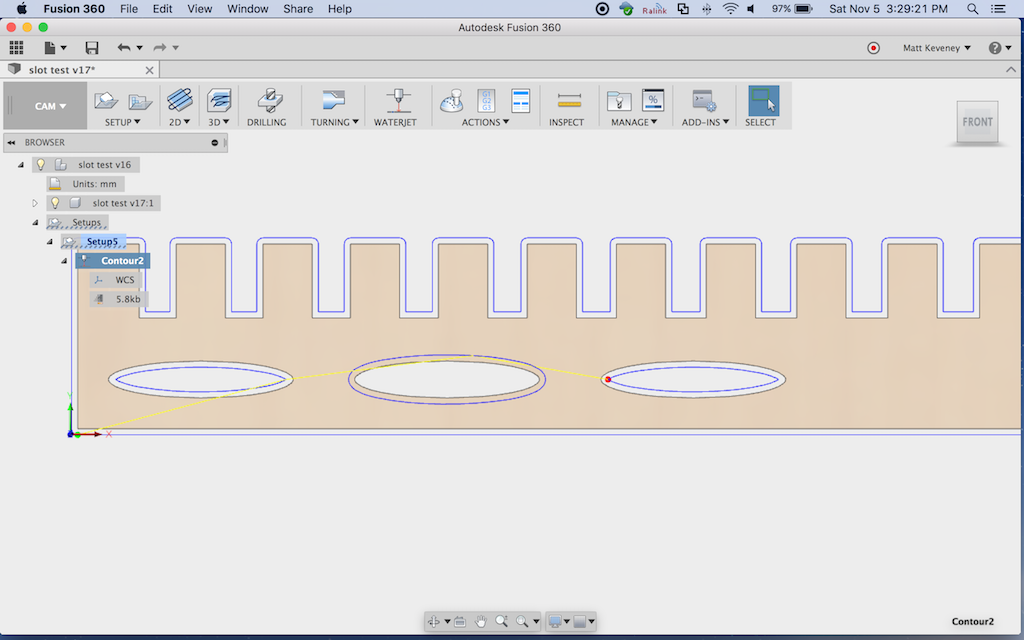
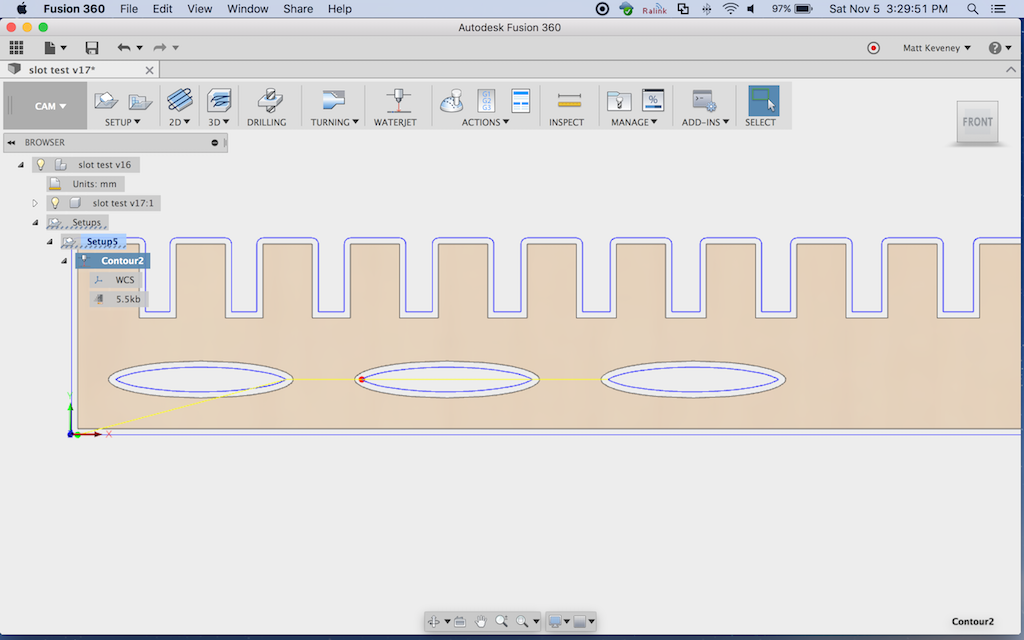
profile-wrong

profile-fixed

When the tool path looks correct, right-click on setup and choose ‘post process.’
Under ‘settings’:

  • Set ‘source’ to ‘personal posts’ (or ‘My Cloud Posts’ if you went that route).
  • Set ‘post processor’ to ‘dxf.cps – Autodesk DXF’
  • Setting ‘units’ to ‘millimeters’ seems to work properly on our laser. You can use millimeters here even if you designed the project in inches.

Under ‘properties’:

  • check ‘only cutting’ This will remove the ‘raise and move’ tool paths.
  • Click ‘OK’ and save your DXF file (probably to your network folder, so you can easily access it from the laser cutter’s computer).

Then, import the DXF into the laser as usual. Everything else is still done as taught in our Laser 101 class.

Note on Kerf

The kerf produced by a laser cutter is not perfectly vertical, it’s V-shaped (wider at the top). The kerf will vary in width depending on your material, power and feed settings.

To determine the correct kerf, I recommend cutting a test shape; perhaps a square 20mm on a side. Set the kerf to a reasonable estimate (.2 to .5 mm worked for me, cutting 3 mm baltic birch ply). Then re-generate the tool path and cut using the speed and power settings you will be using for the final piece. If the part measures too small, increase the kerf and retry. If it measures too large, decrease. You should be able to zero-in on the right kerf size for your material’s speed and power settings in just a few tries. Don’t expect perfection, since the kerf can vary even within a single cut due to variations in the material density. I called it good once I got within .1mm.

It should go without saying that you should not scale the cut path inside Lasercut, since that will also scale the kerf adjustment. If you want to make your part bigger or smaller, adjust the model in Fusion 360.

Conclusion

This method should enable you to cut parts to dimensions that precisely match your design. Of course, there’s more to it than that. You have to get the design right to begin with, including appropriate clearances for mating parts. I made the comb-like part illustrated above to experiment with slot sizes; you may want to do something similar with your project.

And I must mention that I don’t think Fusion 360 is the universal design tool for the laser cutter, especially for projects that simply don’t require that level of accuracy.

Designers who identify as artists rather than engineers will probably be much more comfortable with a 2D drawing tool like Illustrator or Inkscape. I recently used Inkscape to model a puzzle project; it would have been a big pain in the neck to do with Fusion 360. Even if you are making parts that must fit together, you can certainly get by with a bit of experimenting, some sanding here and there, and maybe a little extra glue in spots.

I have not yet explored generating separate layers in Fusion 360 for use with engraving or multi-power cutting operations. If you figure that out please write a follow-up post!

Ray came by when I was cutting my first prototype and wondered whether I took care to cut the inside cutouts away before the perimeters. If you don’t do so, the part may fall from the material and shift slightly, causing subsequent cuts on that part to land in the wrong place. I had not done anything special in this regard, but observing the rest of the job, it appears that Fusion did it for me — all interior cuts were performed first. …Or maybe I just got lucky. I’ll ask on the Fusion 360 CAM forum and see if anyone knows.

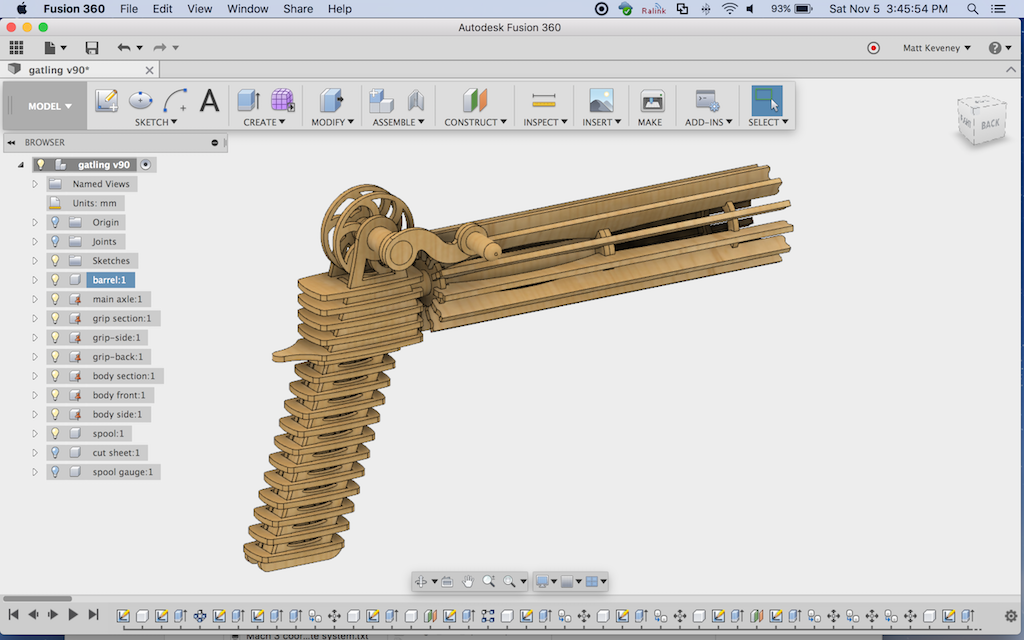
And, if you’re wondering about that cool rubber band gun at the top of the article, I’m afraid you’ll just have to wait for a follow-up post. I have a prototype together, but already have a dozen minor tweaks in mind to make it perfect!

3D Print Hangout, November 2, 2016

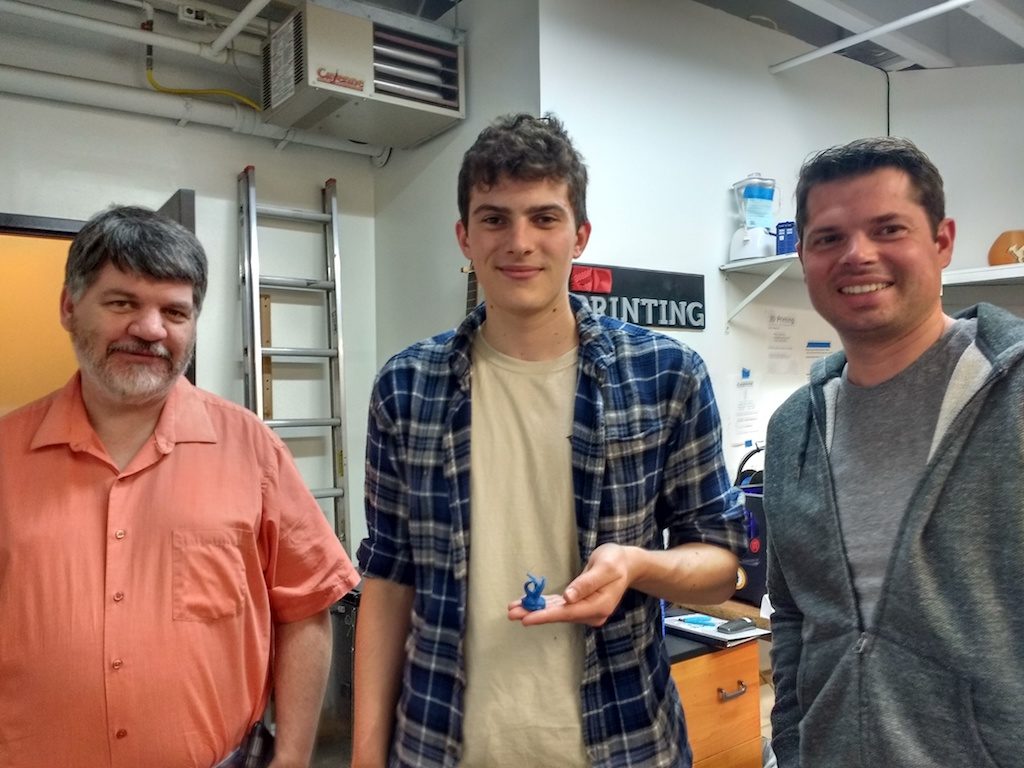
At last night’s hangout we had four guests. Two newcomers: Max and Klario; veteran Grant was there, and newcomer Mark, an experienced 3D print user wondering what AMT is all about. I neglected to write a blog post for our last 3d printing hangout (on 10/17/2016), so in this post I cover a few things from that meeting as well.

A former member (We miss you, Will, come back!) donated a 3Doodler pen (the3doodler.com) that has sat unused for months. A few weeks back, Grant asked about methods to fasten 3D printed parts together and I suggested he give the 3Doodler a try. I don’t think it’s really designed for the purpose, but nobody else was using it, so why not?

Last meeting, he reported his results: Spotty, unfortunately, but mostly because the pen seemed to be having some mechanical problems. But the idea still seemed to have merit…

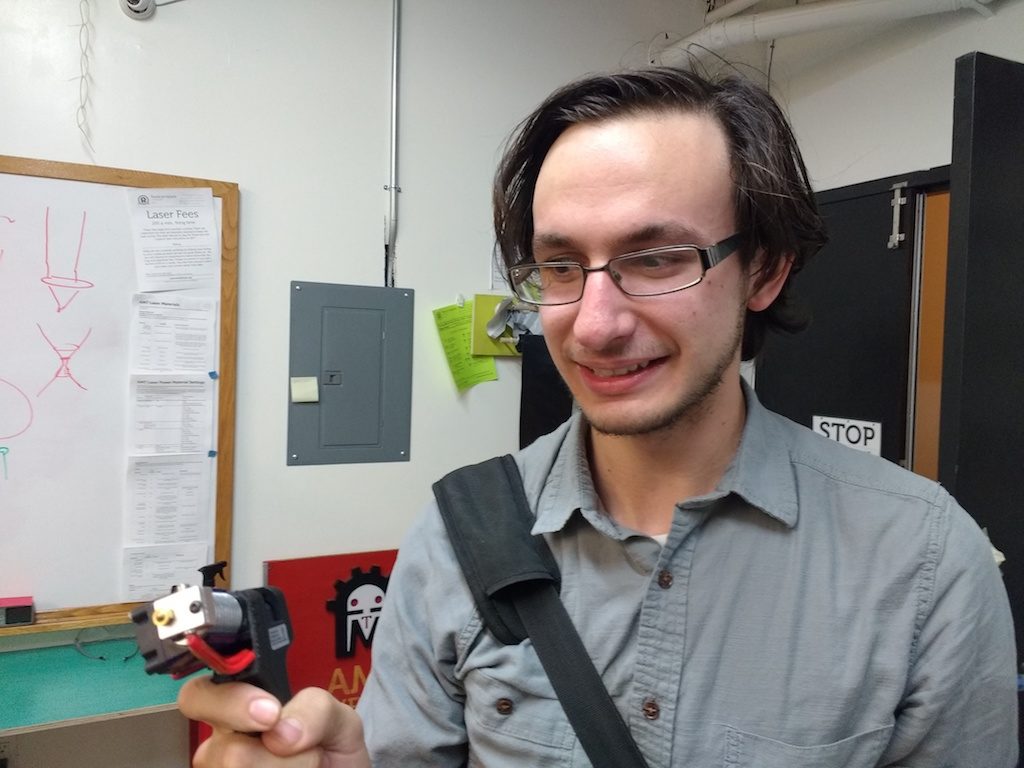
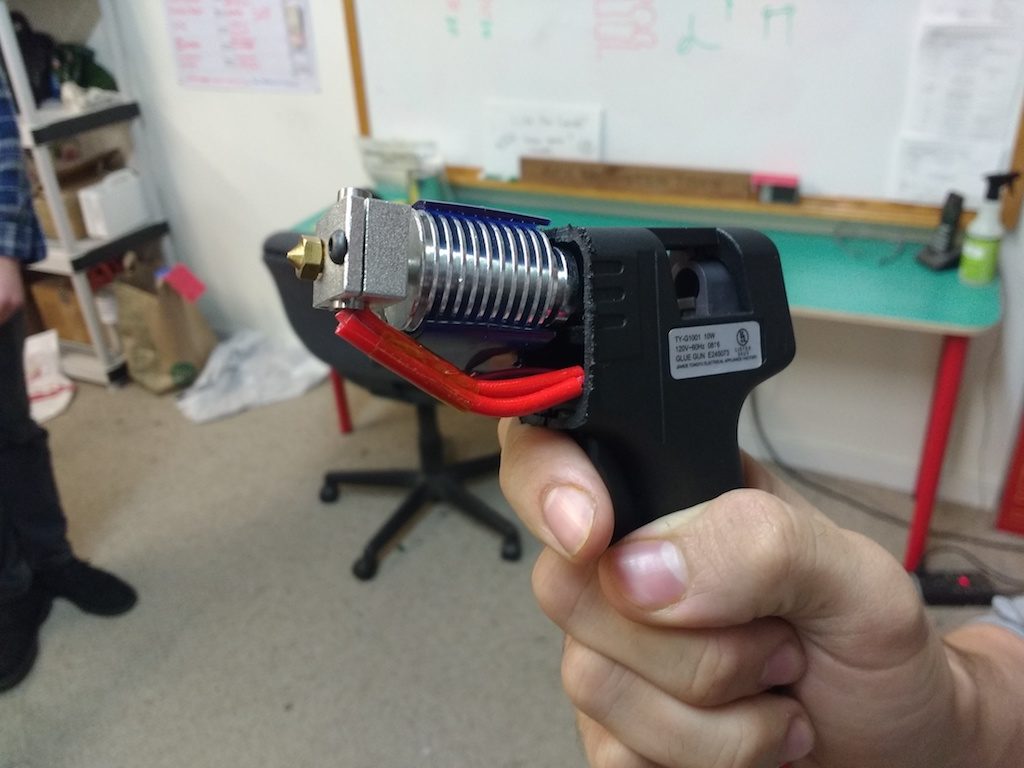
So, as all proper inventors must, Grant has decided to make a better one. He’s hacking together a glue-gun and a 3D printer hot-end. I’m dying to see the result, and I think we should all gang up on Grant and force him to write a blog post on his progress!

3dp-grants-gluegun
3dp-grants-gluegun-closeup

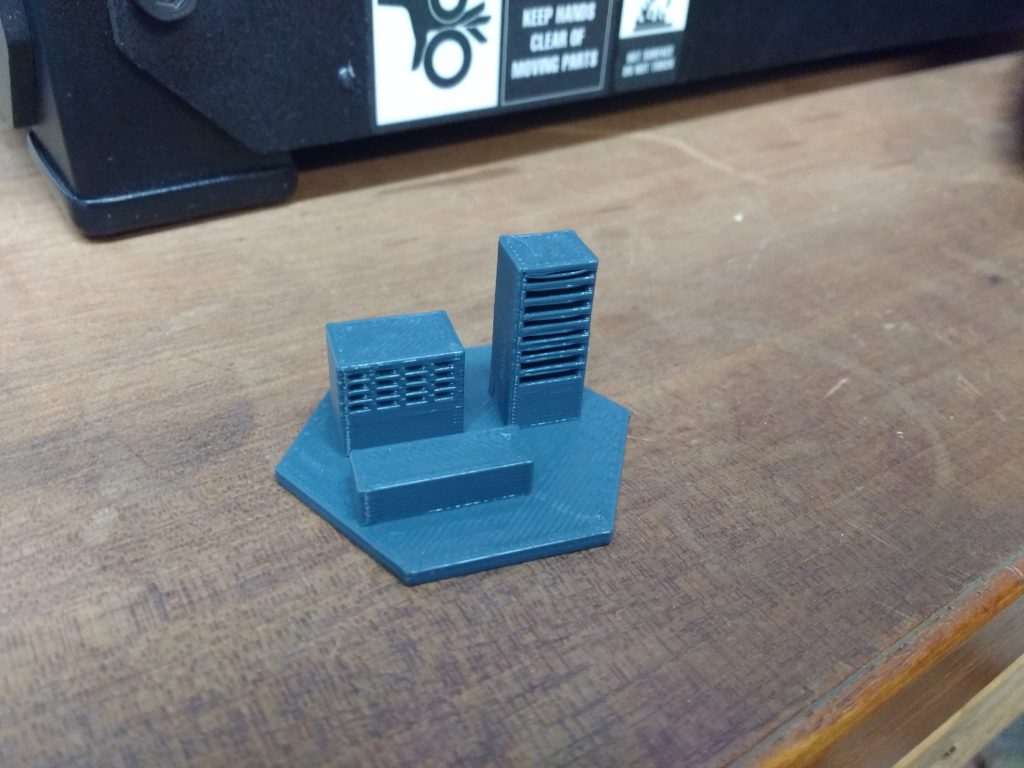
We did the usual printer walk-through last night. We printed a jackknife-style keyring and a weird alien chess piece as samples. We also talked briefly about design, but most of our guests were already somewhat familiar with design processes.

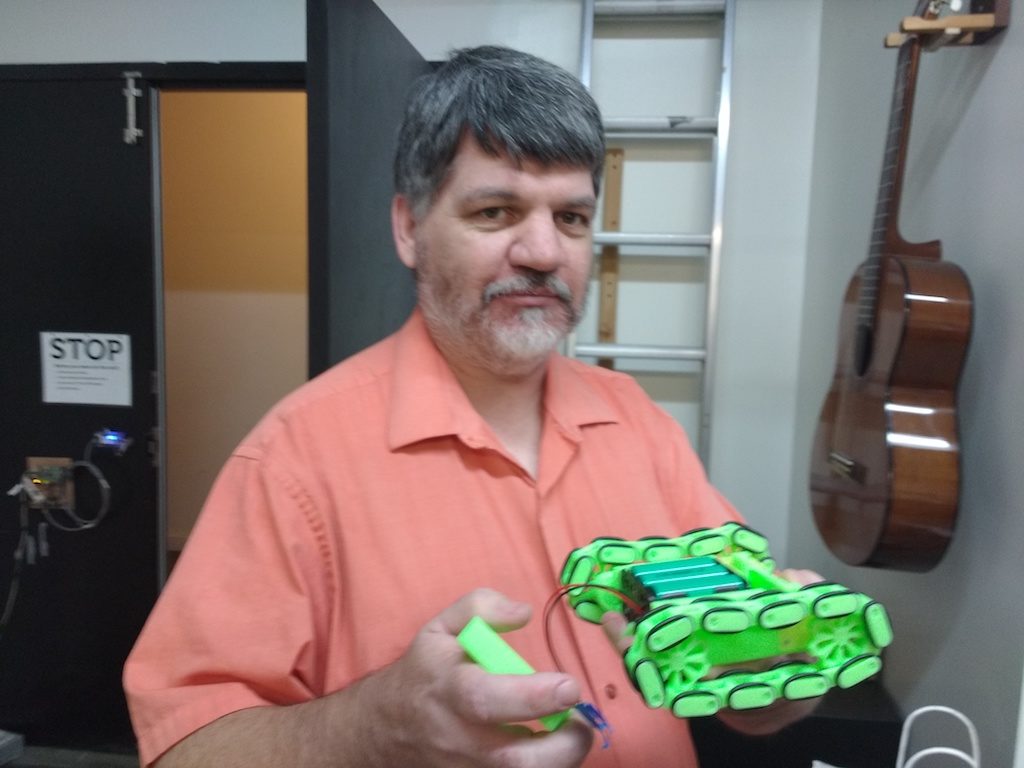
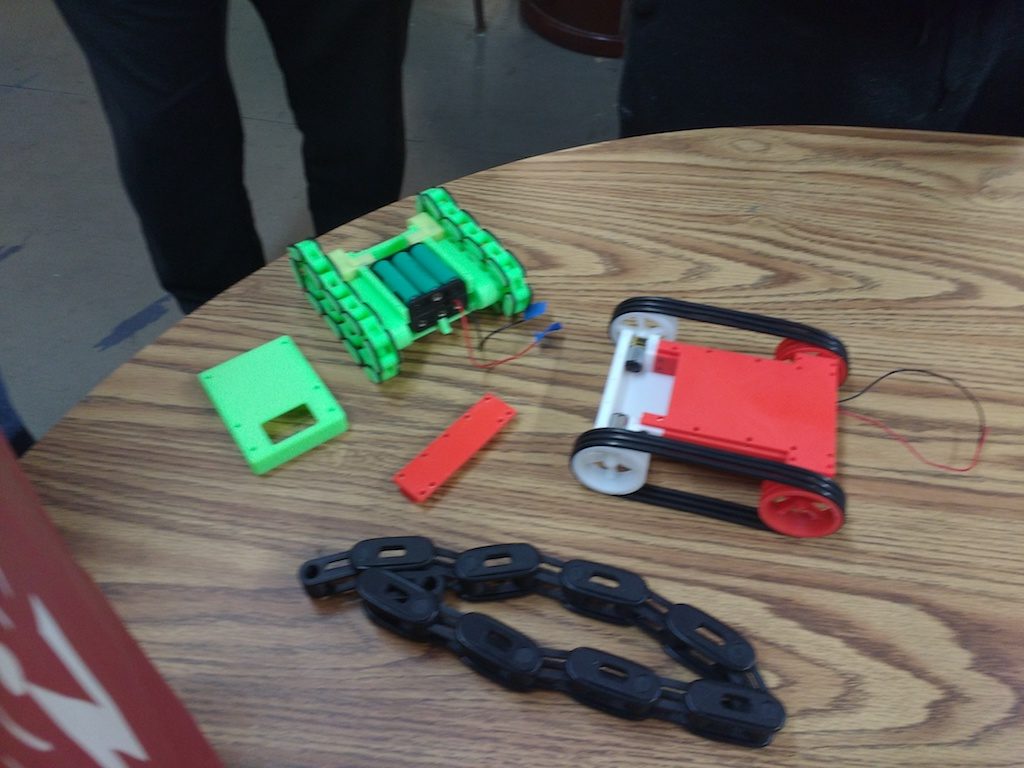
As things were drawing to a close, Mark just casually mentioned that he had a few samples of his work in his car, if we were interested in having a look… I only wish he’d mentioned them sooner! Mark has some really cool robot drive systems, almost entirely 3D printed! I immediately dragged him upstairs to show Ray, who I knew would be interested.

3dp-mike-and-robot
3dp-mikes-robots
3dp-mikes-smaller-tread
3dp-mikes-tread-section

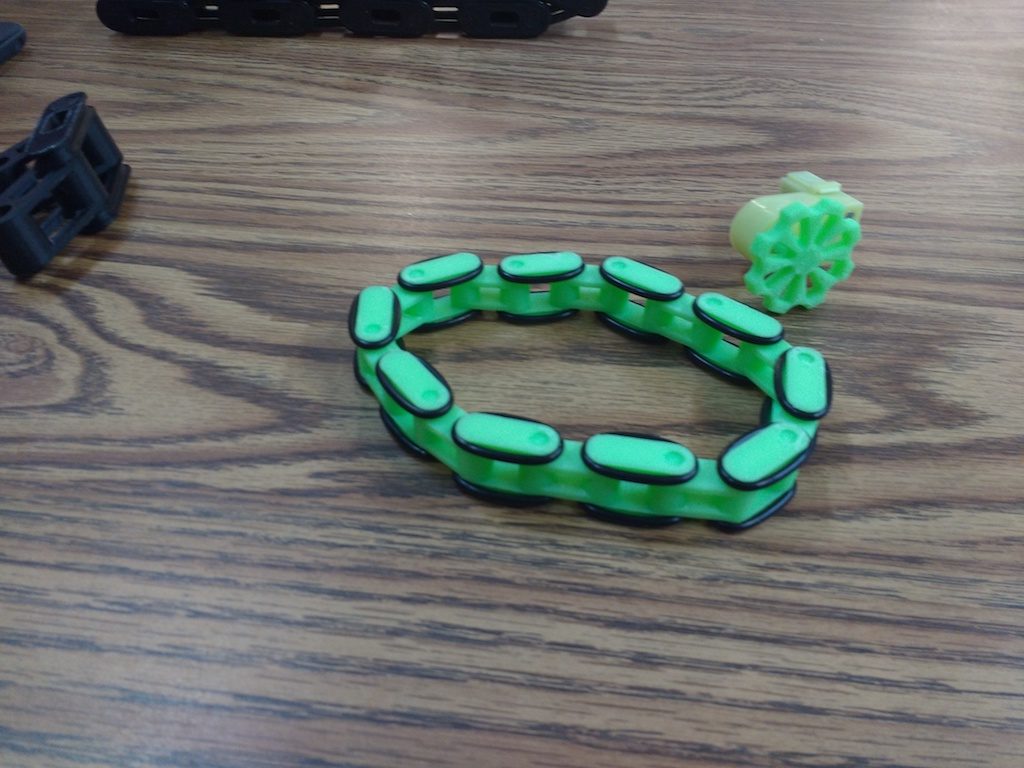
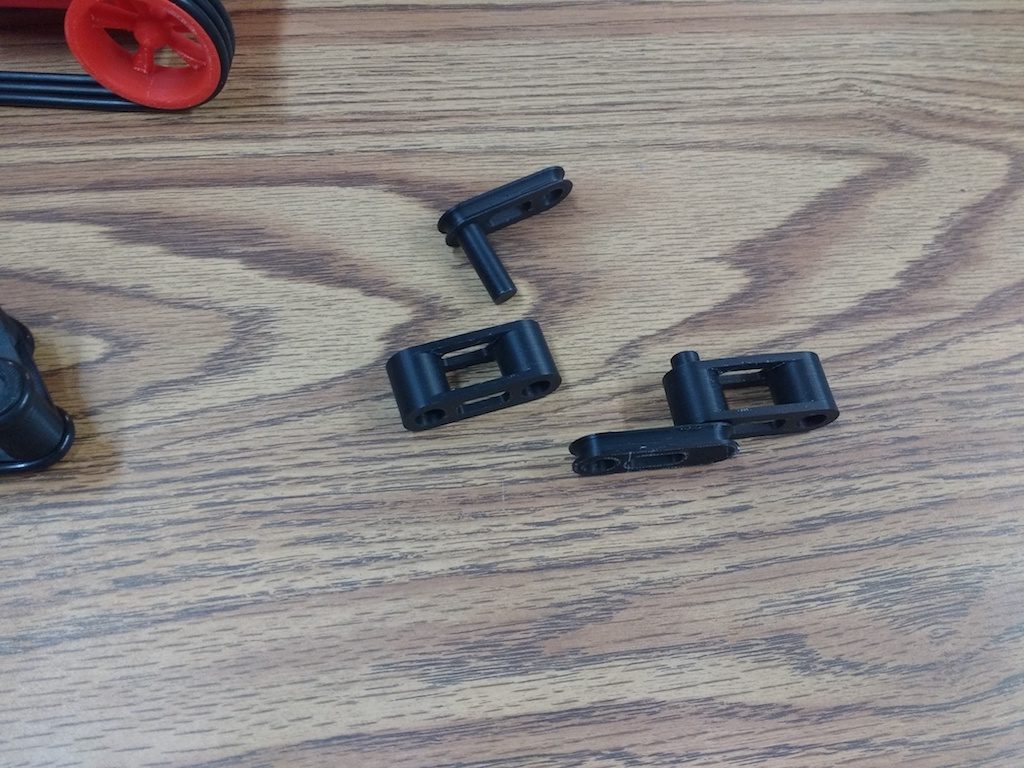
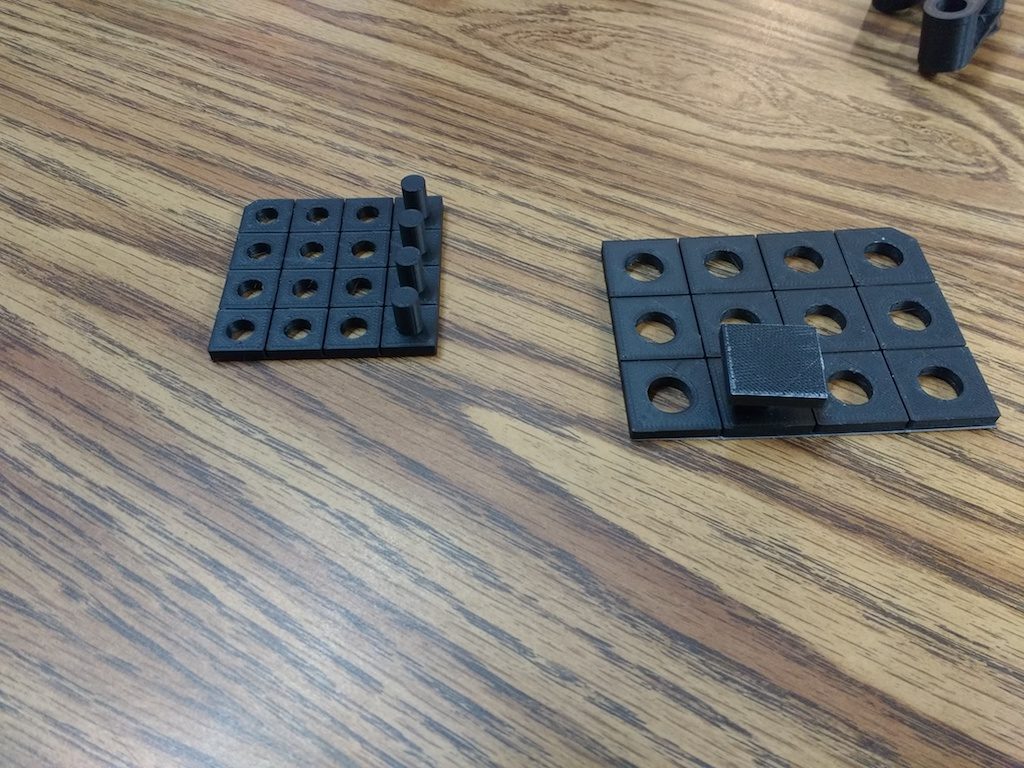
Mark’s tank tread sections use O-rings for traction, and press-fit together with a very satisfying snap. They’re held together by friction, naturally augmented by the ridges the 3D printing process produces. He has designed a few test pieces to get his hole sizes just right.

3dp-mikes-fit-test-pieces

Mark is thinking about joining AMT; I sure hope he does. In any case, I’ve asked (nay, demanded) that he keep returning to share his progress. Please know that our 3D printing hangouts are open to everyone; not just members. Whether you’re completely new to it, or an experienced veteran like Mark, we’d love for you to join us and share in the fun!

Simplify 3D class wrap-up

In place of our regular 3D print meeting, we had a special event last night. Our former 3D print steward, Sean Charlesworth returned to give a class on Simplify3D. Seven members and guests attended.

Simplify3D is an alternative slicer for 3D printing, with a host of advanced features. Sean walked us through the options and demystified all. The customizable support material seems to be the standout feature, and one I’ll be trying soon!

It’s a commercial product, but we have a license for use here at AMT. Next time you have a 3D printing project, give it a shot!

Thanks Sean!

A note on Fusion 360 for the big CNC

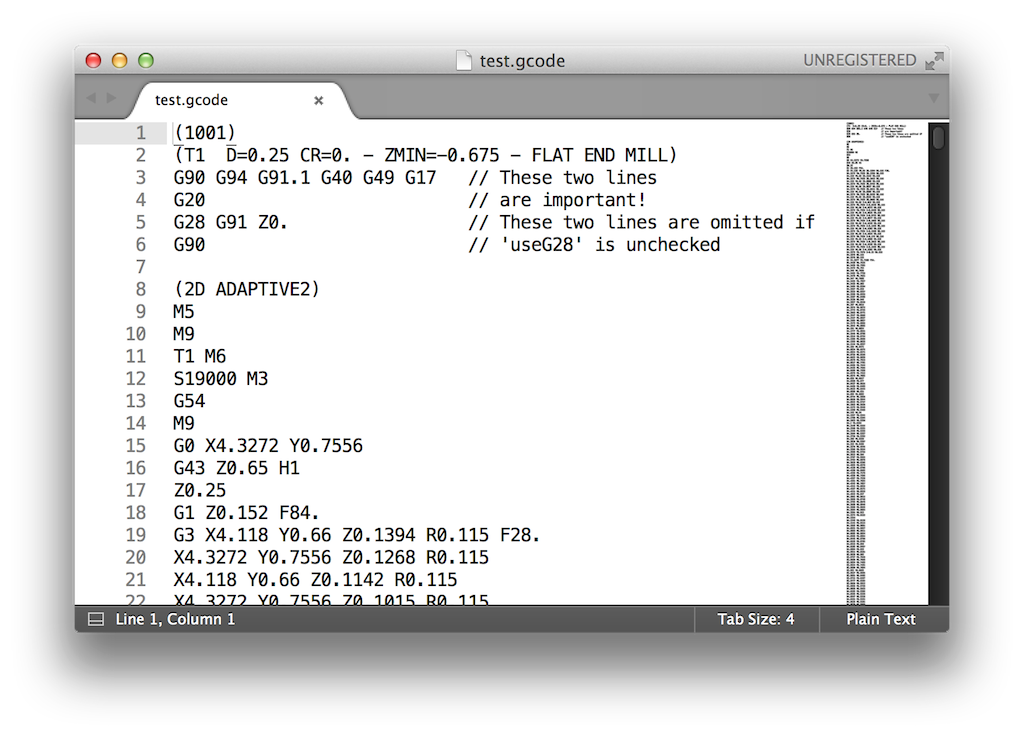
The gcode emitted by Fusion 360 using the default settings does not work on our big CNC. Rama figured out that manually editing the gcode and removing the first six lines gets around the issue.

I was curious about this and decided to investigate. I reverse-engineered the codes in the preamble, but all seemed to be perfectly valid Mach 3 g-code. Finally, I found the culprit: G28.

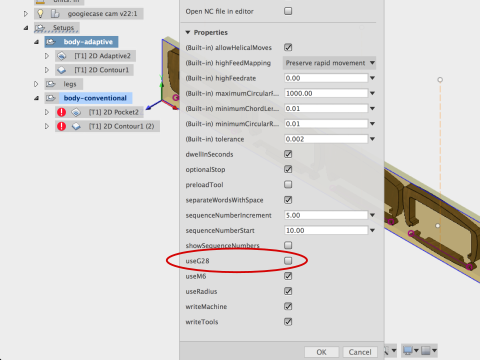
g28screenshot

It turns out that there’s a simple solution: Click post process to create the gcode.  Then open the Properties pane and un-check useG28. This option also controls some related codes at the end of the file.

g28codeshot

I do not recommend deleting the entire six-line preamble! It sets up various values in Mach 3’s brain, and omitting them may be give unexpected results. It sets units to Metric or Imperial, for example. If omitted, your job might be unexpectedly scaled to a weird size.

That’s all you really need to know! Read on if you’re interested in the details.

The issue is covered in this article:

http://discuss.inventables.com/t/learning-about-g28/12205

Briefly, G28 is used to return the cutter-head to the home position. If your CNC machine has end-stop switches, Mach 3 can be configured to move to the physical limits of its travel, which is often a convenient parking place for the cutter-head at the end of the job. It also resets Mach 3’s zero position in case you have some kind of permanent workpiece mounting arrangement that always positions the workpiece in the same place.

We don’t use the big CNC this way. Instead, we mount workpieces in a variety of ways and manually set the zero position before each the job. The article above makes a case for implementing G28, but I don’t think it’s applicable for us.

I figured this out by digging into the code. It turns out that the tool-path is converted to gcode by a nicely commented Javascript program. Search your system for ‘mach3mill.cps’ It will be buried down in the bowels of your application tree somewhere, and is probably in a different place for PCs vs. Macs. I looked for the G28 code, found it was controlled by an option, then finally googled for that option to locate the above post. Anyway, it’s good to know that we have flexibility if we need to further customize gcode generation.

3D Print Hangout, September 19, 2016

Two guests tonight, Dan and Enric. Enric thinks folks are probably still recovering from Burning Man.


3dp-overhang-glasseshook

I started by printing glasses hook version II that we designed last session. I was a bit concerned about the extreme overhang on the little corner retaining pieces, but the printer handled it with aplomb.

I was also anxious to try out the new flexible BuildTak plate Sean recently installed. As the video shows, our results were rather mixed… My part didn’t just pop right off, but removing the plate did make it more convenient to use the spatula.

Unfortunately, I’m still not happy with the design.  After a bit of playing with it, we came up with an even better idea!

Important note: The plate has a distinct high spot near the middle, which may be due to the underlying acrylic sheet. It must be leveled much looser than before to account for this: Level as usual, then back off each knob by a half turn or so, until the center gap feels right. One of our members reported extreme difficulty using high-resolution, since that first layer is so thin. If you have too much trouble, just flip the plate over and use blue tape as before.

3dp-dans-gamepiece

Dan is a newcomer to 3D printing, but came prepared with a few models he’s already made. His first print was a game piece for a board game he and some friends are designing. It printed perfectly on the first try.

A few announcements:

On Meetup I’ve renamed this meeting to 3d Printing Hangout to more accurately reflect what really happens here. Previously we’d scheduled two kinds of meeting, the focus alternating between 3D printer builders and 3D print design. The distinction seemed like a good idea at the time, but it turns out that folks of all interests and levels show up at either meeting, so I thought I’d rename the meeting just to make it clear. Nothing’s really changed.

In place of our next scheduled hangout (October 3) we have a special guest: Sean Charlesworth returns to teach us the ins-and-outs of Simplify3D. Serious 3D-printing enthusiasts won’t want to miss this one:

http://www.meetup.com/Ace-Monster-Toys/events/234203445/

-Matt

3D print meeting wrap-up, September 5, 2016

I think holiday weekends are probably not a good scheduling choice. We had just two guests last night: Andy and Miles. Both are new members.

We did the usual run through on each printer. The Type-A machines printer is up-and-running since it’s recent upgrade, but still exhibits quality issues from time-to-time that I haven’t quite sorted out. Running at a lower-than-usual speed generally tames it for now: say 50mm/second or less.

Andy found a die model on Thingiverse that seemed like a good, simple example. Unfortunately the filleted corners meant we had excessive overhang for the first few layers, resulting in somewhat ragged quality on the bottom face.

3dp-AndyWithDie

Then we found a knight chess piece which seemed like a more challenging test. This one gave us a chance to see what the generated support material was like.

We also spent an hour or so brainstorming with Fusion 360. None of us had any clever ideas for an example model, so I resurrected the ‘glasses hook’ idea that we worked on last meeting. The first design we did had a few areas for improvement, which we tried to incorporate this time around. Unfortunately it was getting too late to print by then; I’ll print it out later and report.

3dp-glasseshook

Tonight Taylor Stein returns for another Fusion 360 training session. This time the focus is on 3D printing, but any Fusion 360 topic will be entertained if there’s sufficient interest. Come if you can! Taylor’s sessions are always popular and well worthwhile.

-Matt

Fun with planetary gear trains

If you’ve seen my websites (here and here) you’ll know that I love mechanical gadgetry. Sometimes the mere mention of a particular mechanism or mechanical problem awakens this obsession, for which there’s no cure but to work out a solution.

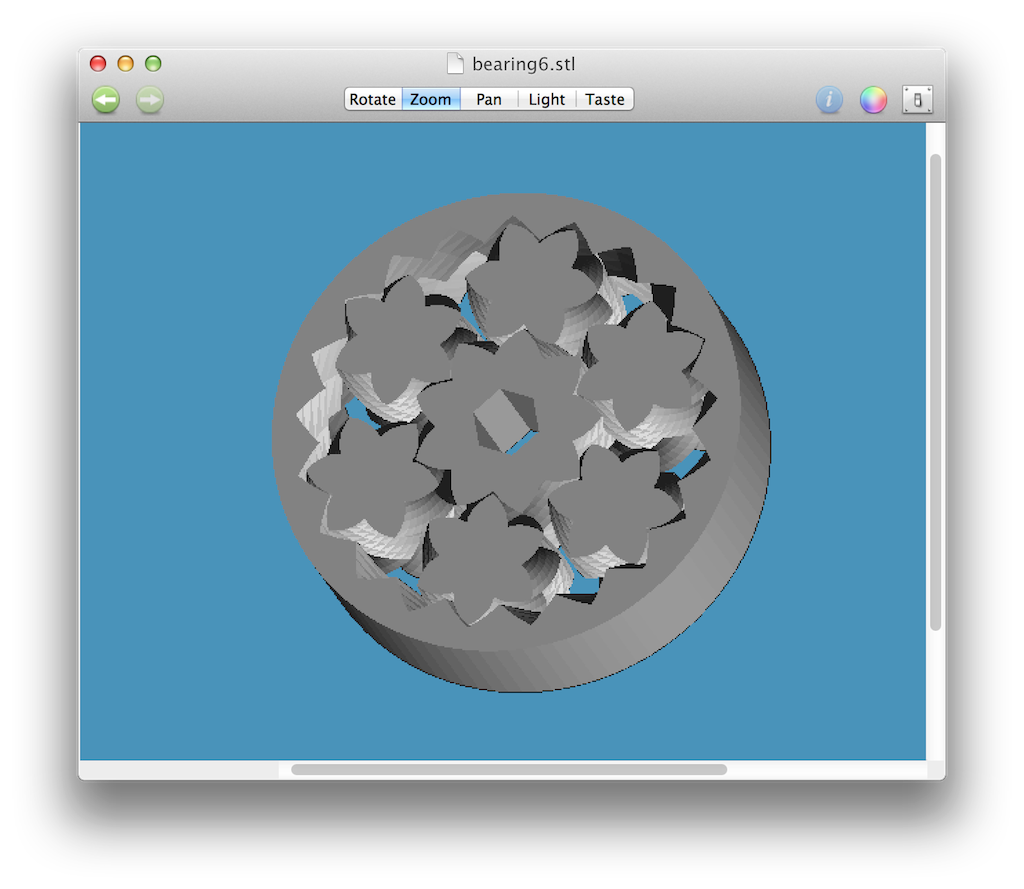
Such was the case a few nights back, when a number of us happened to be in the 3D printing/Laser cutter room working on a variety of unrelated projects. In the midst of it all, Cere and I struck up a conversation about an interesting planetary gear mechanism she found on Thingiverse. Here it is:

plg-emmetsBearinghttp://www.thingiverse.com/thing:53451

The designer, Emmett Lalish, is an expert in the nuances of 3D printed design and a prolific contributor to Thingiverse. His projects are very popular and highly recommended.

This mechanism illustrates captured planetary gears that require no carrier. The gears have a herringbone tooth form and are printed in-place, so they require no assembly and cannot be disassembled. The mechanism is an entertaining illustration of the potential of 3D printing, and has practical application as a roller or thrust bearing.

Cere was thinking that it might be an appropriate driver for a kinetic sculpture idea she’s toying with. In her application the ring would be stationary, the sun gear motorized, and the planet gears would drive the sculpture. I hope we can persuade her to blog about the sculpture portion, which sounds fascinating. I must confess that I was more interested in the driving mechanism.

Cere’s idea was to expand Emmett’s design by adding teeth to the outer perimeter of the ring, another set of planet gears and another ring, all driven by the central sun gear. I knew at the time that there would be an additional degree of freedom in that mechanism that would cause trouble, but with everything going on that night I couldn’t clearly articulate my thoughts. Anyway, it’s much easier with illustrations, and was a good exercise to get more proficient with Fusion 360’s assembly and rendering tools.

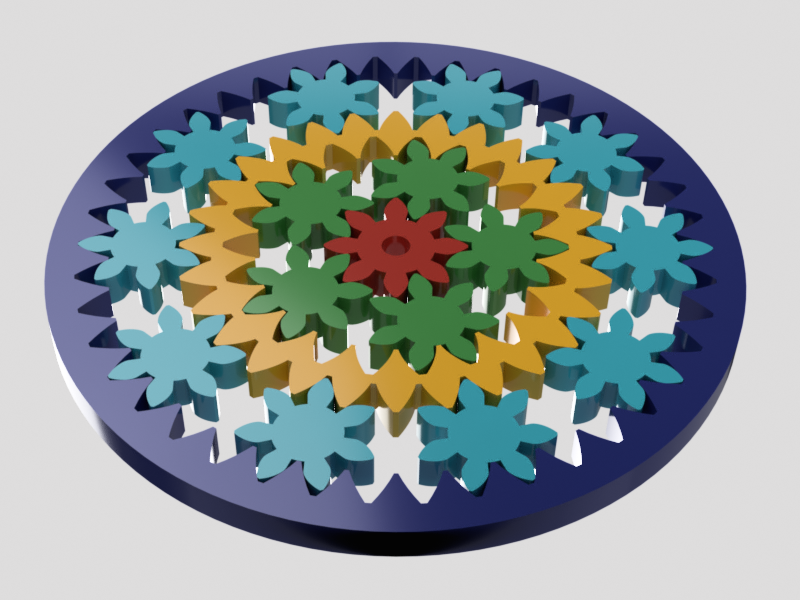
Here’s my copy of the original mechanism. I’m using simple spur gears for clarity.

And here’s the extension Cere envisioned. The ring becomes a sun gear in a larger version of the same mechanism.

plg-double

The problem here is that the mechanism is not deterministic. The inner ring floats without being positively driven.

For example, the inner ring (yellow in this model) might, due to friction, remain stationary and not drive the outer planets at all, as illustrated here:

Then again, there might be such friction in the inner assembly to make it revolve as a unit, driving the outer planets as expected but without properly turning the inner planets about their axes, as illustrated here:

In practice the result would probably be a inconsistent mixture of the two, with erratic motion in fits and starts. What we want is a mechanism that smoothly revolves all the planets about their axes while they orbit the sun gear. Here’s what I think Cere really wants:

From this we can see that the inner ring must somehow be made to turn at a particular ratio with respect to the rest of the mechanism. I’m sure there are many ways to do this, but the most appealing to me is to create another sun-and-planet mechanism beneath this one! The carrier of this driving layer is fastened to the inner ring gear of the main mechanism. The upper mechanism then behaves as desired.

Of course, there are simpler mechanisms that might meet Cere’s needs. Perhaps the easiest modification is to just enlarge the sun gear so we could accommodate more planets.

Here’s a gear train that contains a series of planet gears in a sort of pinwheel arrangement between the sun and ring. We will need a carrier in this case, and some of the planets revolve in the opposite direction, but we don’t need a two-stage device.

It’s been fun exploring the options. If you’d like to know more, here’s a good explanation of planetary gear ratios and how to calculate them:

http://woodgears.ca/gear/planetary.html

To model the gears, I have a Fusion 360 add-in installed. I can’t remember whether Fusion came with it or I installed it later… In any case, I modified it to suit my needs, which might be a good blog post in its own right.

I hope this has inspired you to come up with your own mechanisms! Please blog about it if you do.


3D print meeting wrap-up, August 22, 2016

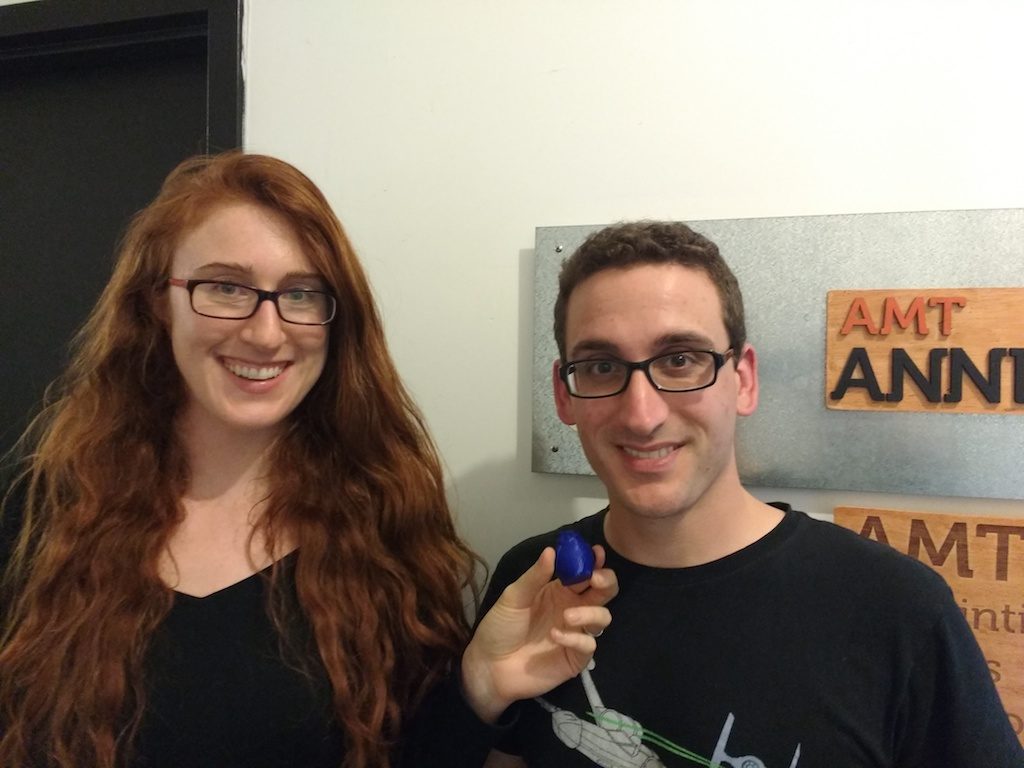
Three guests joined us at last night’s meeting: Newcomers Katrina and John and ever-faithful veteran Enric.

Enric spent most of the night tweaking the programming for his cool blinkey roller skates (with 3D printed electronics enclosure).

I walked through a printer demo for Katrina and John, printing a cool statuette of an owl that Katrina found on Thingiverse.

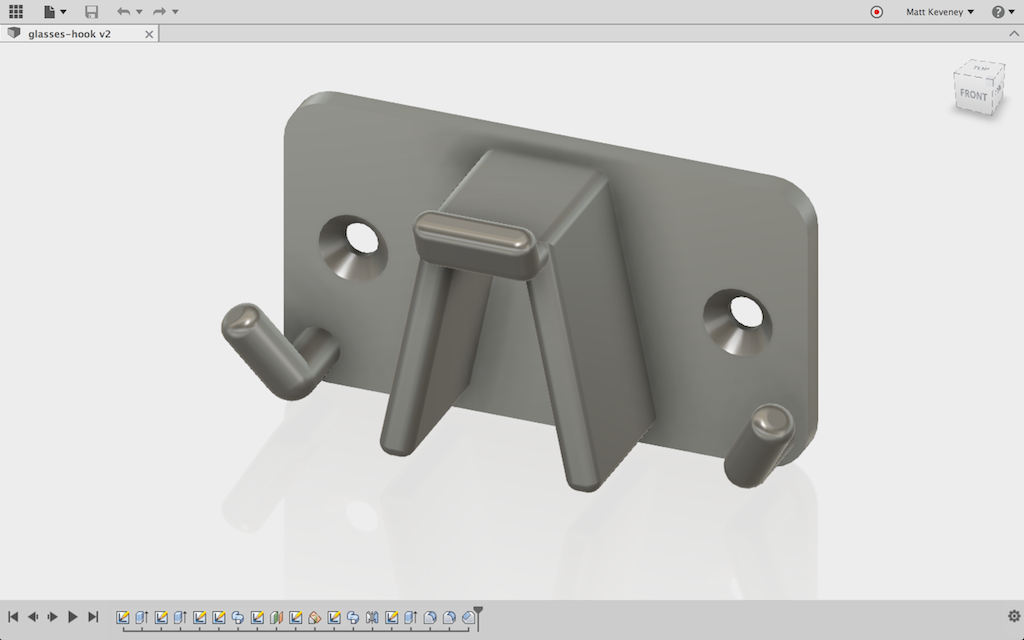
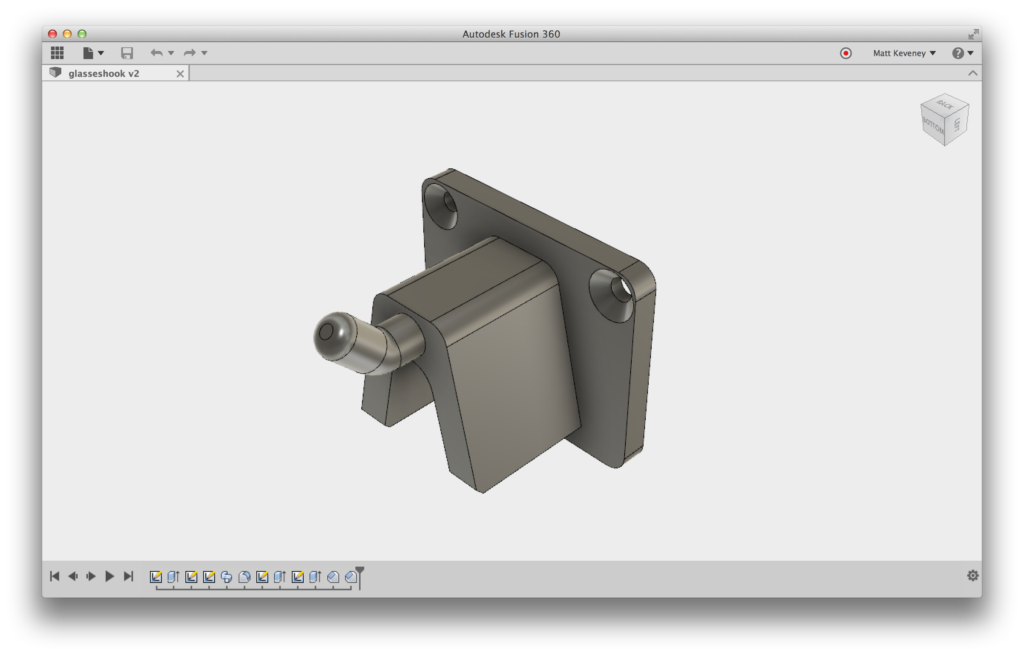
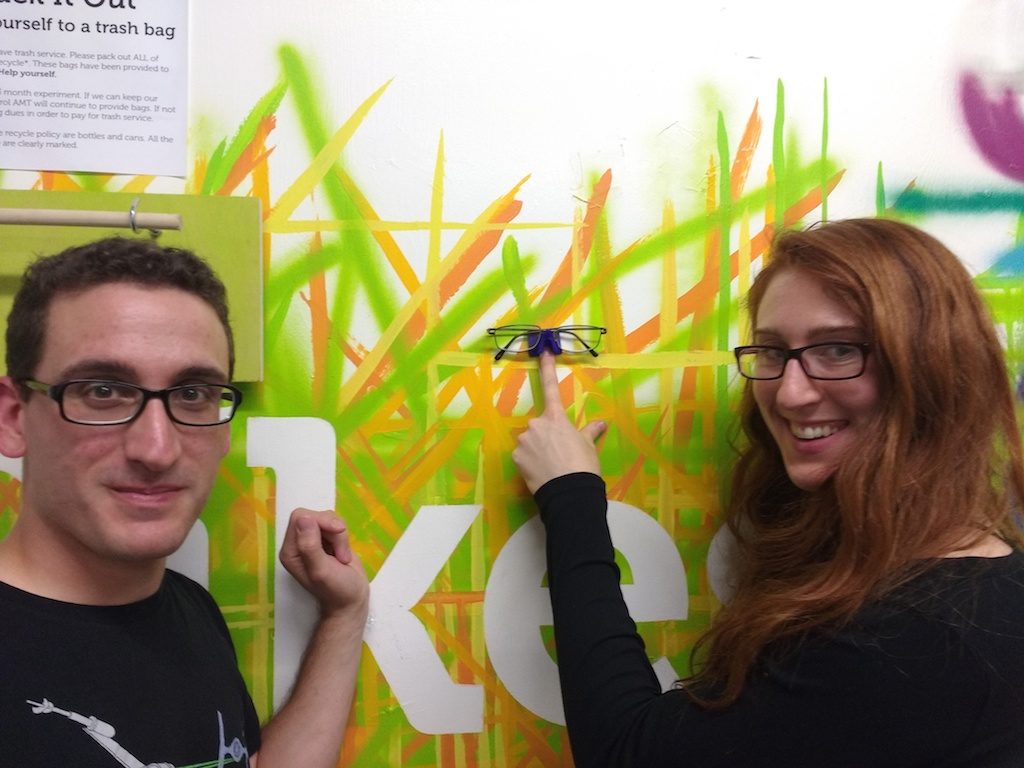
While that was printing we ran through a quick design demo. I keep a few different strengths of dollar-store reading glasses on hand in my shop, and wanted a good way to hang them on my tool-board. So we brainstormed a little hook and modeled it in Fusion 360.

3dp-glasseshook-modelIt’s always satisfying to go from idea to finished thing in one session. This one worked, but everyone had thoughts for improvement as soon as it came off the build plate. The glasses fall off unless they’re very carefully placed on the hook. Maybe a flat section on the bottom and a wider hook portion would make it a bit more reliable. Here’s the Fusion 360 model, in case you’d like to have a closer look, and maybe tackle those improvements!
3dp-glasseshook

All in all, another fun night!

3D print meeting wrap-up, August 8, 2016

Three guests at last night’s meeting: Grant, Charles and our faithful regular, Enric.

Charles has a good deal of experience with Solidworks, and Grant has used 3D printers before, some years ago. We walked through a print job on both printers and talked a great deal about it all.

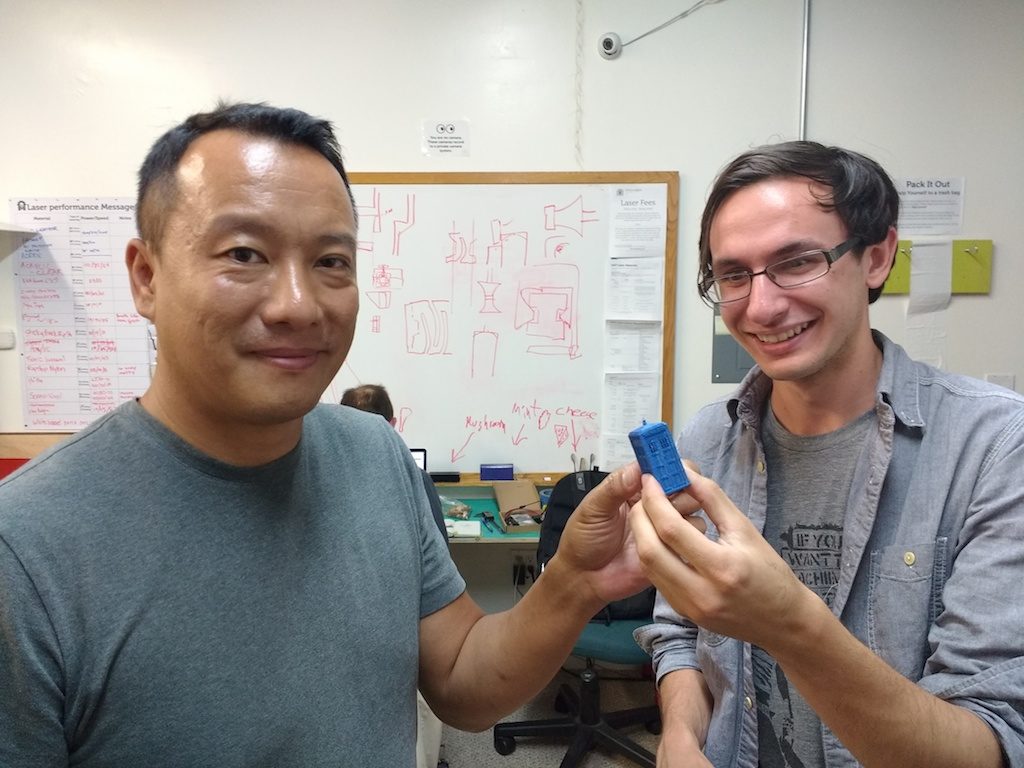
Grant admired Sean’s Tardis, sitting up on the shelf, but that’s a large and rather involved print,  so we found a smaller Tardis on Thingiverse to use as an example print.

Enric is still making interesting electronic wearables that all need custom cases. Lately he’s been working with electroLuminescent wire!

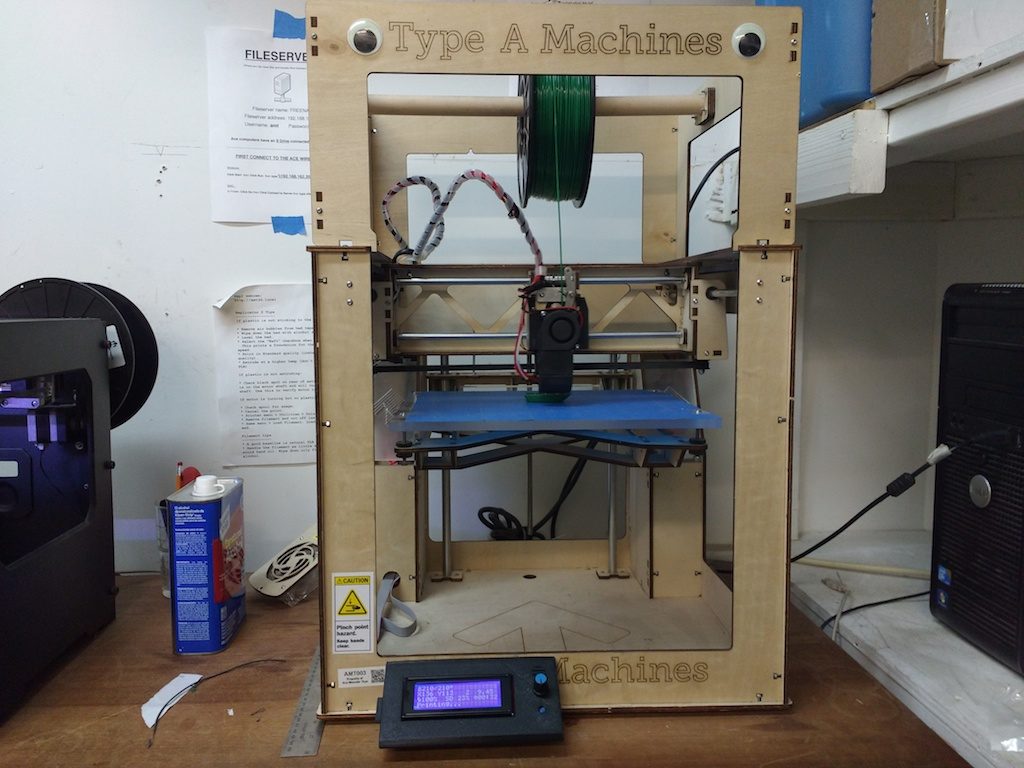
The big news of the night, if I may say so myself, is that the Type-A Machines printer upgrade is (mostly) complete!

3dp-new-typeaPreviously one had to print tethered to the PC, which can be prone to communication errors, and requires a bit of know-how to do basic things like leveling the build plate. Fortunately the Type-A controller is a standard RAMPS 1.4 board, which is plug-in-compatible with an ubiquitous and cheap LCD/SD card reader module; cost: $8.00. While I was at it, I got a new-style 0.4mm hot-end, reworked the fans, and re-flashed the firmware to match.
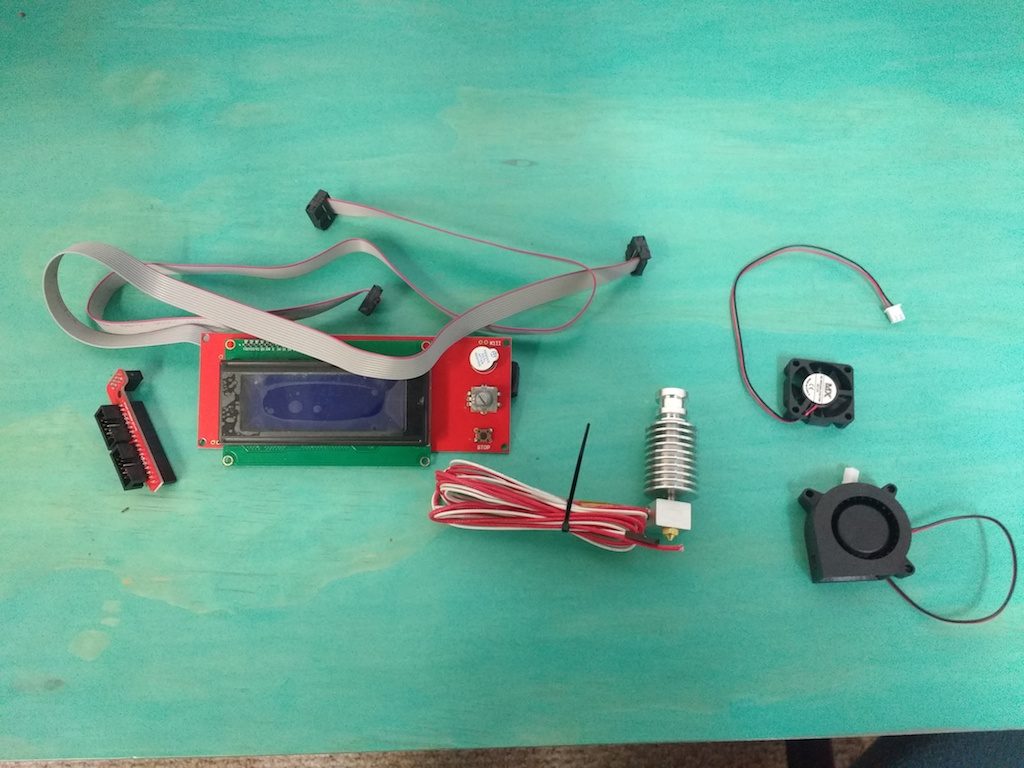
3dp-typea-partsI designed the LCD case/bracket and fan shrouds in Fusion360.  Let me know if you’re interested in how that was done.
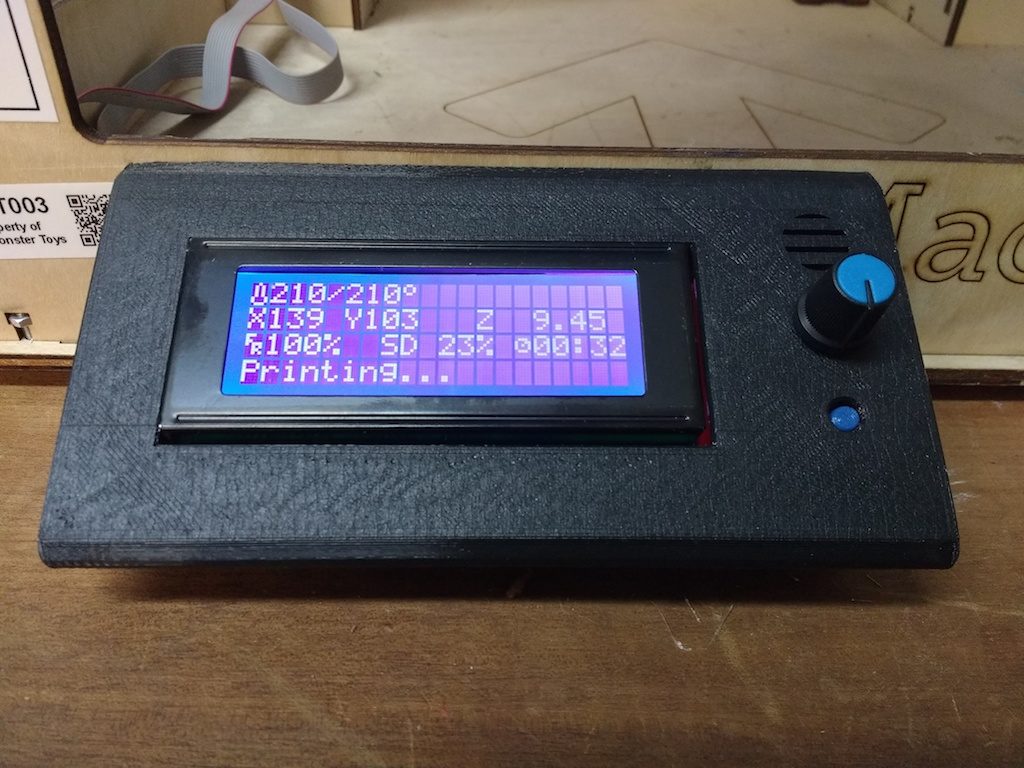
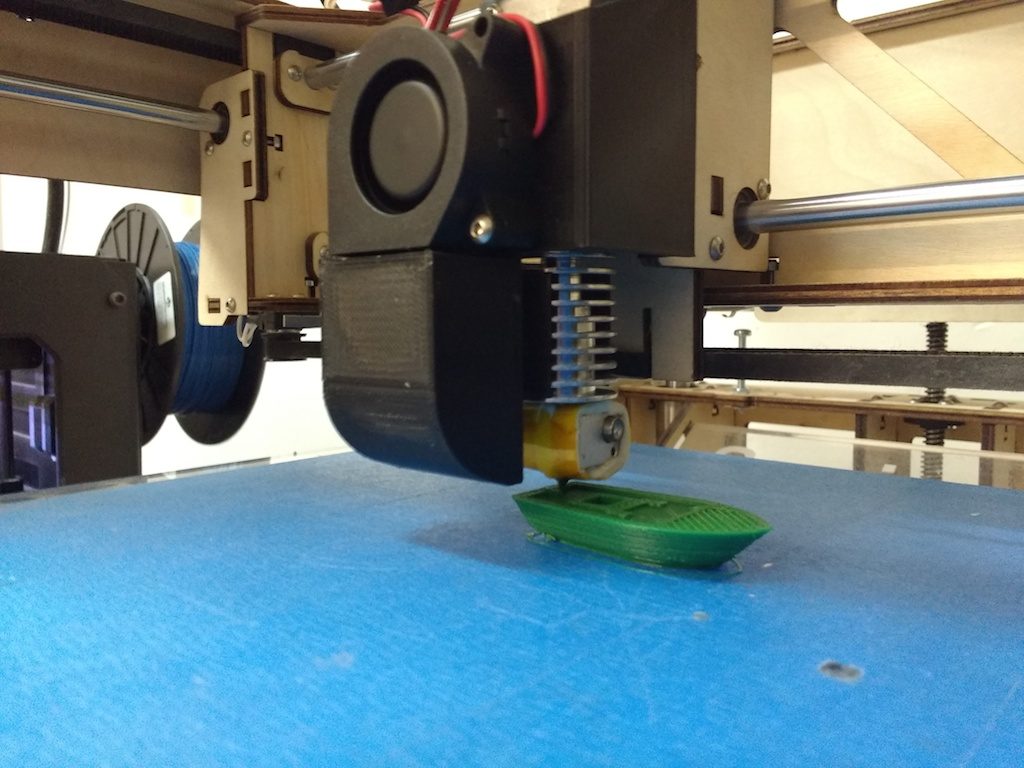
3dp-typea-panel 3dp-typea-atworkIt all works fine, but I’m chagrined to admit that the quality is still a bit disappointing; layers are a bit misaligned, and extrusion is inconsistent. I think maybe belts need tightening, and maybe the extruder pinch-roller needs a stiffer spring. Still, for less than $20.00 invested, we’re not out much if I can’t manage it.
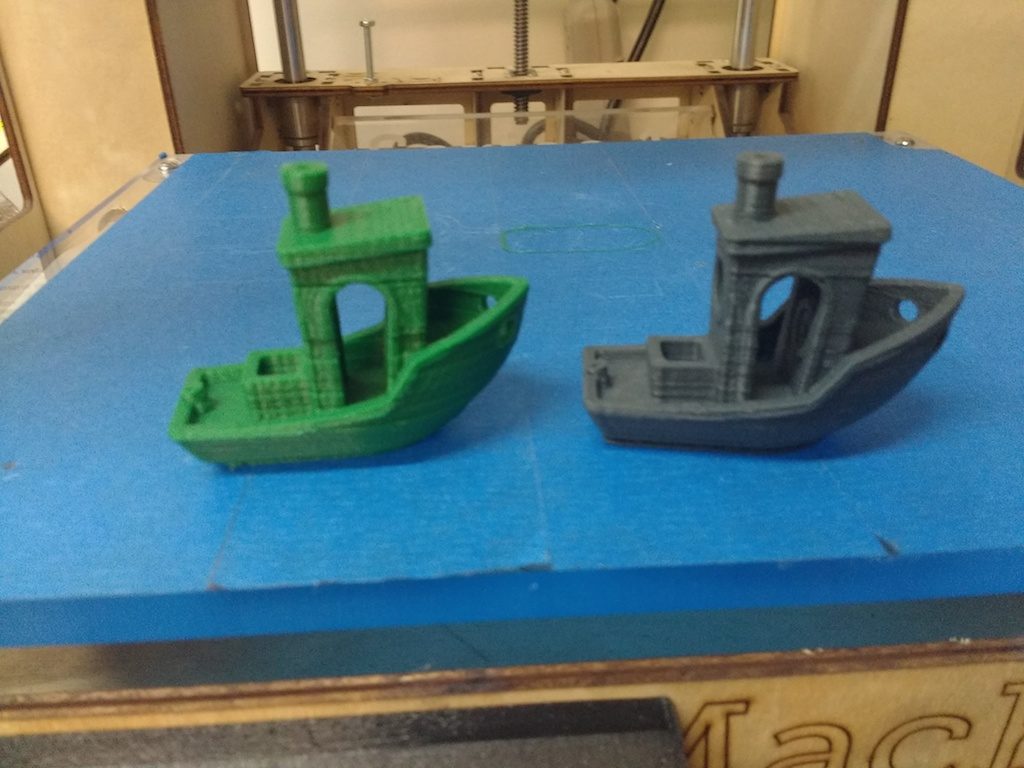
3dp-typea-resultIt also needs updated documentation, which I’m tackling next. If you’re experienced and anxious to try it out, essentially the workflow is this:
  • Use Cura to slice
  • Export to G-code
  • Save G-code to the SD card (please leave it in the Type A; the SD card fits in the printer upside down;  brass contacts up)
  • Use the LCD menu to select print from SD

Note that the SD cards should not be switched! The Replicator 2 requires an old-style SD card, so let’s please keep them separate.

I also plan to add menu-items to the LCD to assist with changing filament and leveling the bed. And finally, I need to document the firmware tweaks and check it all in to our GitHub account. Watch this space for news!

A replacement part for my winch handle

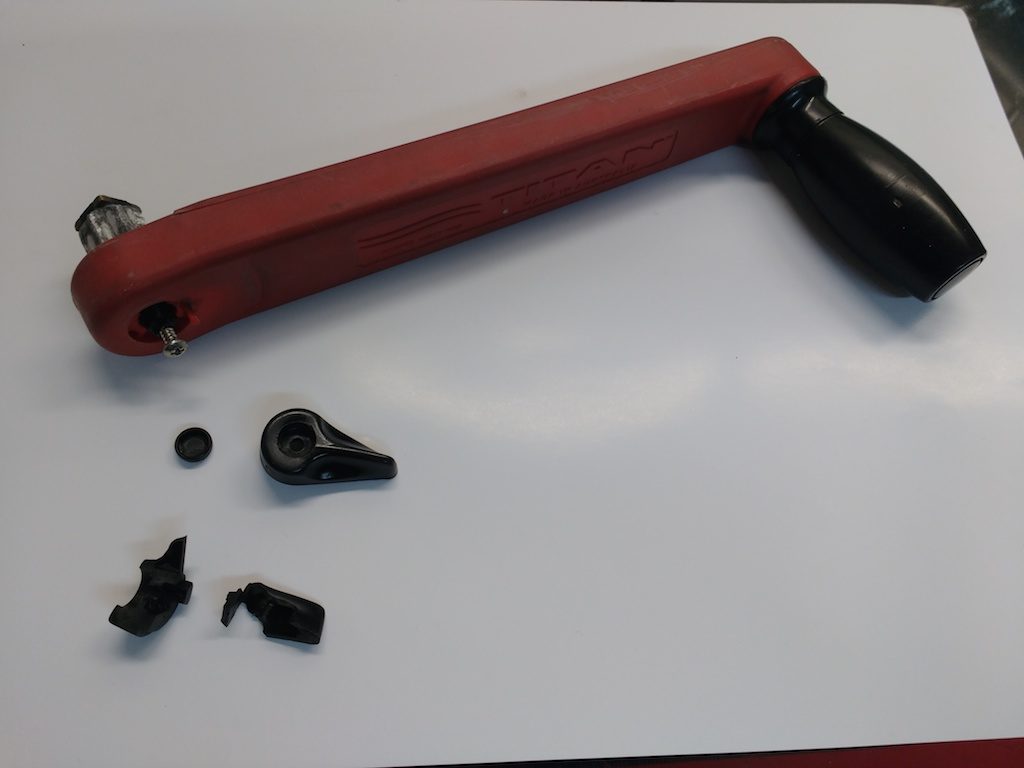
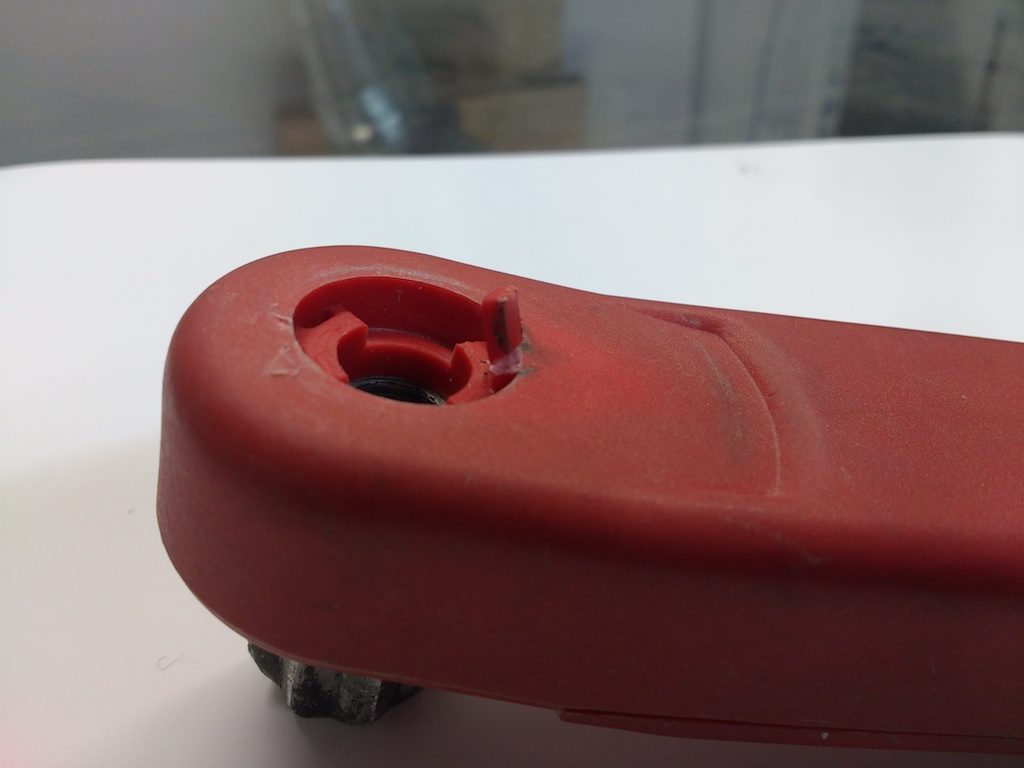
Last Sunday, Steve and I went sailing aboard the Reboot (my sailboat and home). On about the third tack, I put the winch handle in the winch but didn’t quite get it all the way into its socket. Steve was at the helm, noticed my error and shouted a warning. Alas, it reached my ears a second too late. Under the force of my cranking, the locking lever snapped. Steve immediately remarked “Well, there’s your 3D print project for this week!”

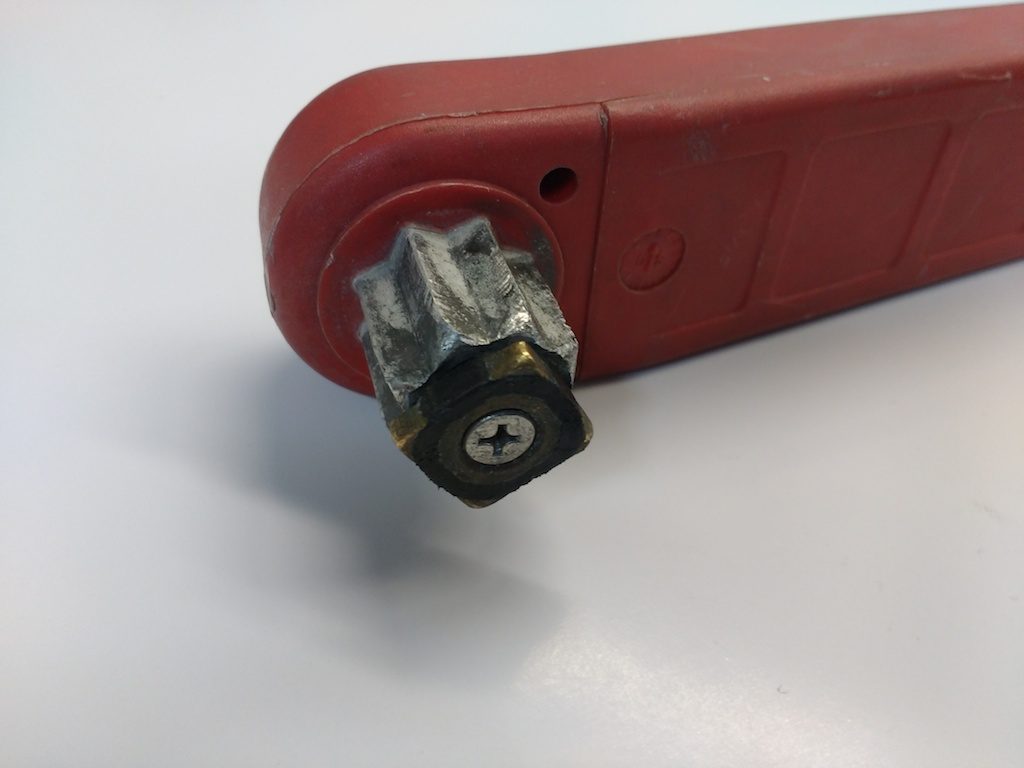
The winch handle is essentially a specialized wrench. The business end is a cylinder machined to an eight-pointed star section. This fits into a mating hole in the top of the winch. At the end of this cylinder lives a small square part which is free to twist slightly (about 22 degrees) and is spring loaded to return to its center ‘misaligned’ position.

When inserting the handle, a slight taper in the hole forces this square to twist into alignment with the star. At the bottom of its travel it reaches a groove in the socket allowing it to spring back to the center-point thus locking the winch in place. To release, you press the lever with your thumb.

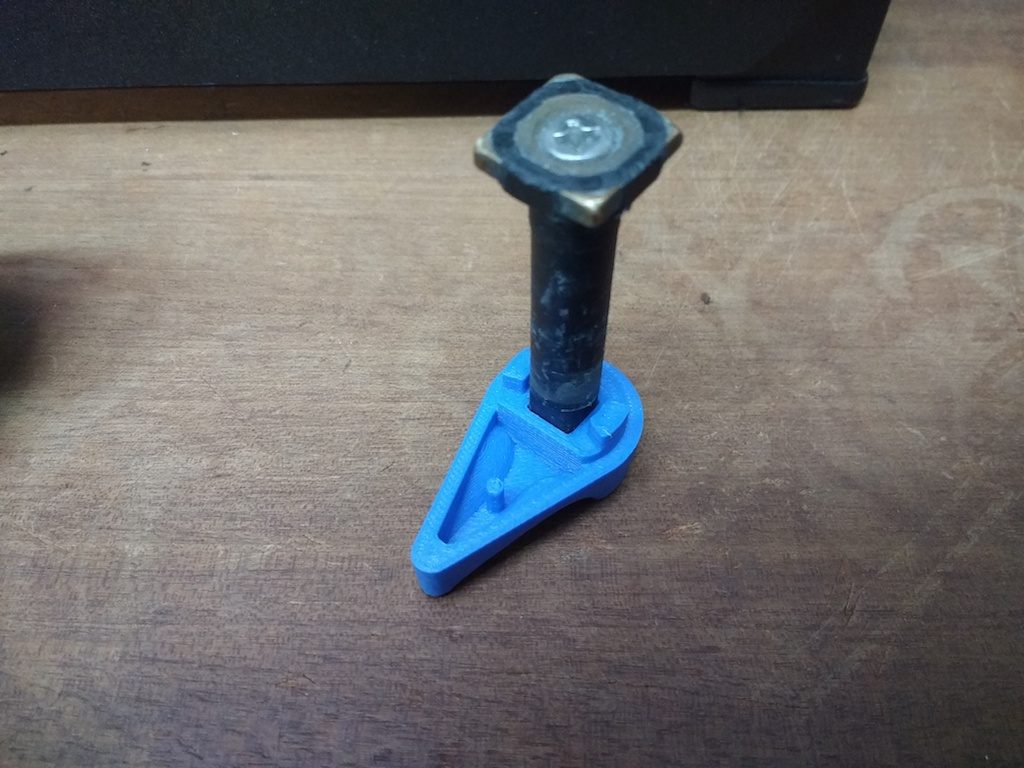
3dpwn 01 square locking part

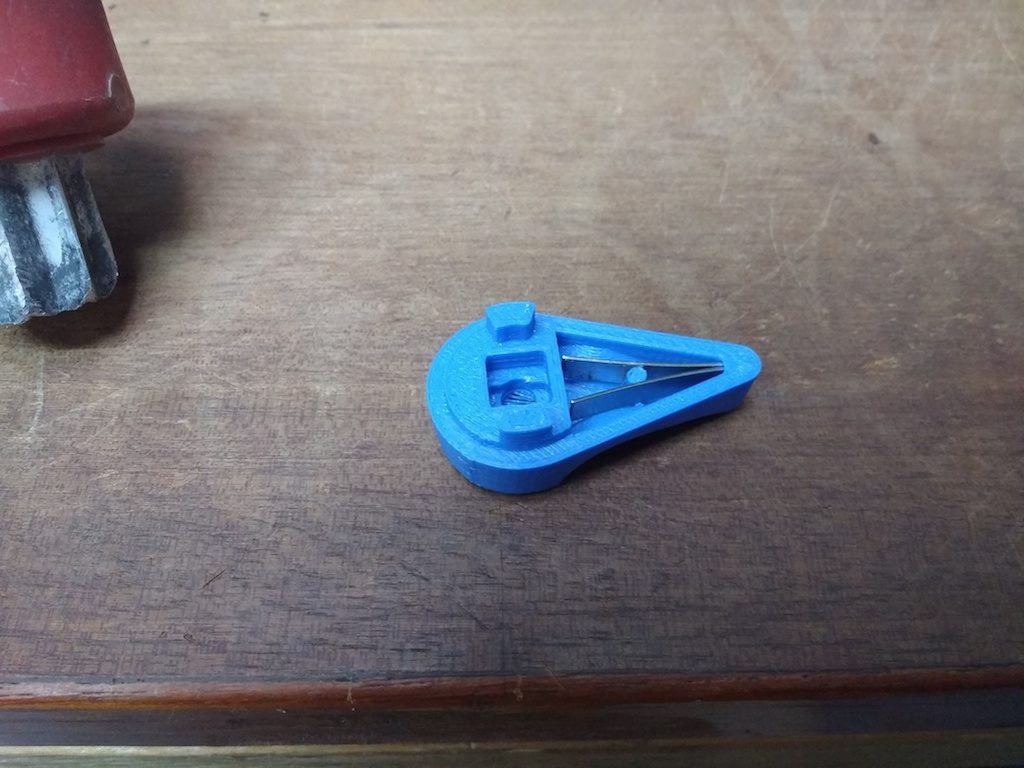
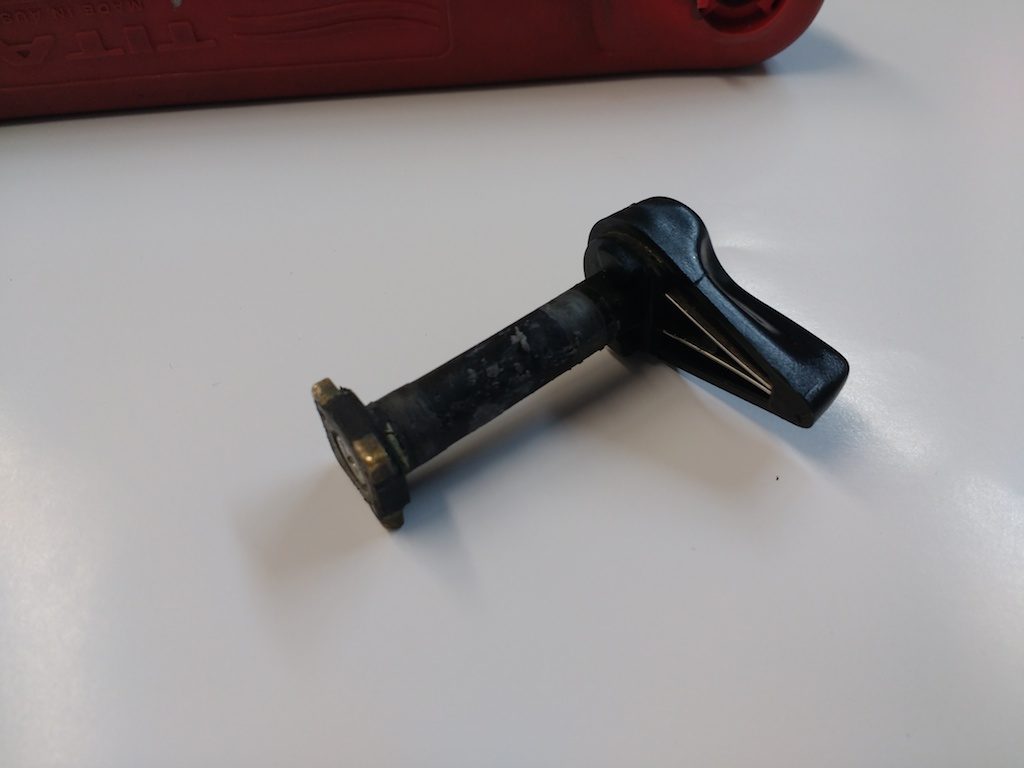
Here you can see the square part, its axle and the thumb lever assembled outside the winch. The spring is a leaf-type located in the lever.

3dpwn 02 lever assembly

With the winch only partially inserted, apparently the full force of my cranking was borne by this square part, transferring the torque to the weakest link of the assembly: the plastic lever on top. I’m lucky it didn’t swing around and bust me in the chops when it let go!

3dpwn 03 broken bits

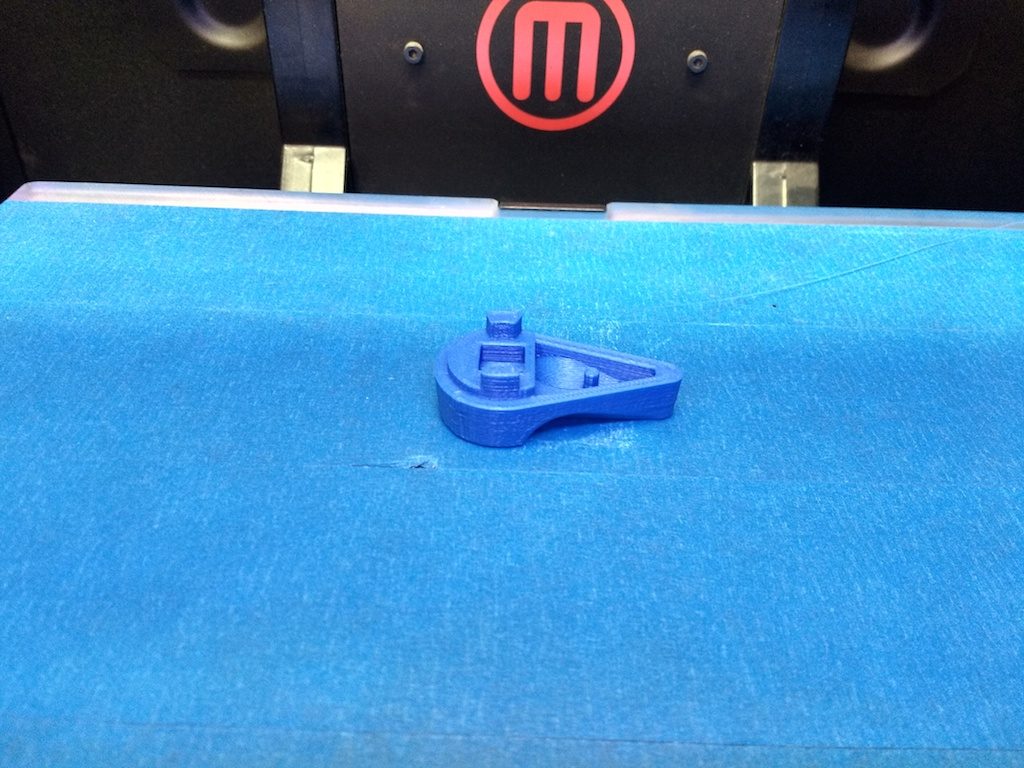
Anyway, this afternoon I modeled and printed a replacement. On a part that has to fit into an existing assembly, it’s very tough to nail the measurements just right on the first try, so I just plan on printing it at least twice. Fortunately this small part only takes 20 minutes or so to print (leaving plenty of time for this writeup). For my first pass, I simply used the blue filament already installed in the Replicator 2.

3dpwn 05 first try
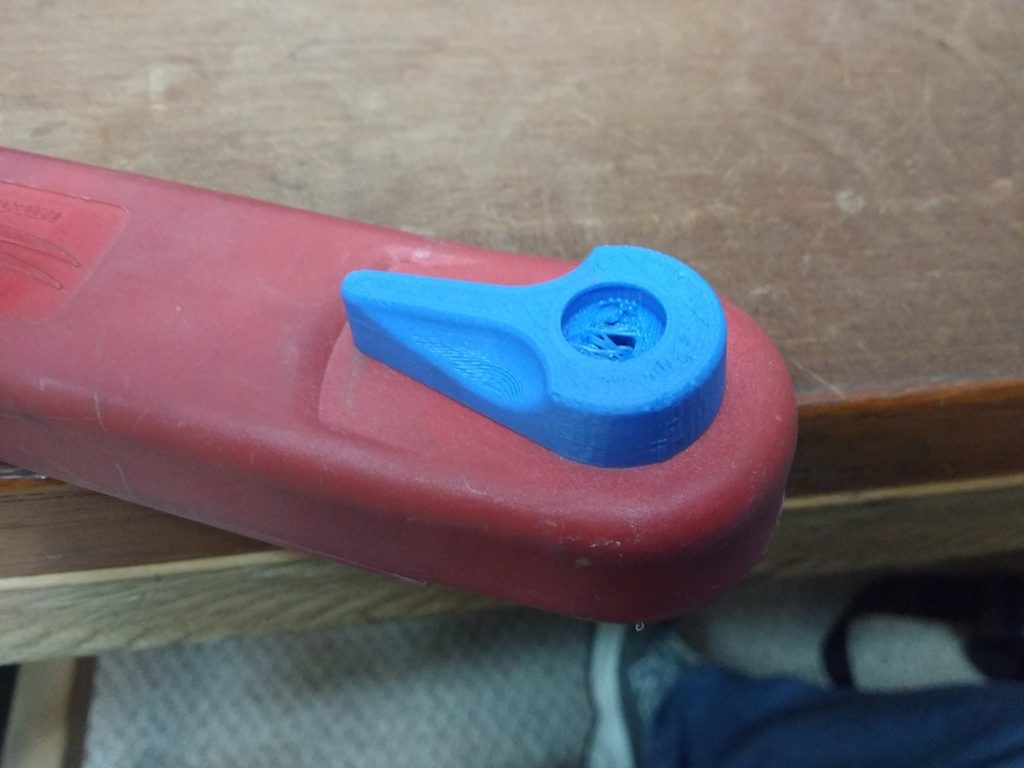
3dpwn 06 fits on top

It was closer than I expected. The first, obvious problem was that I neglected to use any support material for the screw countersink. I could have tried Makerbot’s support, but from experience I know that a custom support piece works better and is easy to implement.
3dpwn 08 fits on assembly

The next problem was that the part reaching into which the axle fits did not quite project far enough. In this photo you can see that I missed by nearly a millimeter (I didn’t have my calipers when I measured the original… this is as good as I could do with my pocket tape measure).

3dpwn 09 boss is too low

And finally, the little boss that separates the spring snapped off too easily. I made it a bit wider, and shifted it toward the axle by 1mm.

3dpwn 10 spring fits

Confident in my edits, I mounted the black filament and printed version 2.

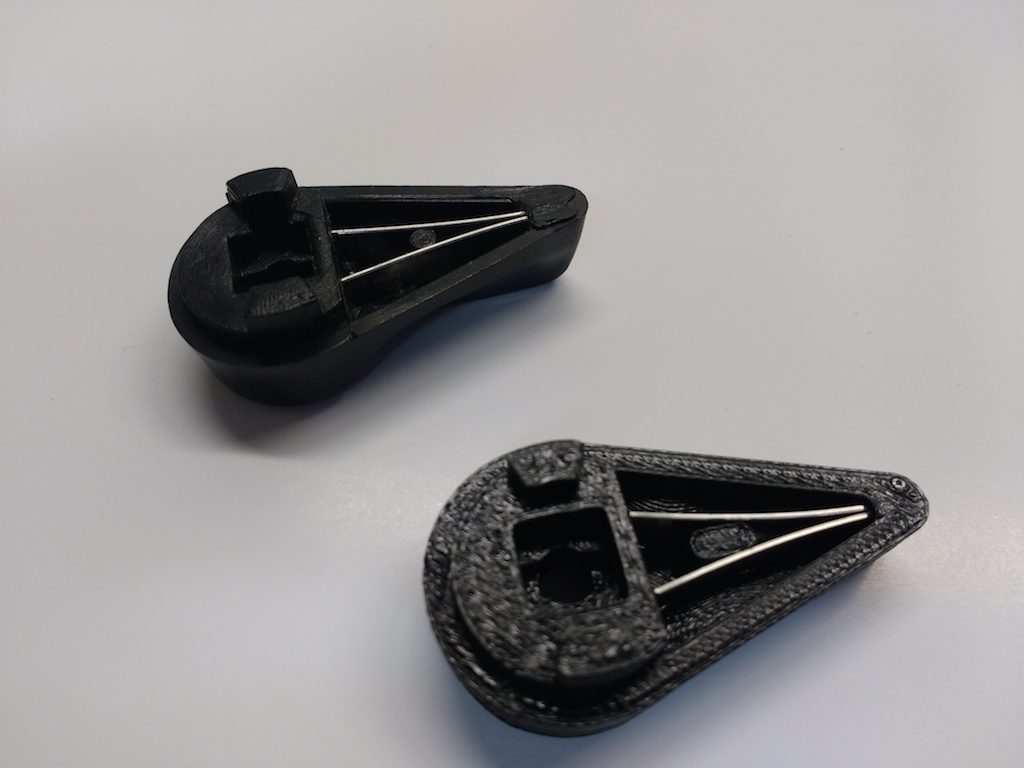
That worked pretty well, but the spring-return mechanism seemed to be binding. It turned out the spring was impinging on the inner surface of the pocket under the lever, so I hollowed it out a bit more and printed again.

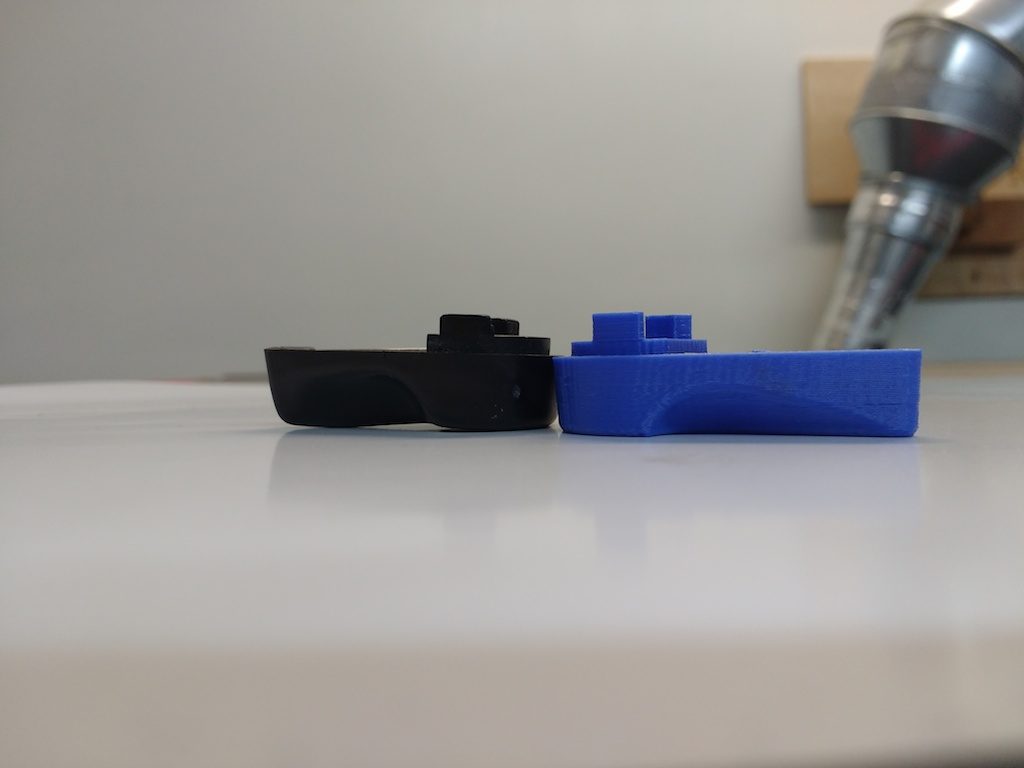
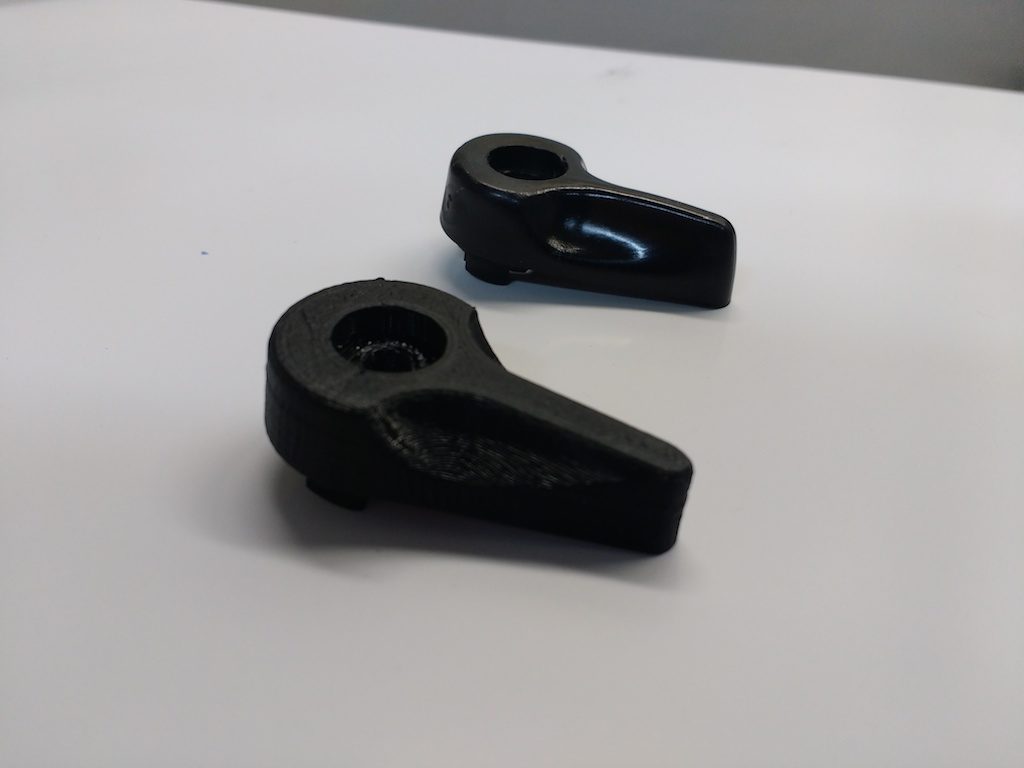
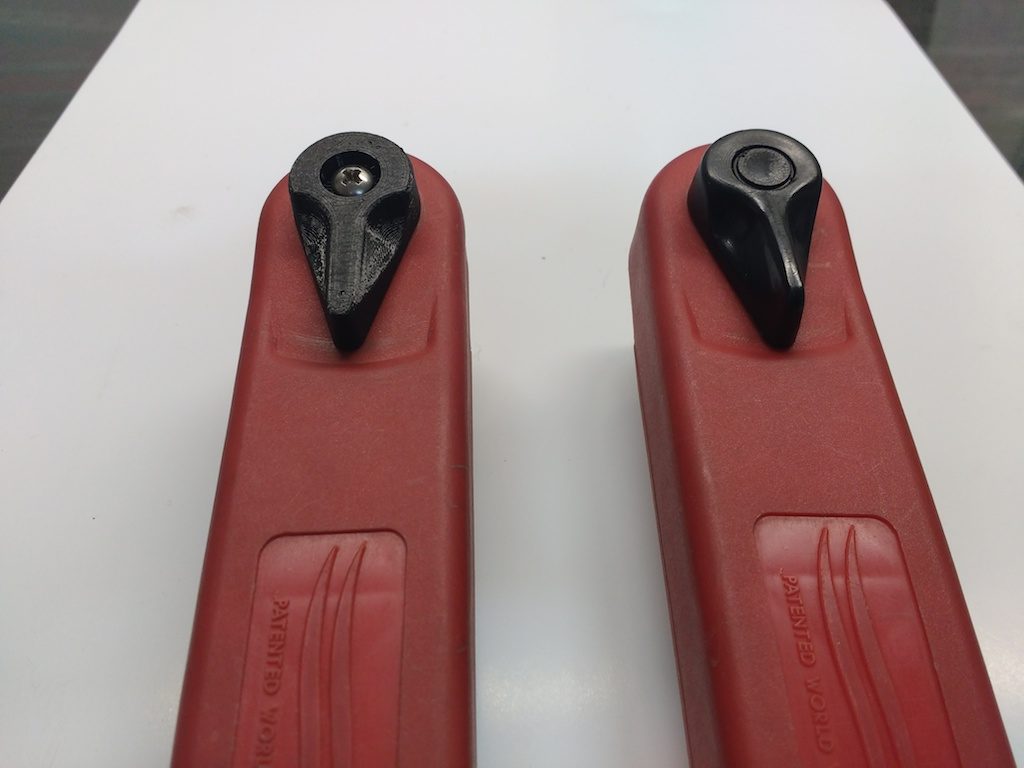
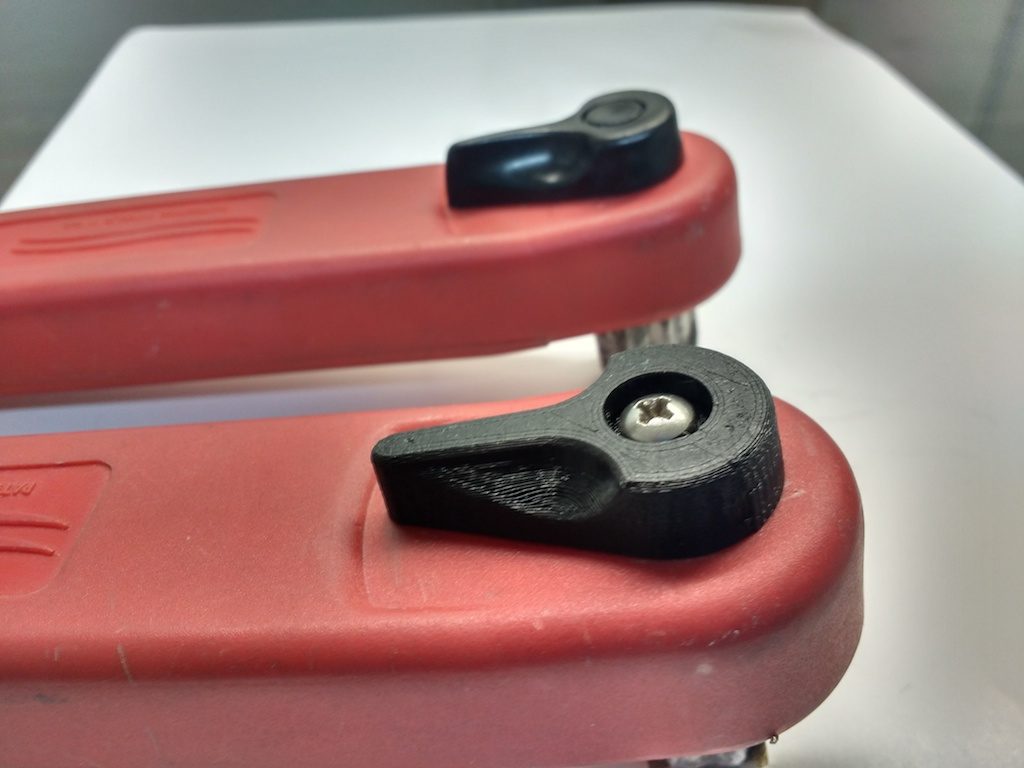
3dpwn 12 compared
3dpwn 13 compared

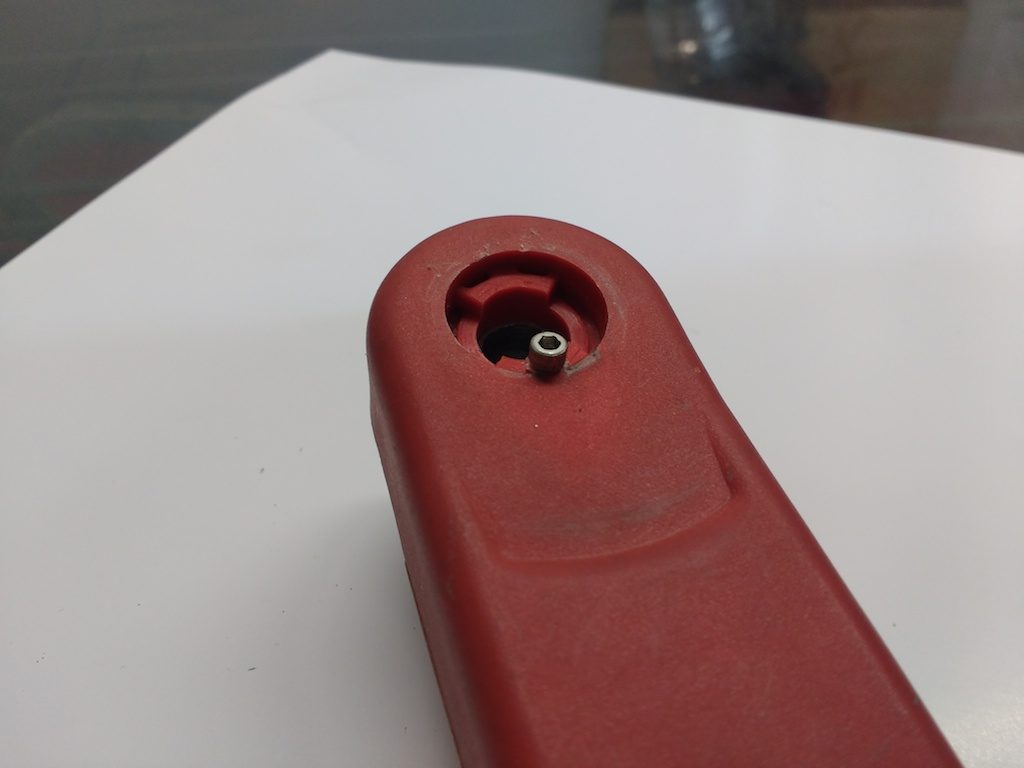
Success! …except now I found another problem: the boss on the winch handle itself was nearly broken off. This probably happened at the same time. Unfortunately, printing the entire handle is probably not feasible: I suspect there’s a steel part inside, and the plastic seems to be tougher material in general.

3dpwn 14 more trouble

Instead, I drilled a hole and inserted a small screw. Seems to work so far; I hope it lasts!

3dpwn 15 more trouble fixed
3dpwn 16 done

Modeling

Modeling a complex shape like this can be a bit bewildering, since there are so many approaches one might take. Where do we start?

I find it useful to first consider the orientation that the part is printed in. Since there are lots of holes and important protrusions on the bottom, I decided to print it upside-down to minimize the use of support material.

This decision immediately necessitated a slight variation from the original design. This photo doesn’t show it very well, but the original thumb-handle projects upward ever so slightly. On mine it’s flat.

3dpwn 17 done side

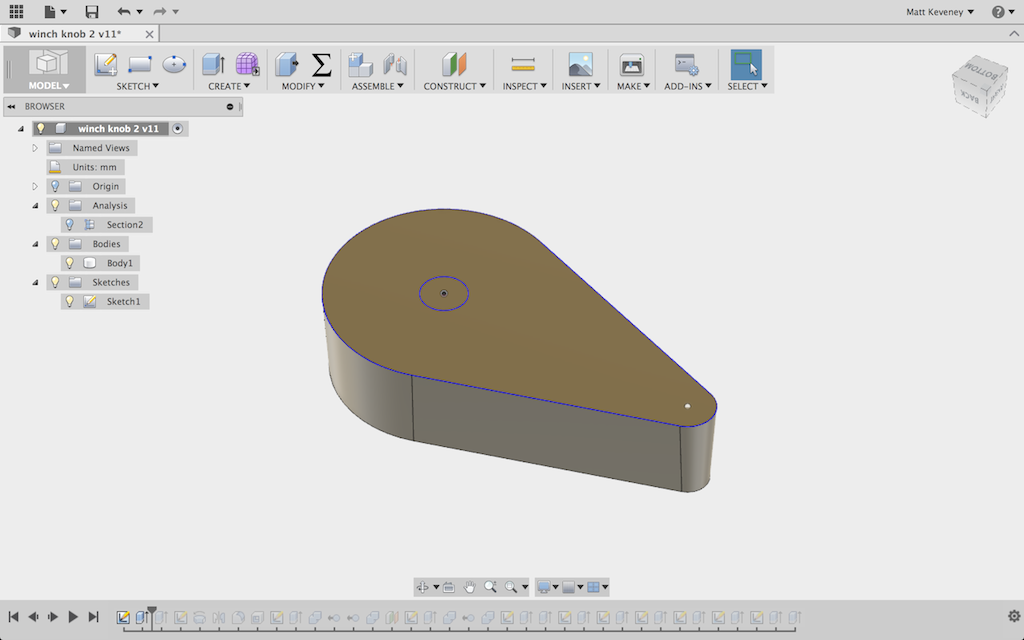
Then, what plane to start sketching? I chose the plane at the base of the lever, but above the parts that protrude into the winch handle body. This section is easily measured and clearly defines the basic body of the lever, so it made sense to start there.

That profile is extruded with a slight angle (I picked 4 degrees), which follows the design of the original part. The original was undoubtedly injection-molded, which requires an angle like this to allow the part to be easily extracted from the mold. We don’t have that restriction with 3D printing but I mimicked it anyway (here shown upside-down).

3dpwn 18 body

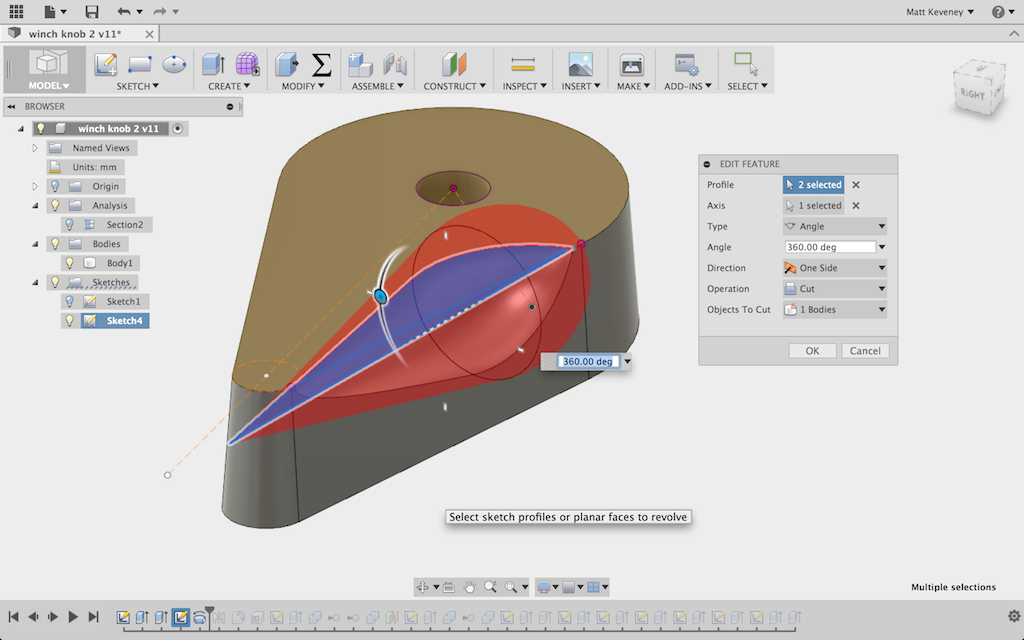
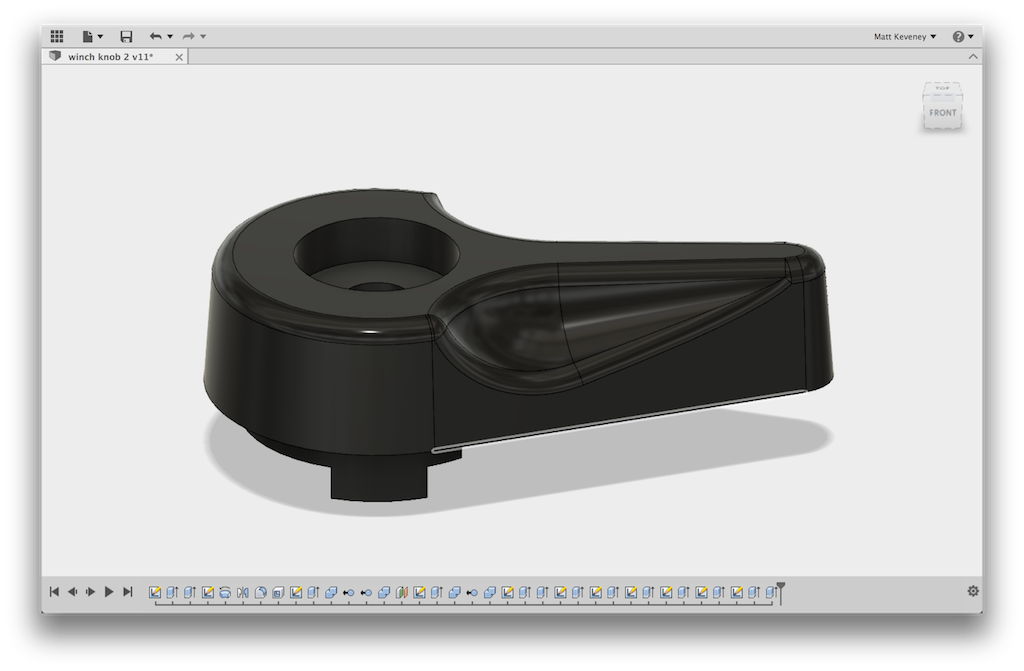
Then the thumb cutaways. These are made by revolving a profile that was made by eye and a bit of trial and error. Mine does not exactly match the original but looks nice and is functionally equivalent.

3dpwn 19 thumbcut

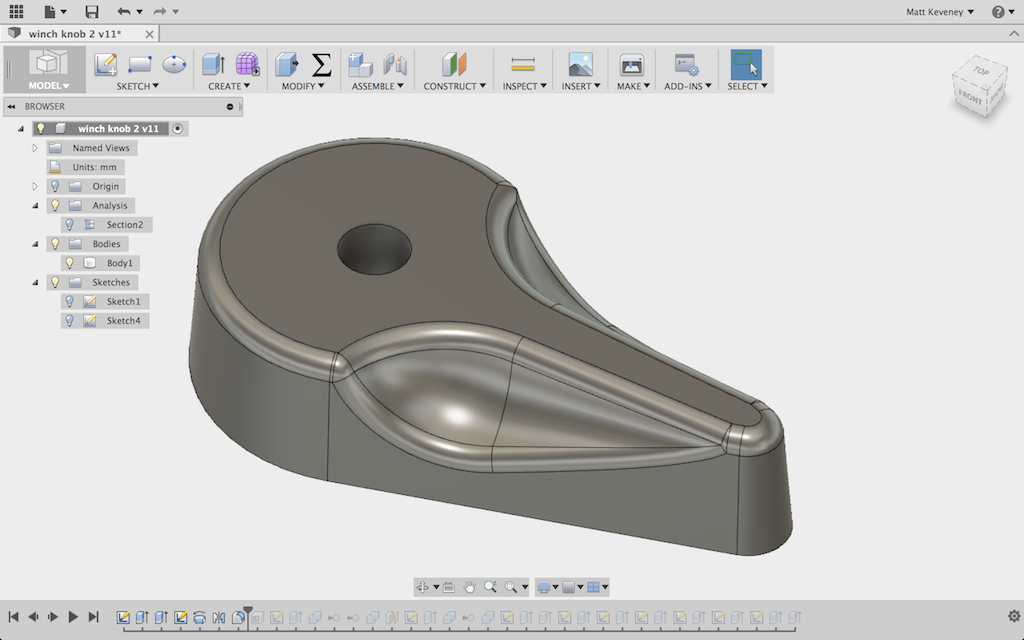
With a fillet added, it looks even better and is quite comfortable to handle.

3dpwn 20 filletted

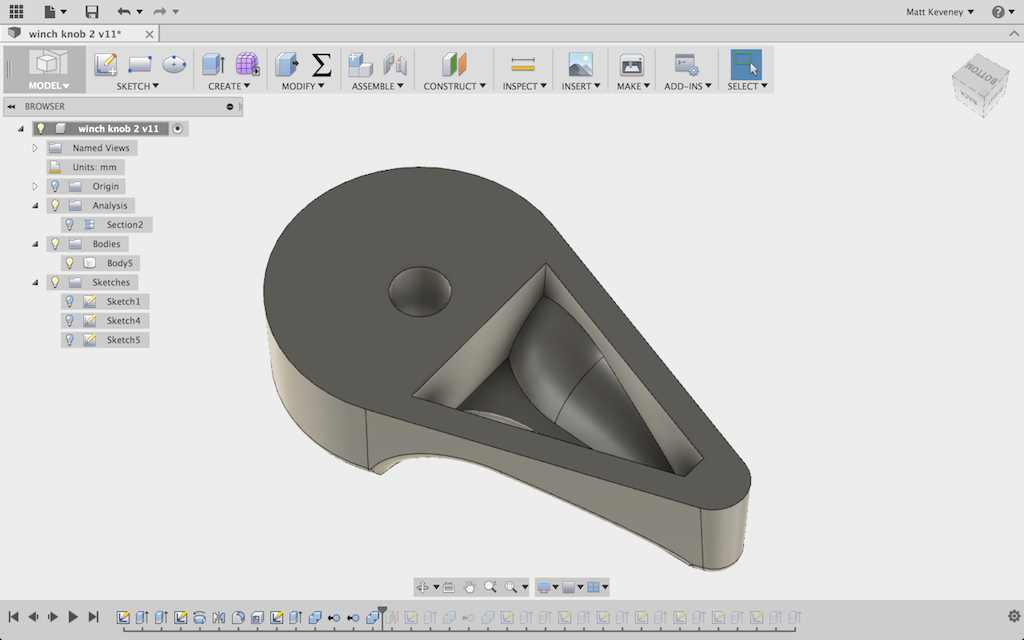
A pocket must be defined beneath the lever to accommodate the return spring. This took a few tries to get right. My initial thought was to simply extrude a pocket, straight in from the bottom, but that cut through the thumb cutaways.

Instead I used the ‘shell’ command to uniformly hollow-out the bottom. Then to thicken up the portion around the pivot, I extruded a section. This went through the lever, so I used a sequence of combine operations to eliminate the protrusions, much as I did with the parametric box update.

3dpwn 21 springpocket

The remainder of the model consist of straightforward sketches and push/pull operations. I’ll upload the model for you to explore on your own if you’re interested.

3dpwn 22 complete

It seems to be working so far. Time will tell how long it lasts. PLA degrades in sunshine, so I might have to revise and reprint at some point, perhaps with PET or another more durable material. In any case, I hope this has shed a bit more light on how you can tackle your own 3D print design challenges. If you get stuck, I’m here to help!